
How to Assign a User to a File
Members can only assign a user to a file they uploaded. Managers can assign users to any file they have access to. Admins can assign users to any file.
Assign a User to a File in a Project
Click on the "Projects" option located in the main menu to the left of your screen.
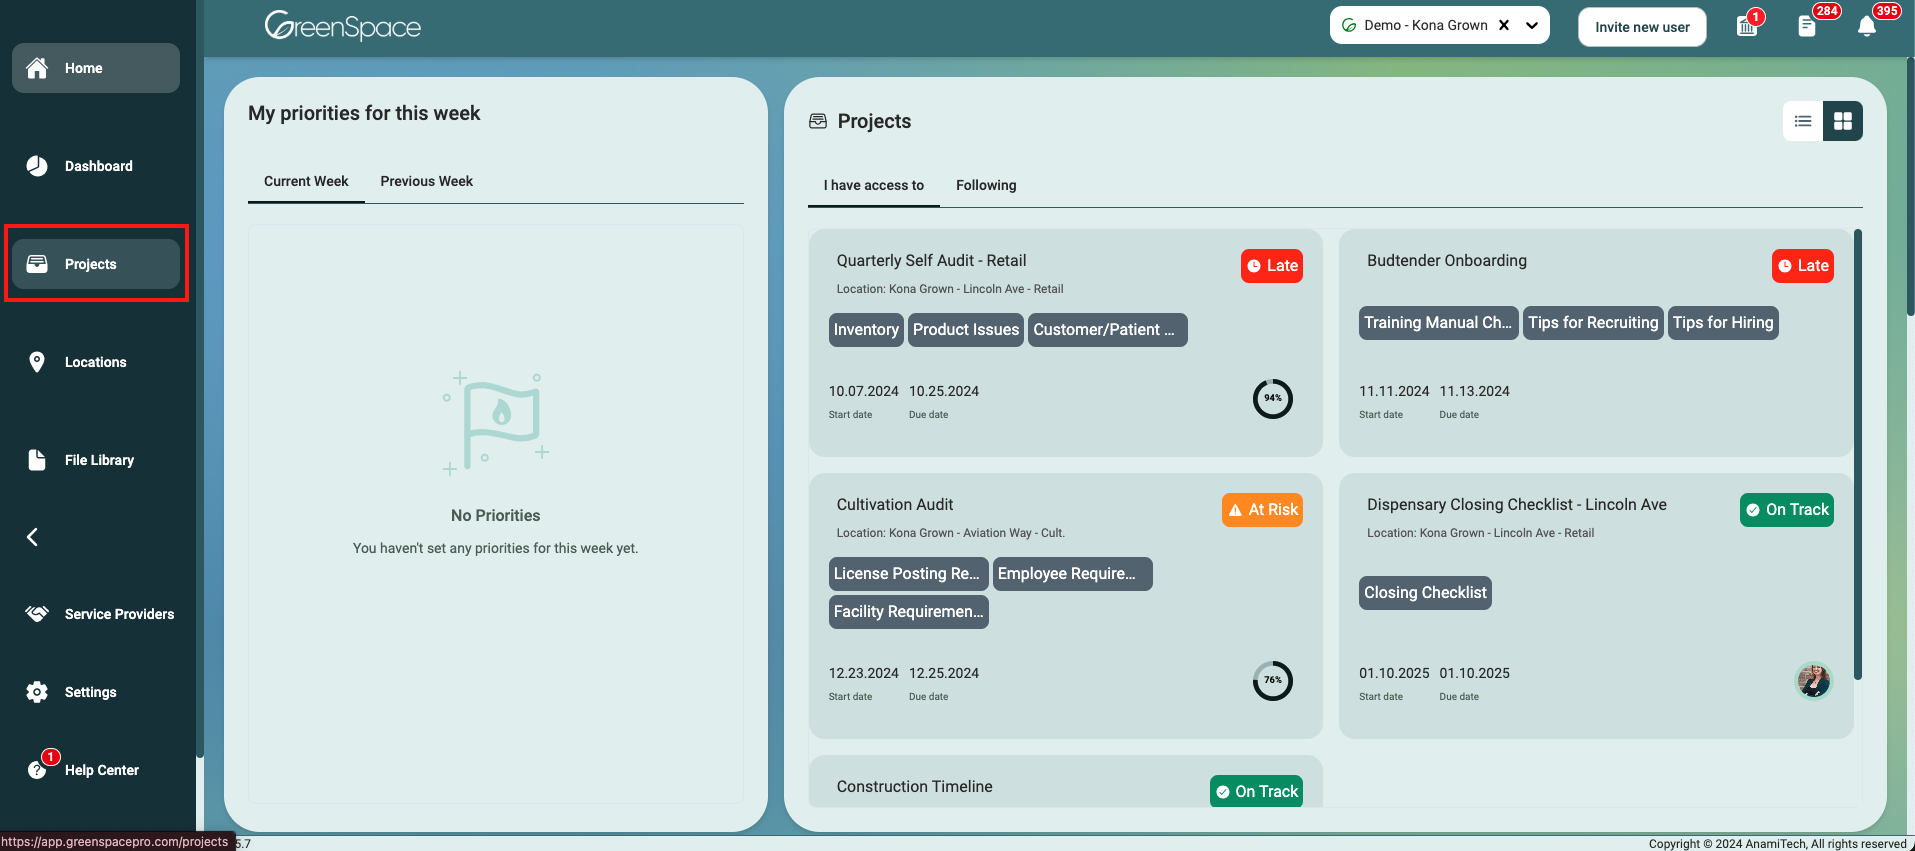
Open the project you would like to assign a user to a file by hovering over the project and clicking on the view eye icon.
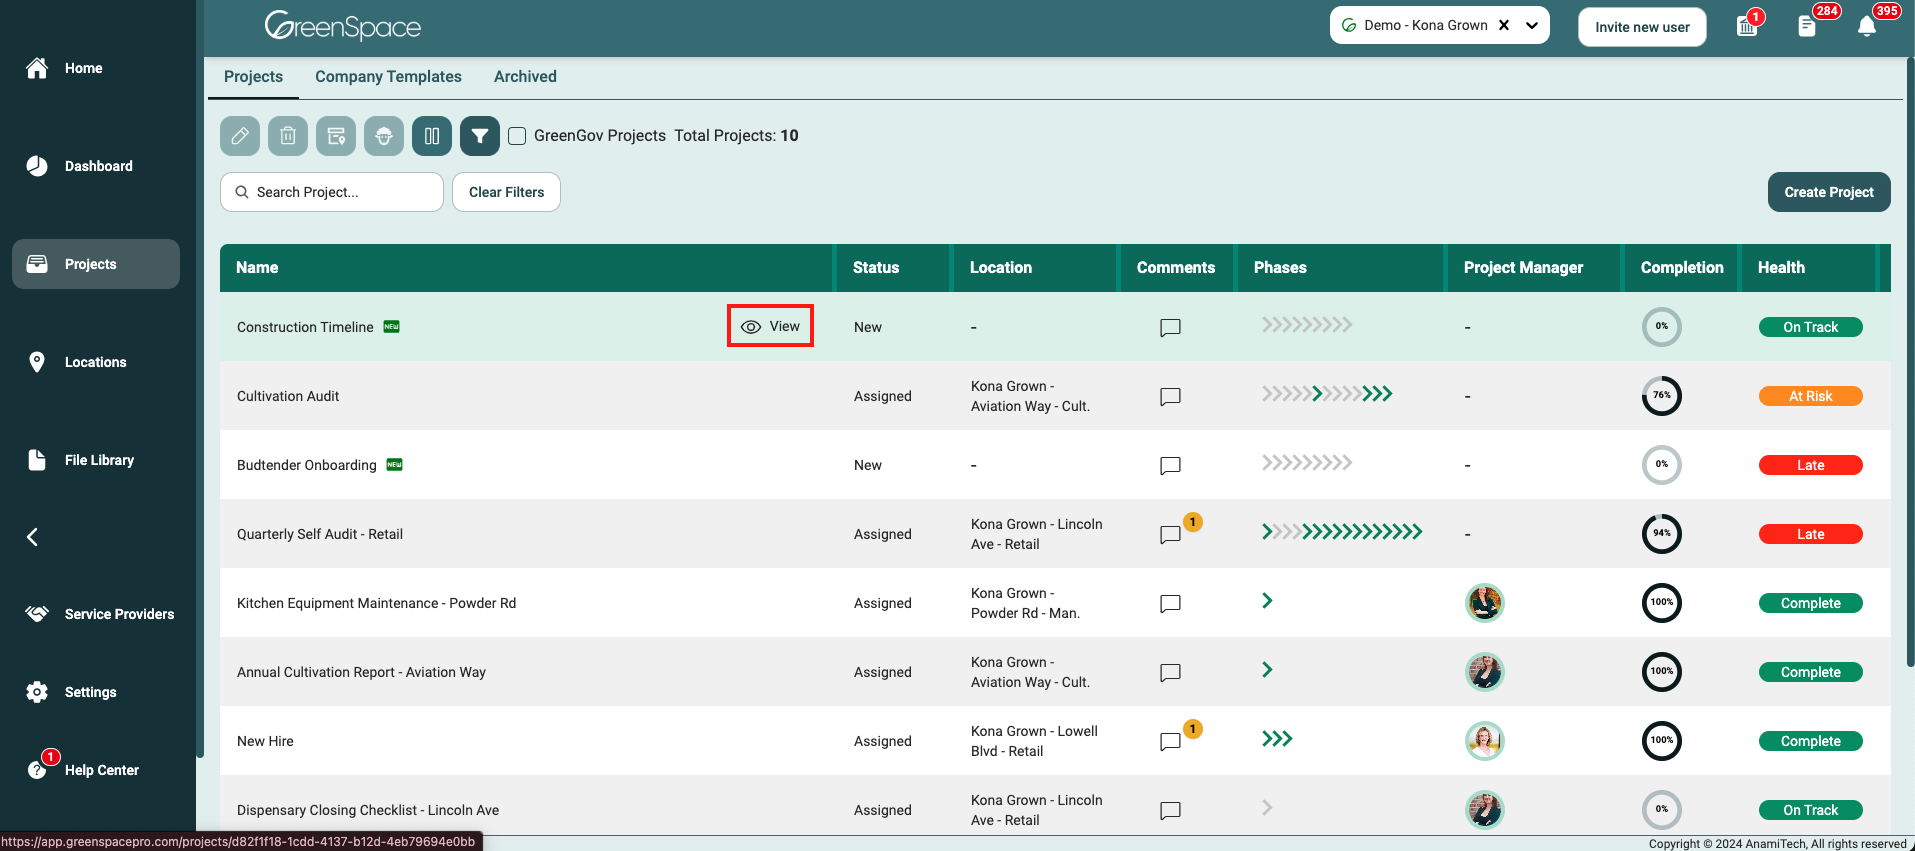
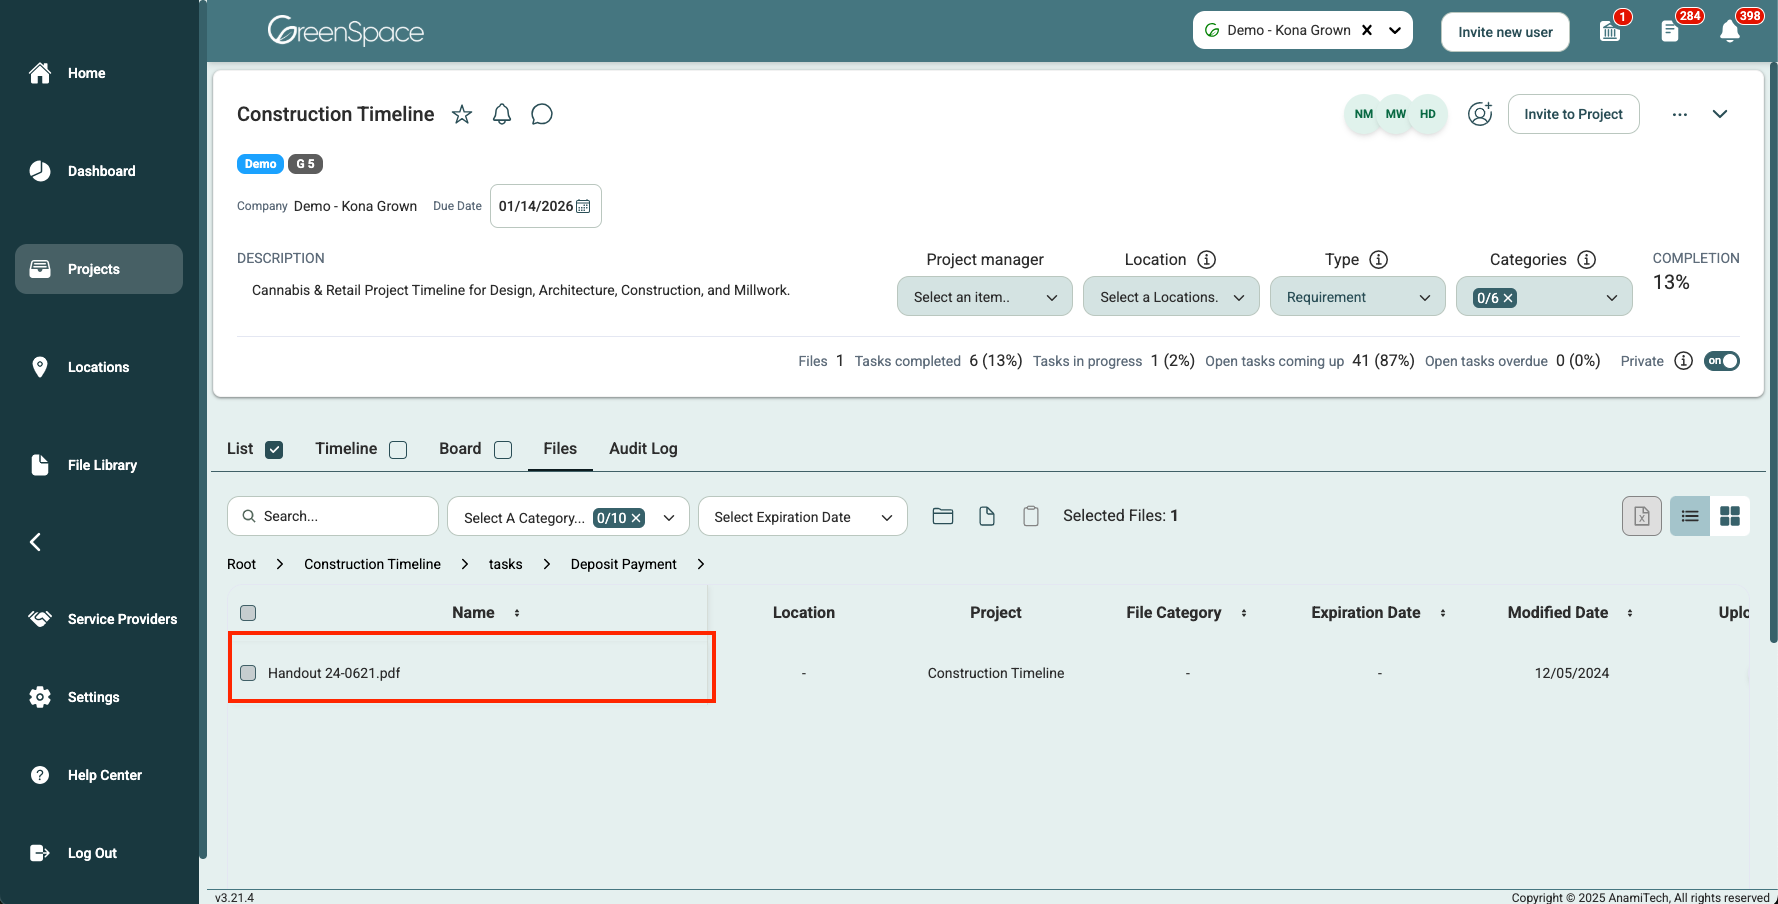
Select the "Files" tab below the Project header.
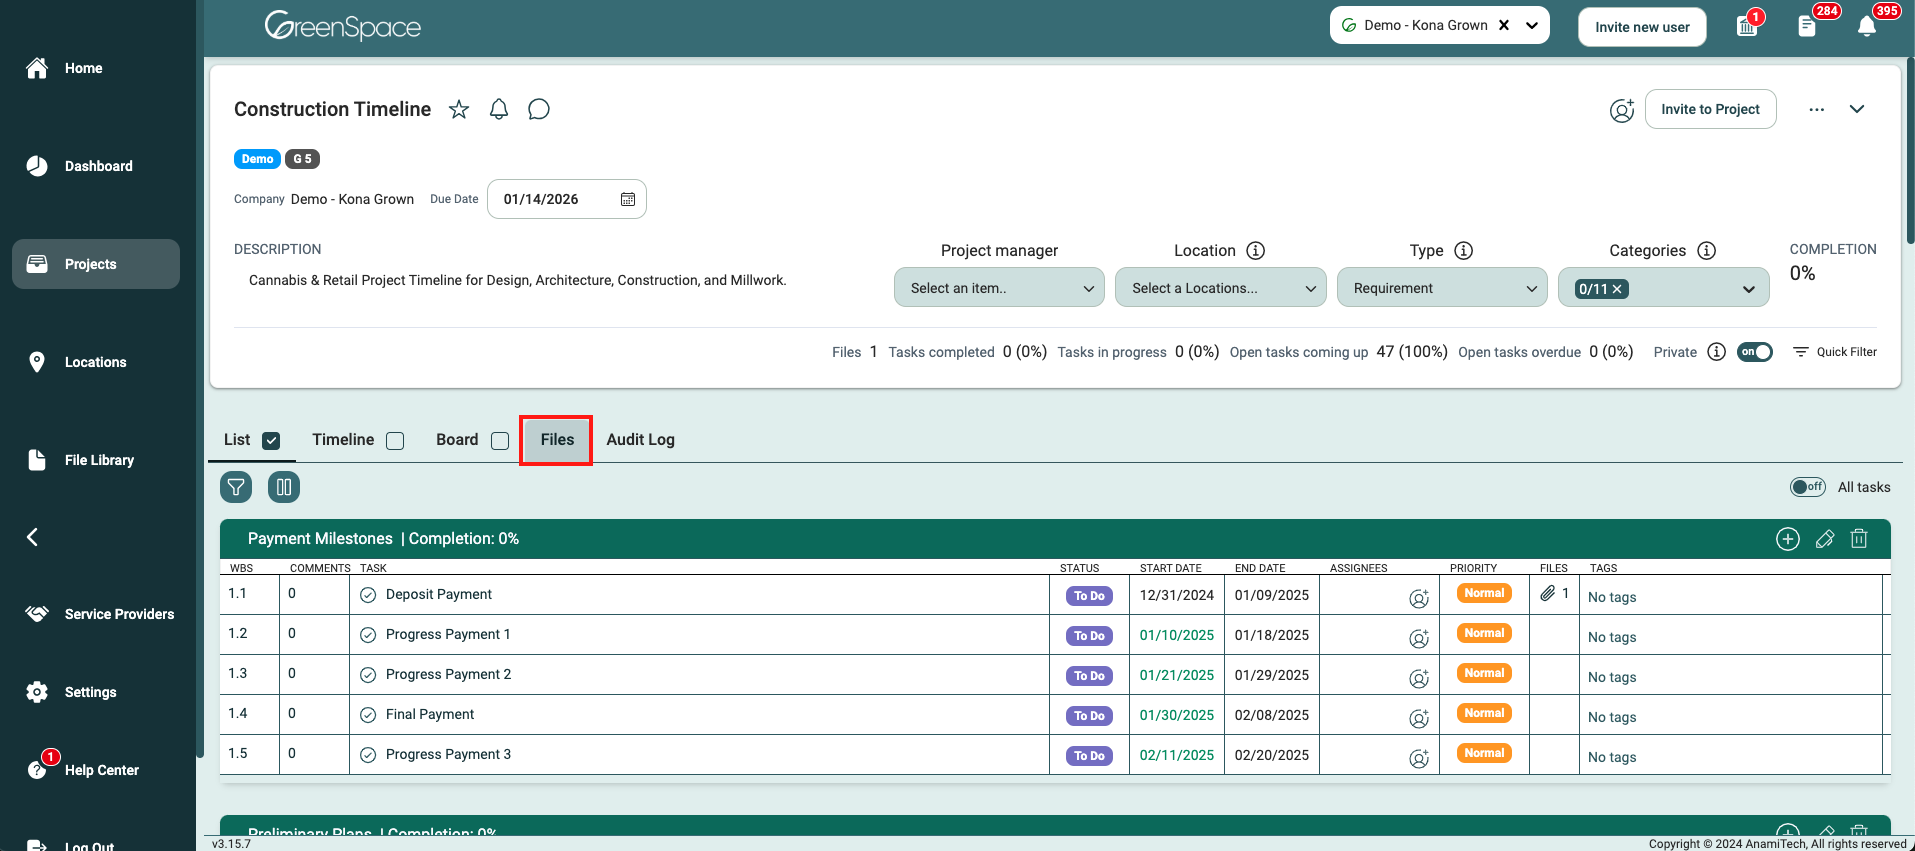
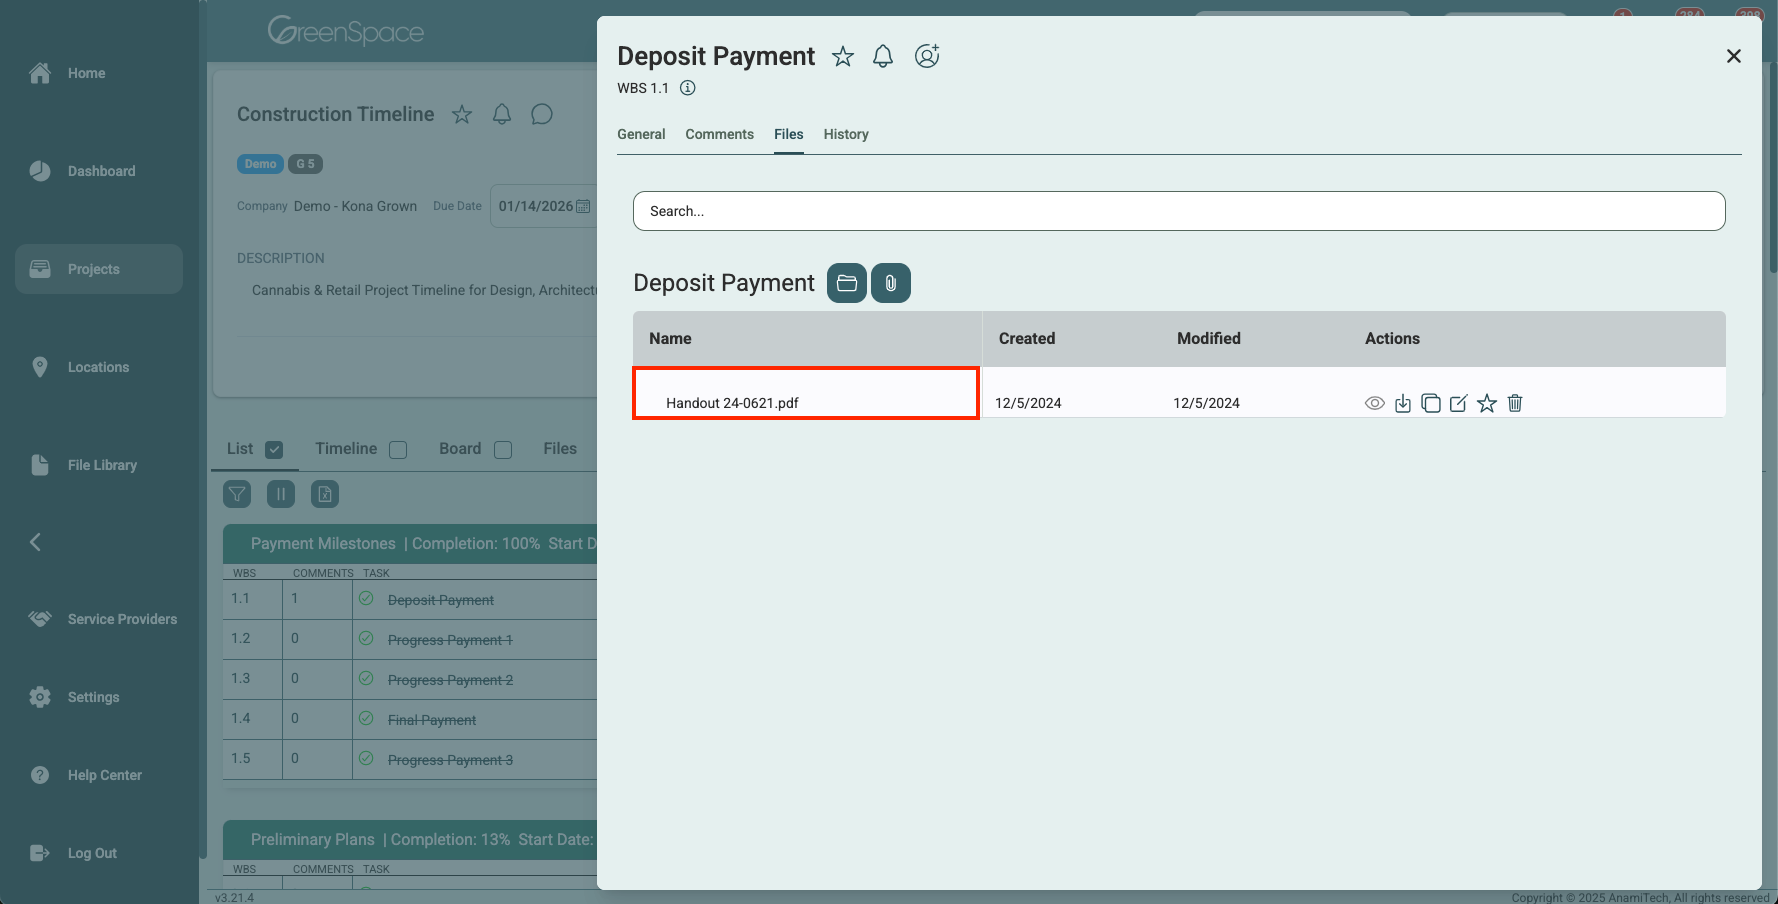
Navigate to the desired folder and click on the file you would like to assign a user.
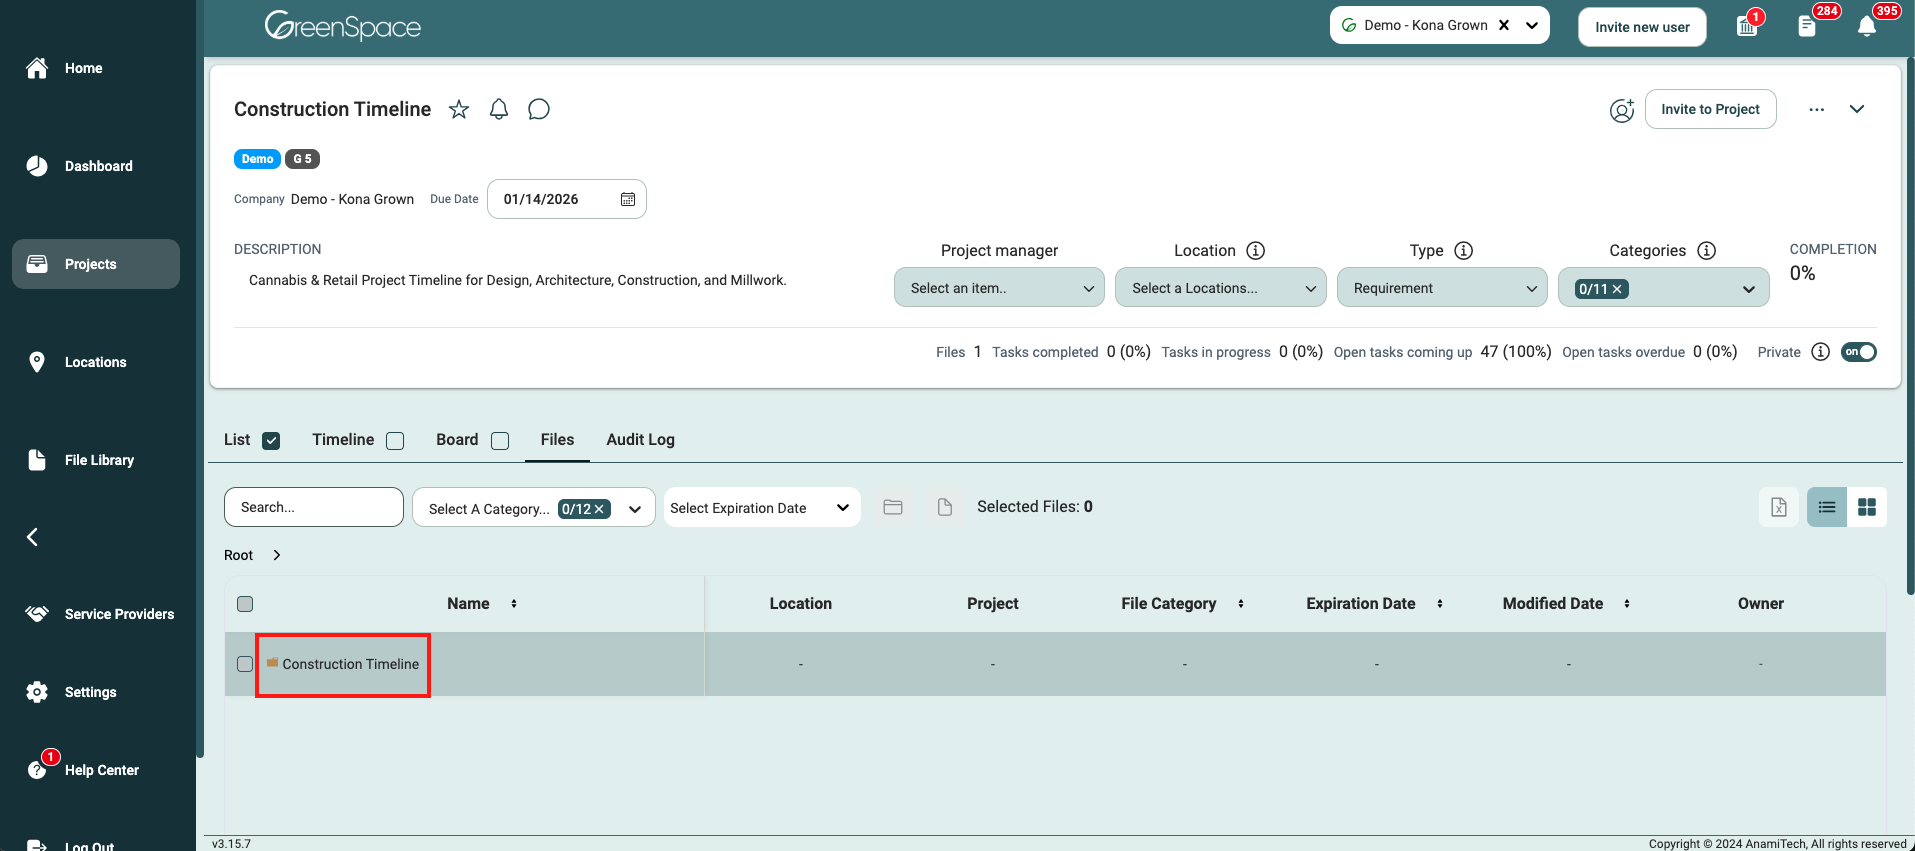
A pop-up window with the file details and available options will appear on the screen. Click the "Assigned To" option to assign the document to a user.
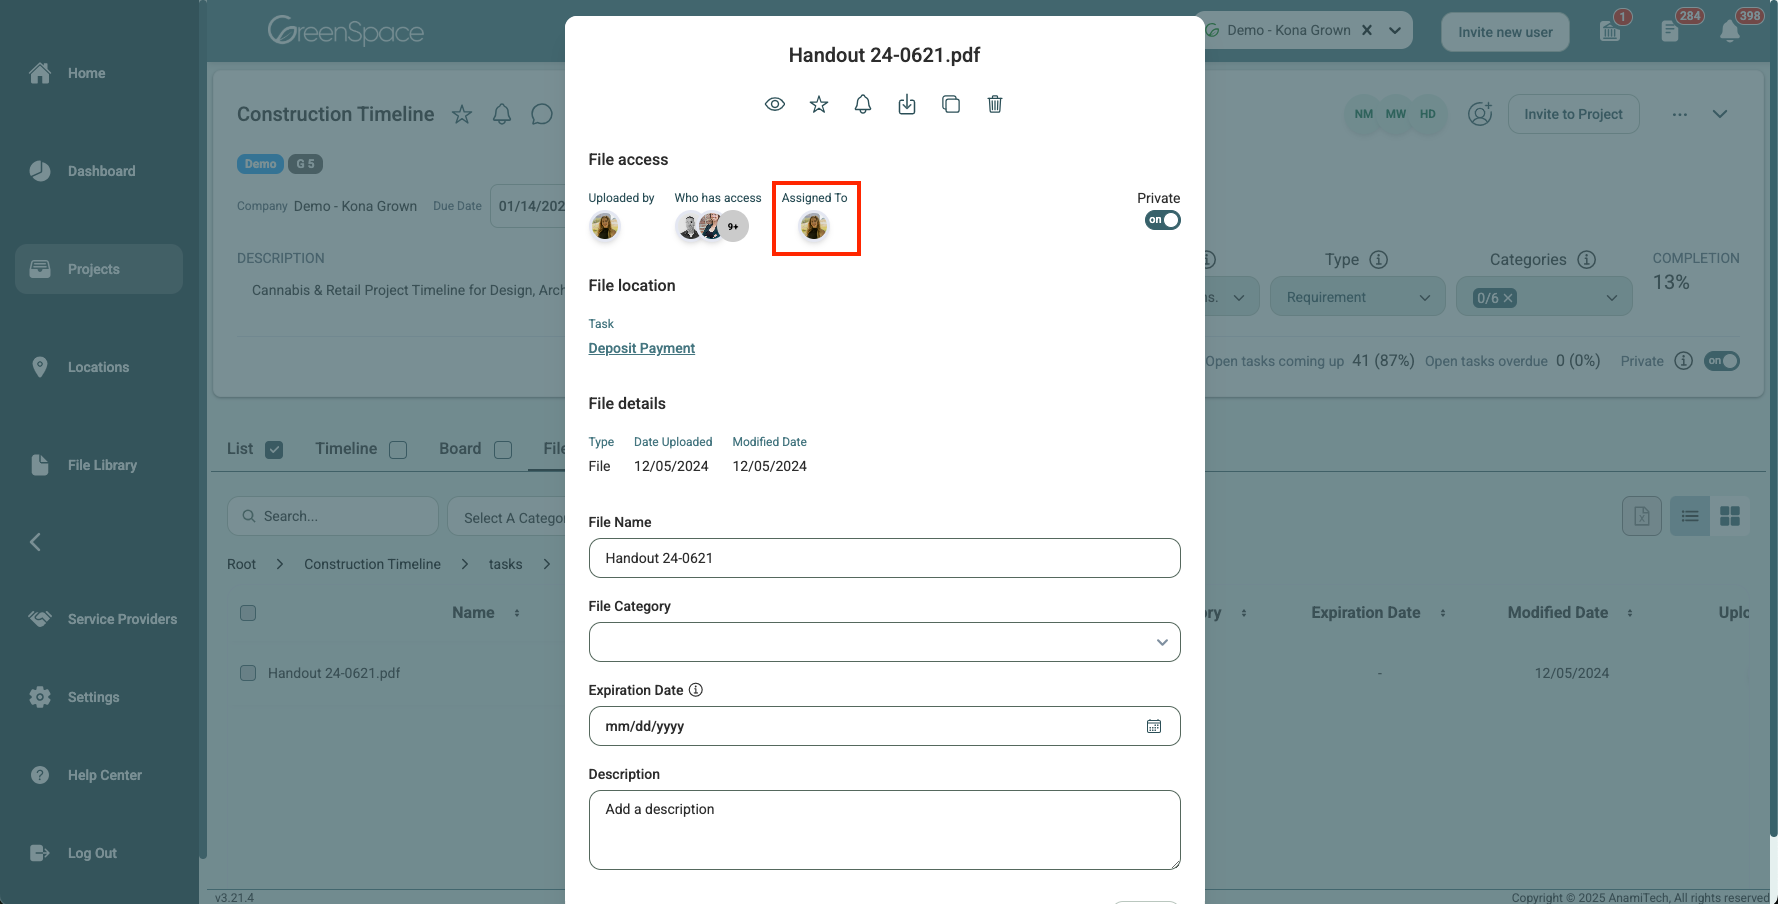
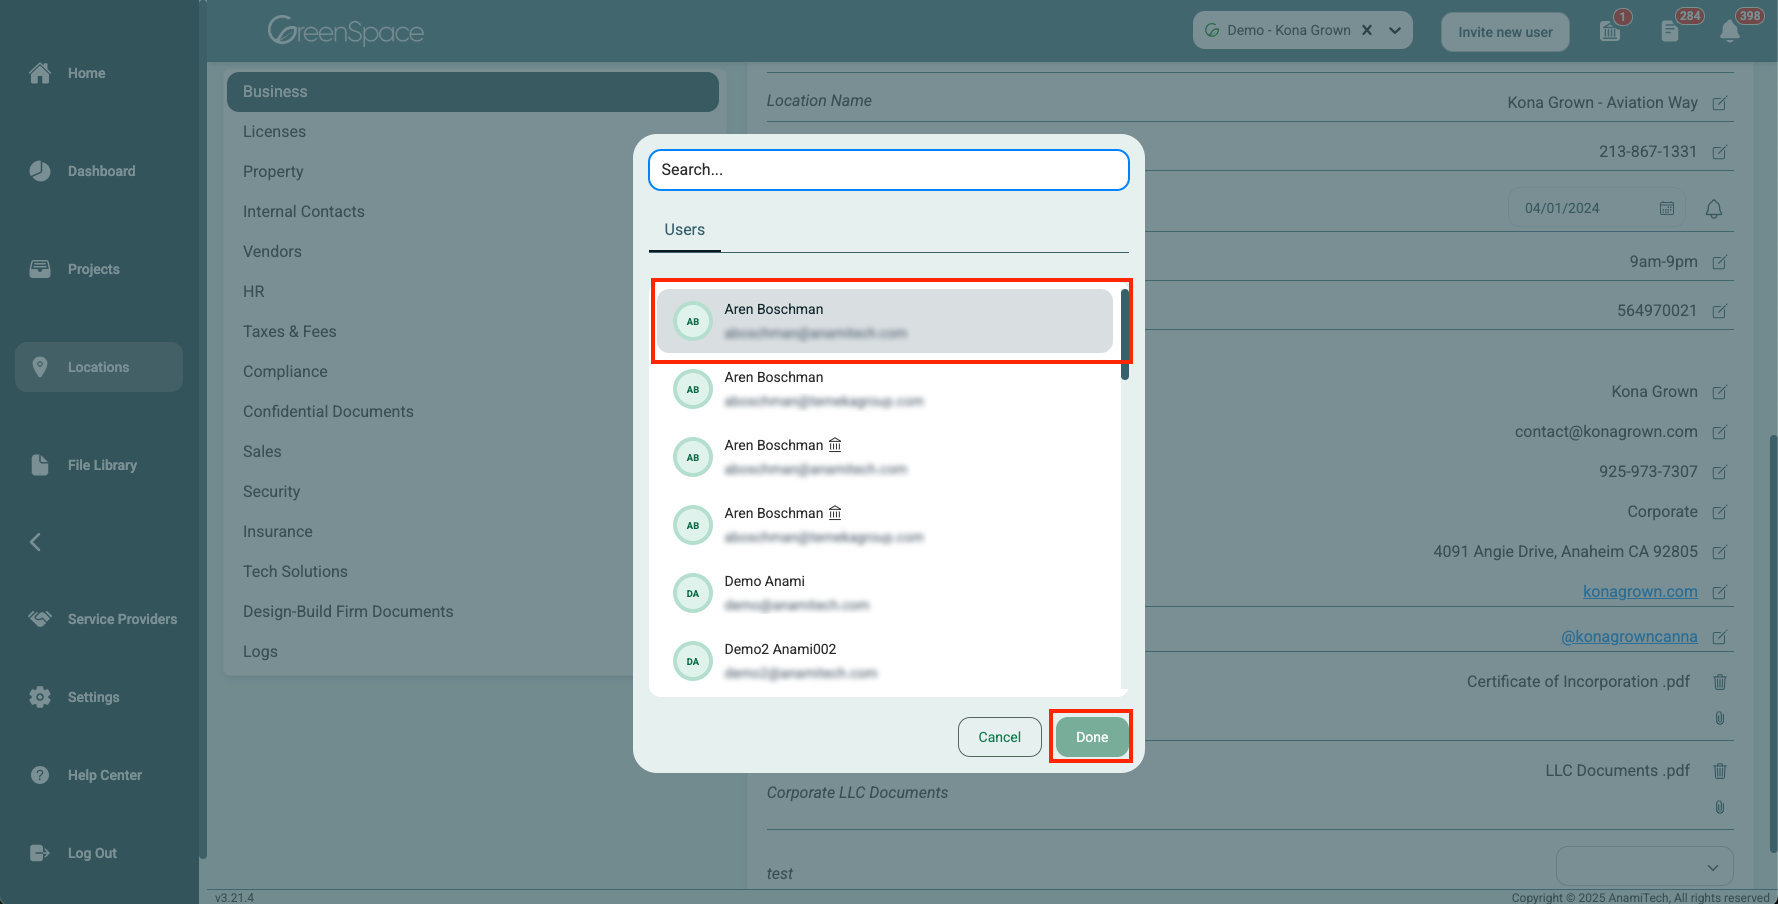
Select the users you would like to assign to the file and click "Done".
Assign a User to a File in a Task
Click on the "Projects" option located in the main menu to the left of your screen.
Open the project you would like to assign a user to a file by hovering over the project and clicking on the view eye icon.
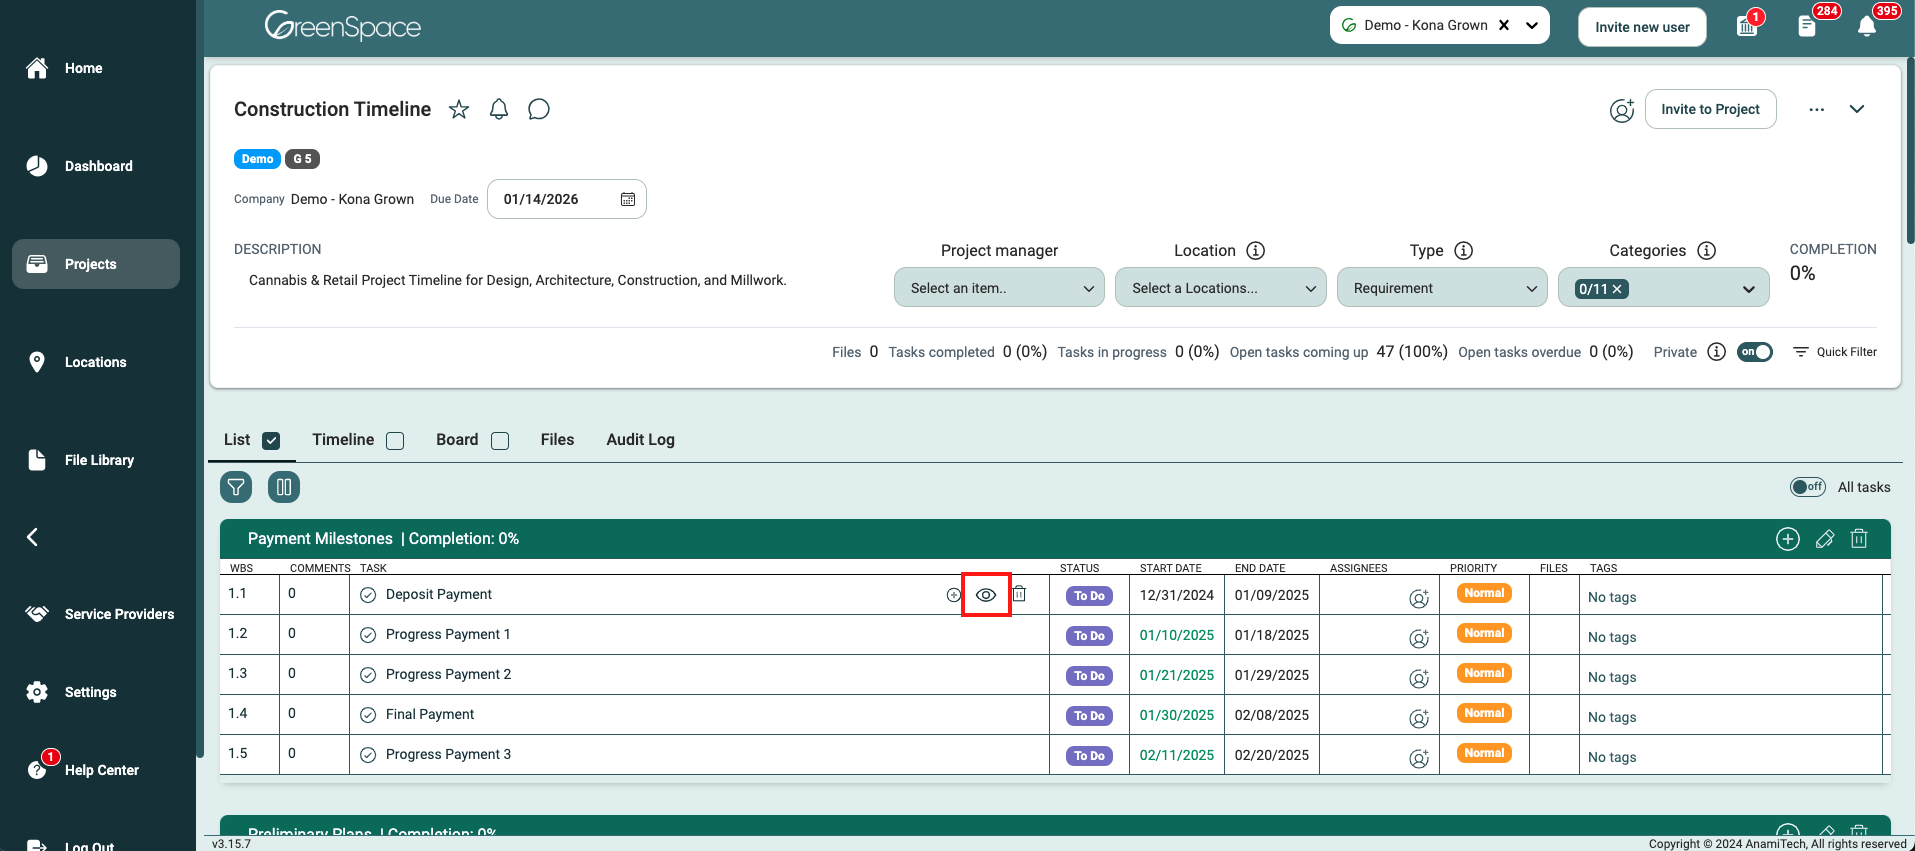
Open the task or sub-task you would like to assign a user to a file by hovering over the task and clicking on the eye icon.
Select the "Files" tab in the pop-up window.
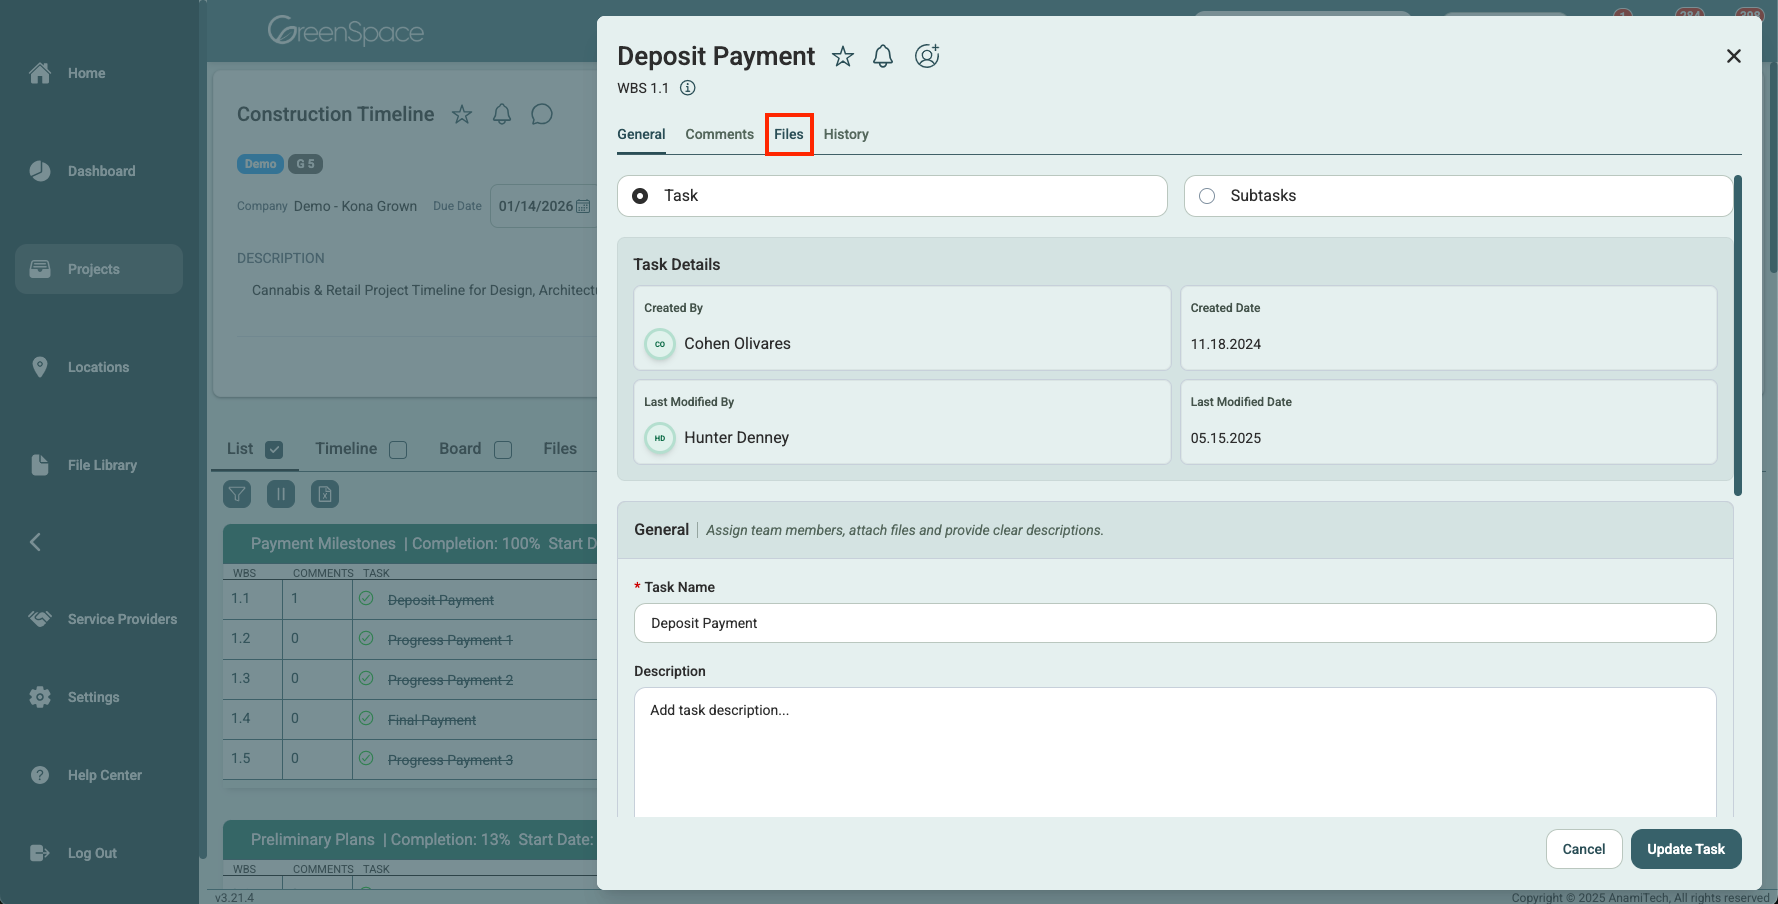
Click on the name of the desired file you would like to assign a user to.
A pop-up window with the file details and available options will appear on the screen. Click the "Assigned To" option to assign the document to a user.
Select the users you would like to assign to the file and click "Done".
Assign a User to a File in a Location
Click on the "Locations" option located in the main menu to the left of your screen.
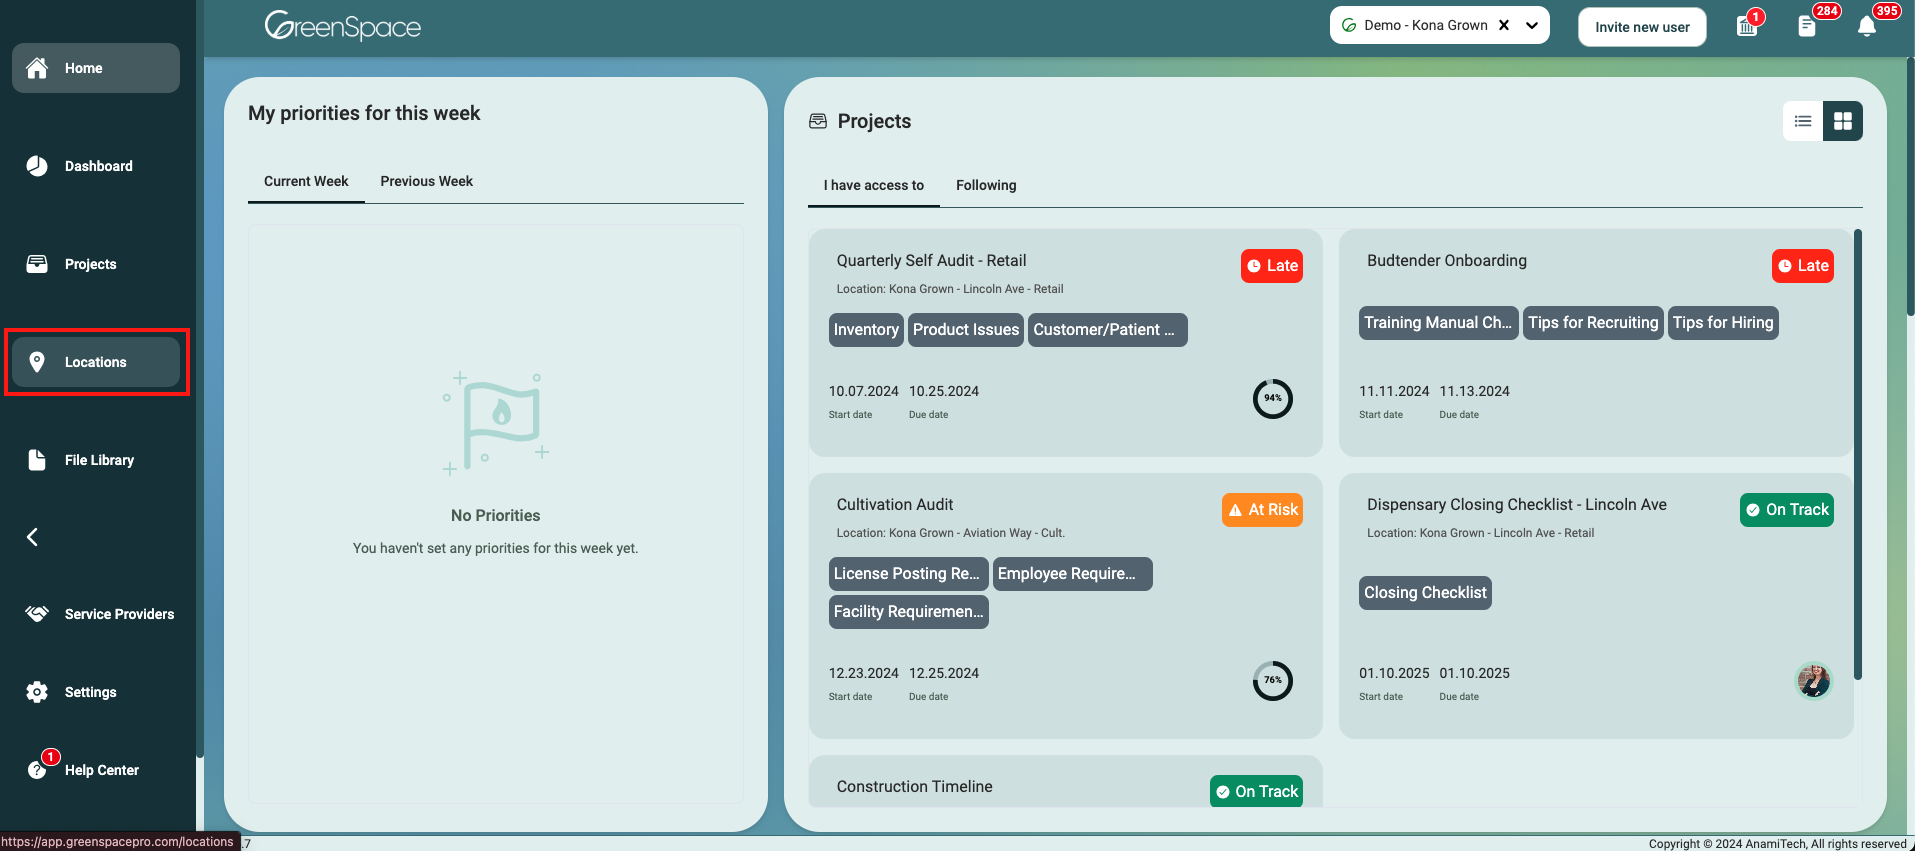
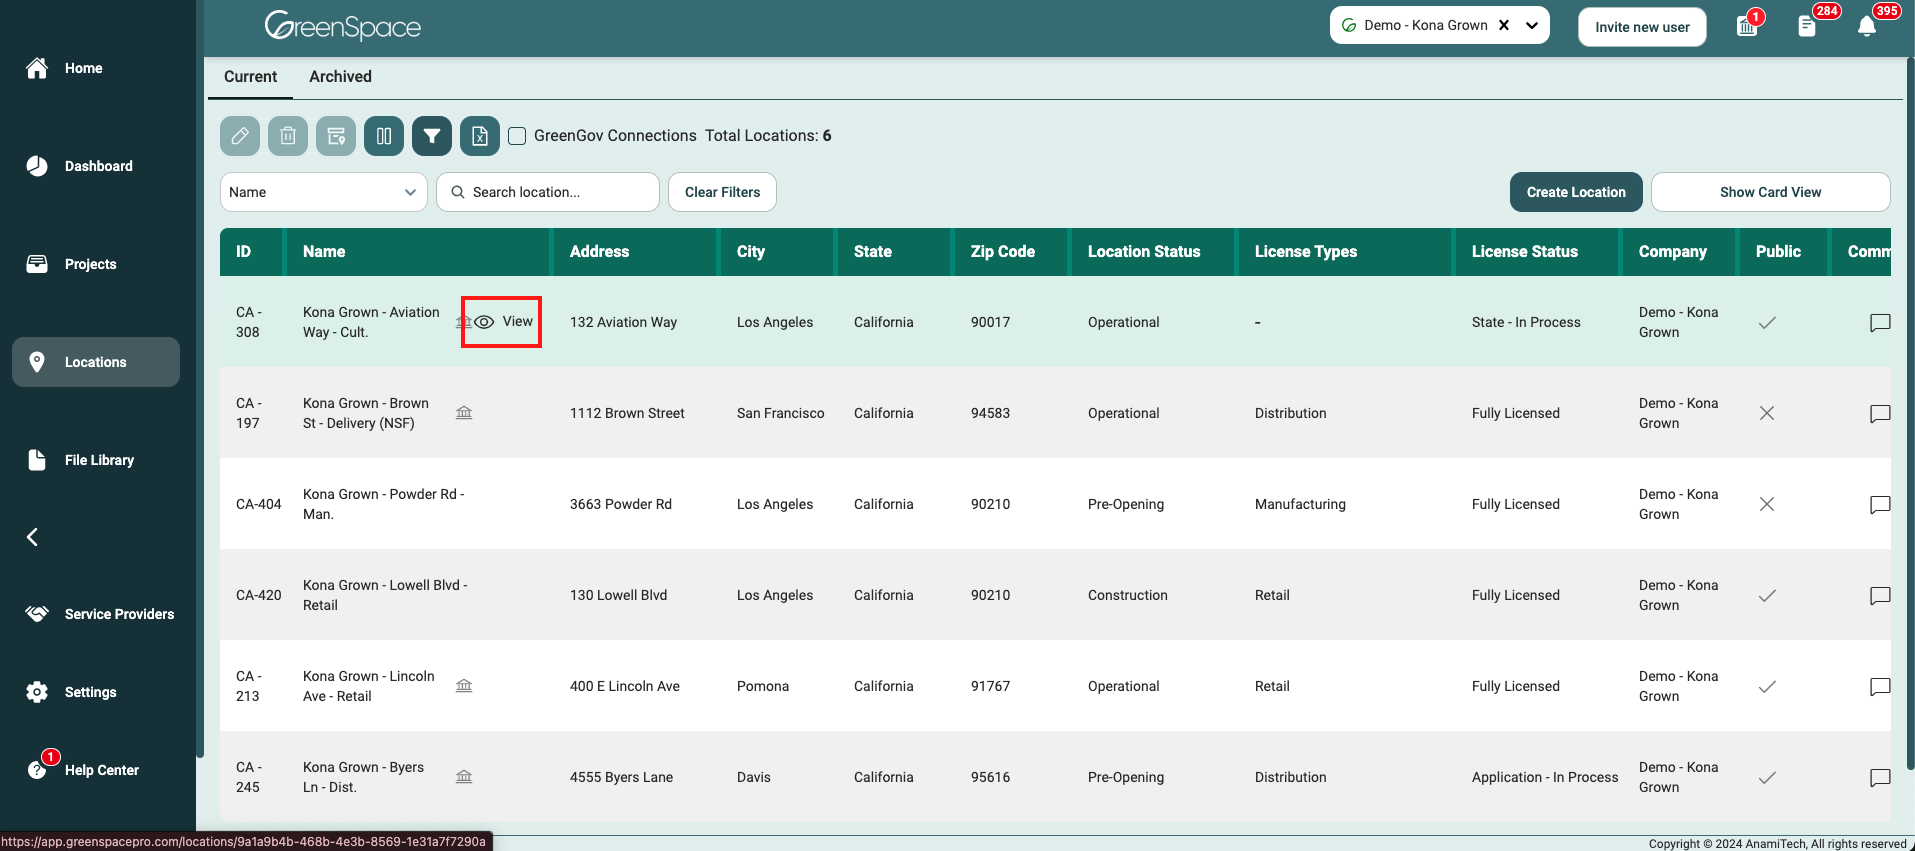
Open the location you would like to assign a user to a file by hovering over the location and clicking on the view eye icon.
Select the "Files" tab below the Location header.
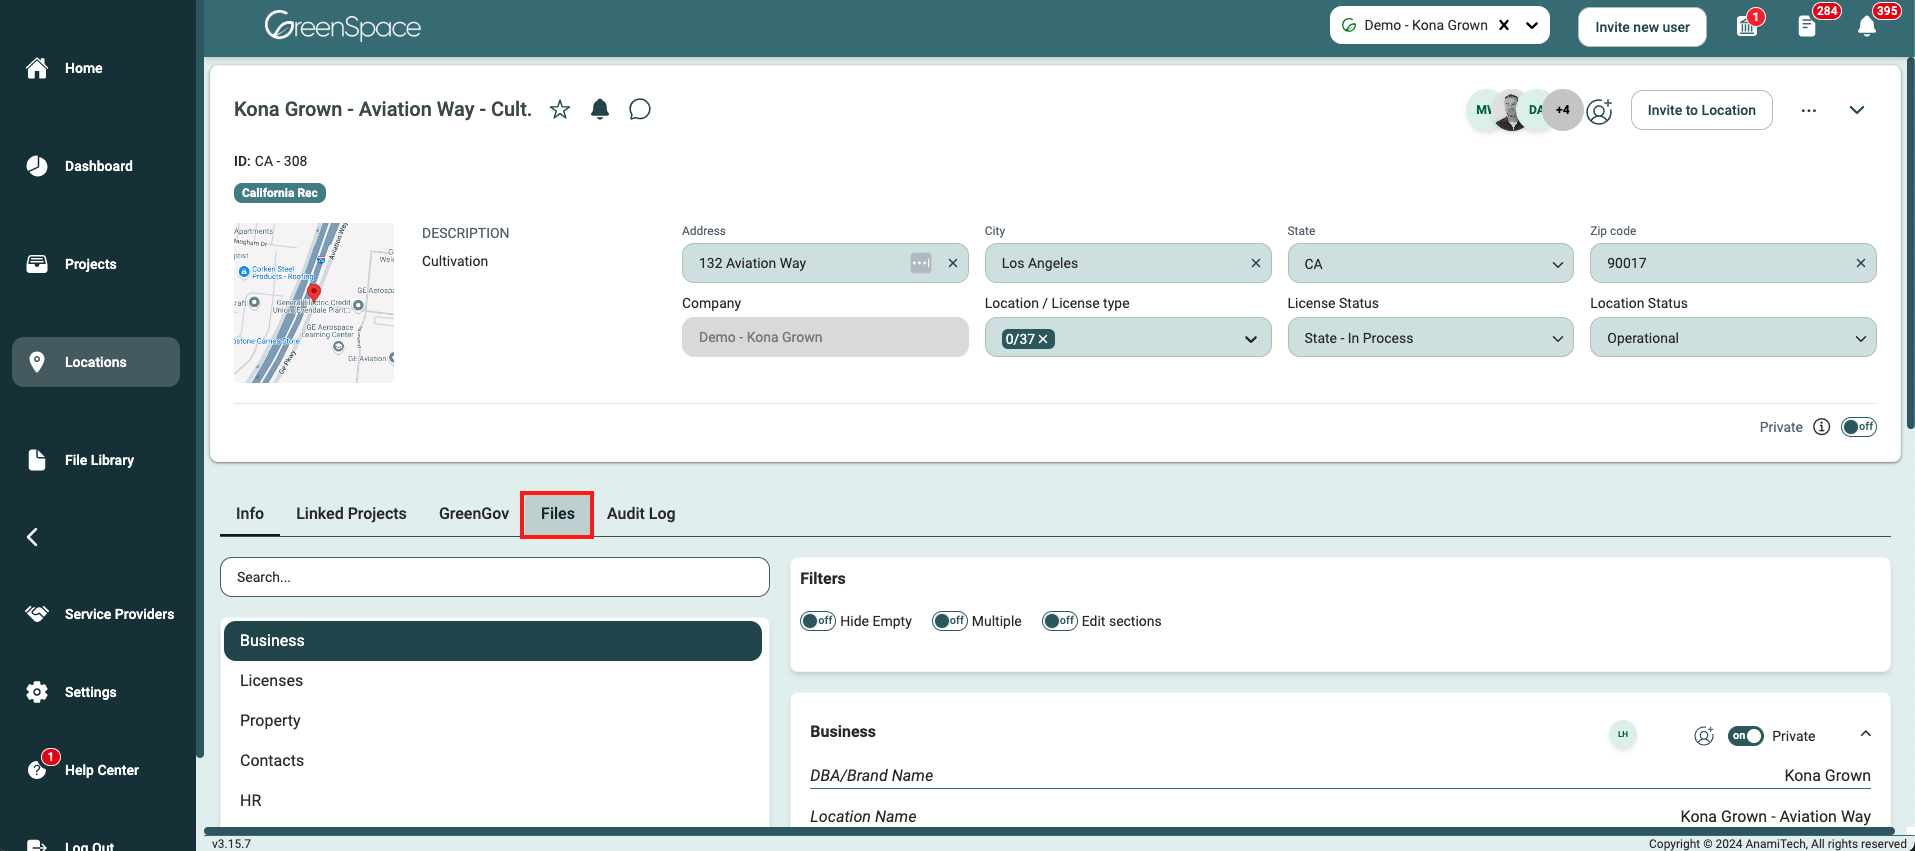
Navigate to the desired folder and click on the file you would like to assign a user.
A pop-up window with the file details and available options will appear on the screen. Click the "Assigned To" option to assign the document to a user.
Select the users you would like to assign to the file and click "Done".
Assign a User to a File in a Location Field
Click on the "Locations" option located in the main menu to the left of your screen.
Open the location you would like to assigner a user to a file by hovering over the location and clicking on the view eye icon.
Identify the field within the location interface where you would like to assign a user to a file.
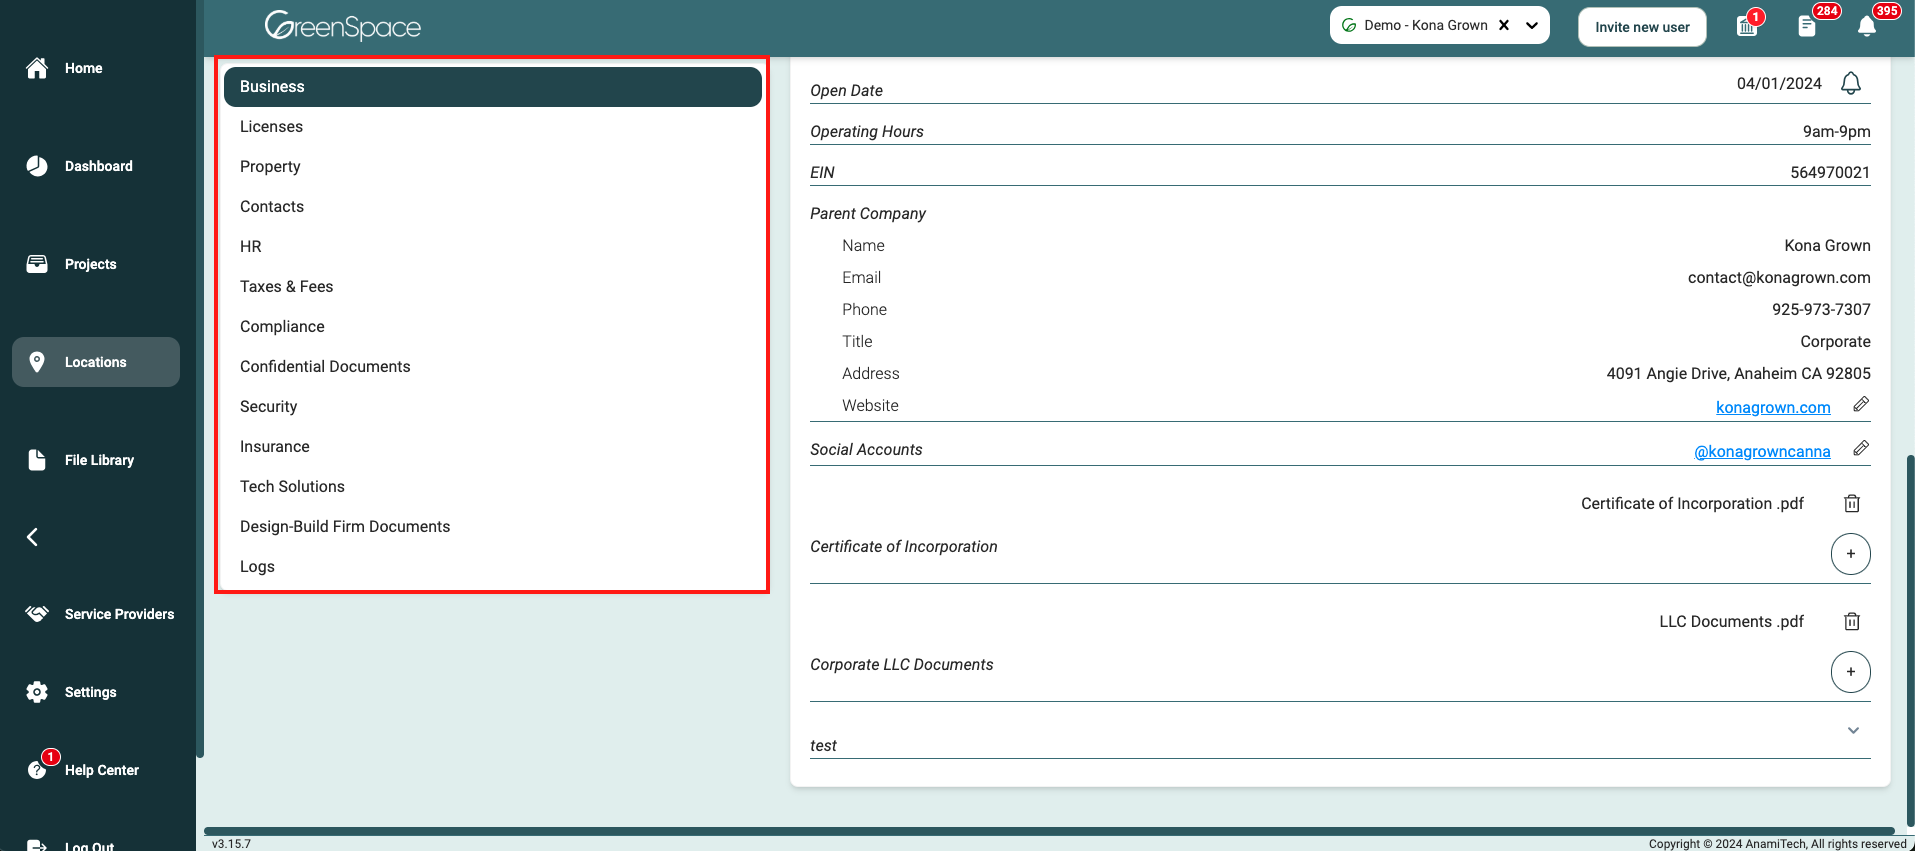
Navigate to the desired field and click on the file you would like to assign a user.
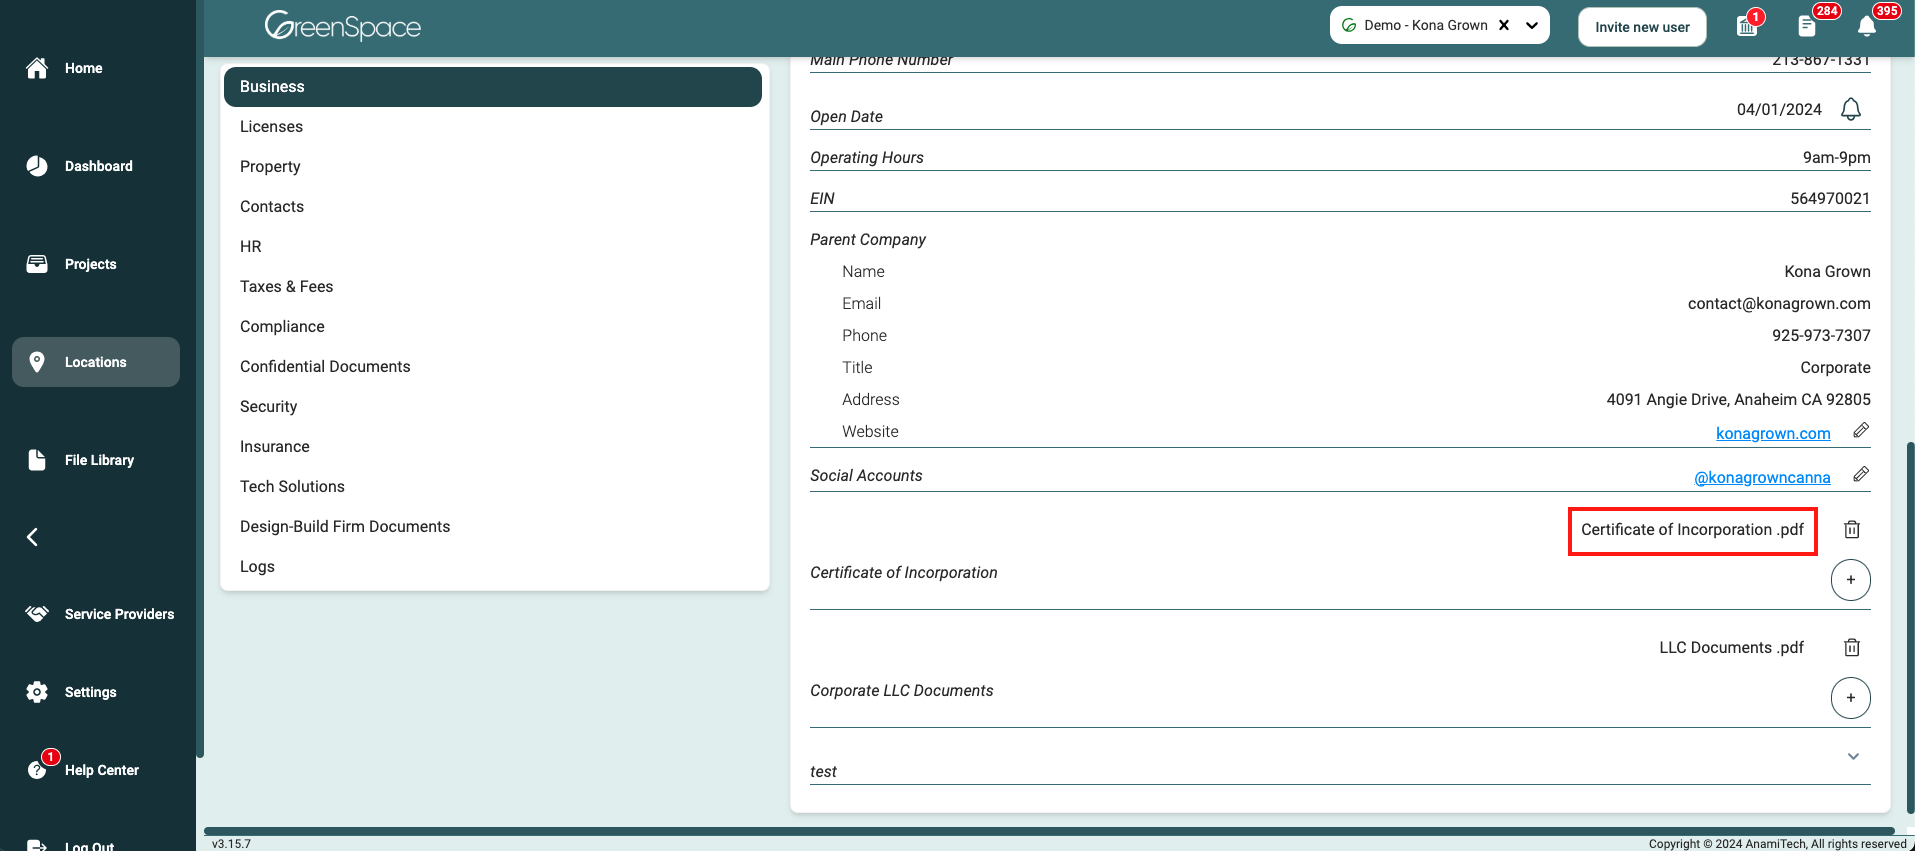
A pop-up window with the file details and available options will appear on the screen. Click the "Assigned To" option to assign the document to a user.
Select the users you would like to assign to the file and click "Done".
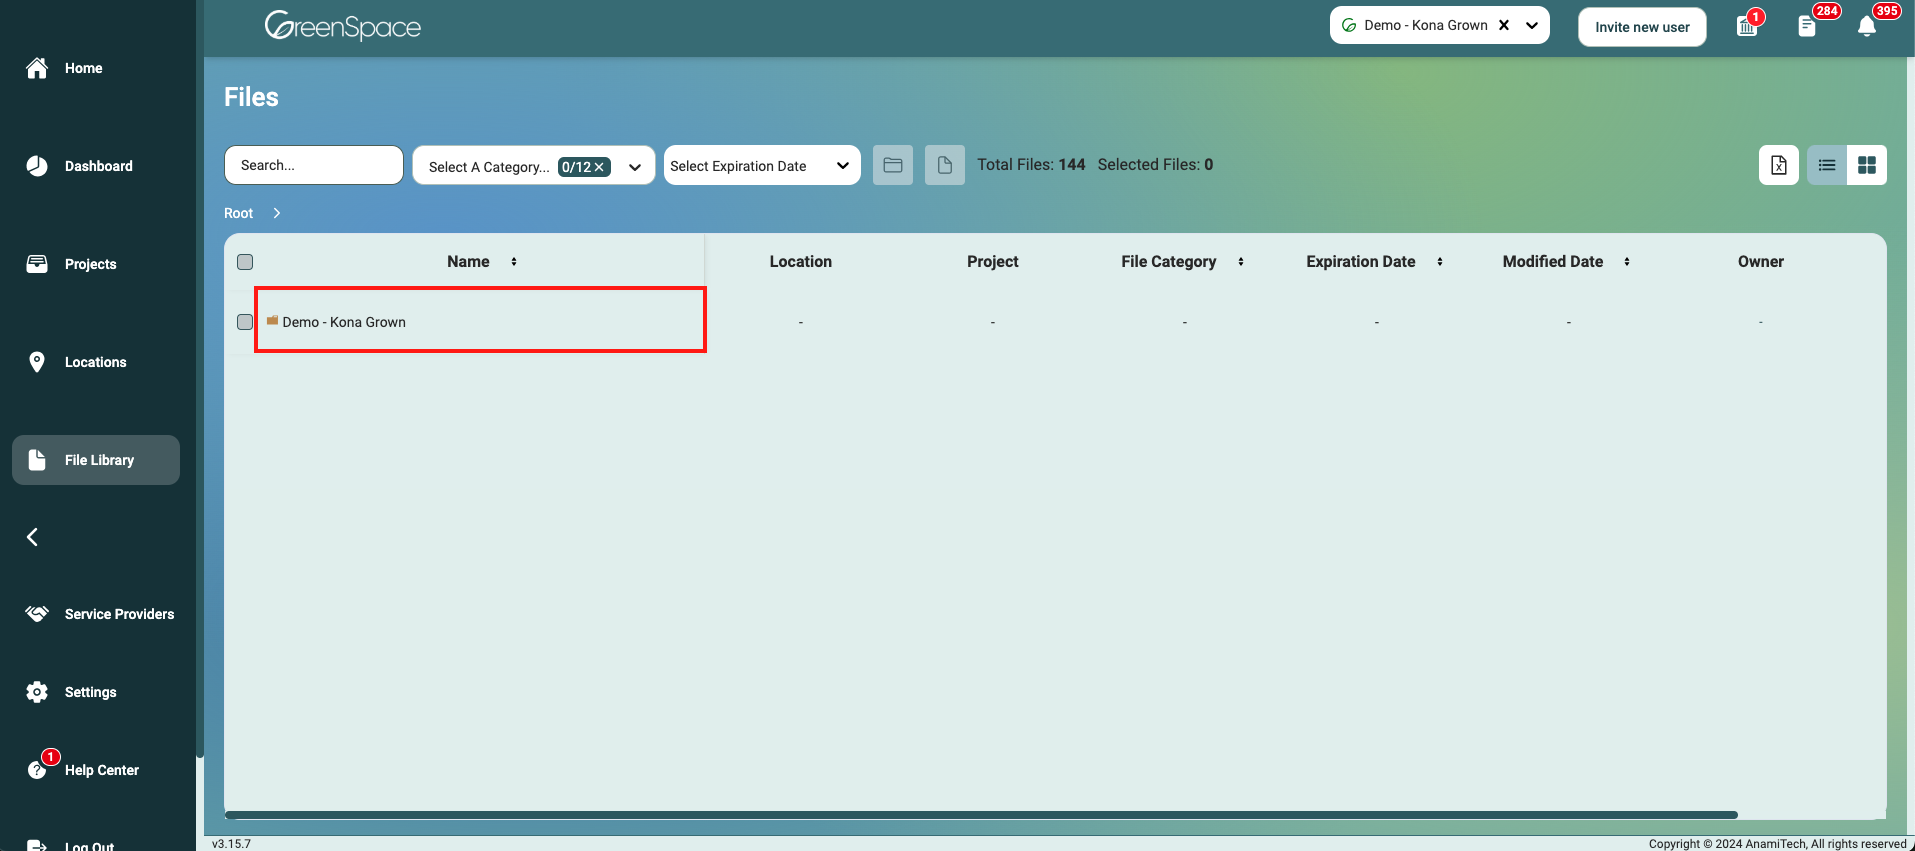
Assign a User to a File in a Company
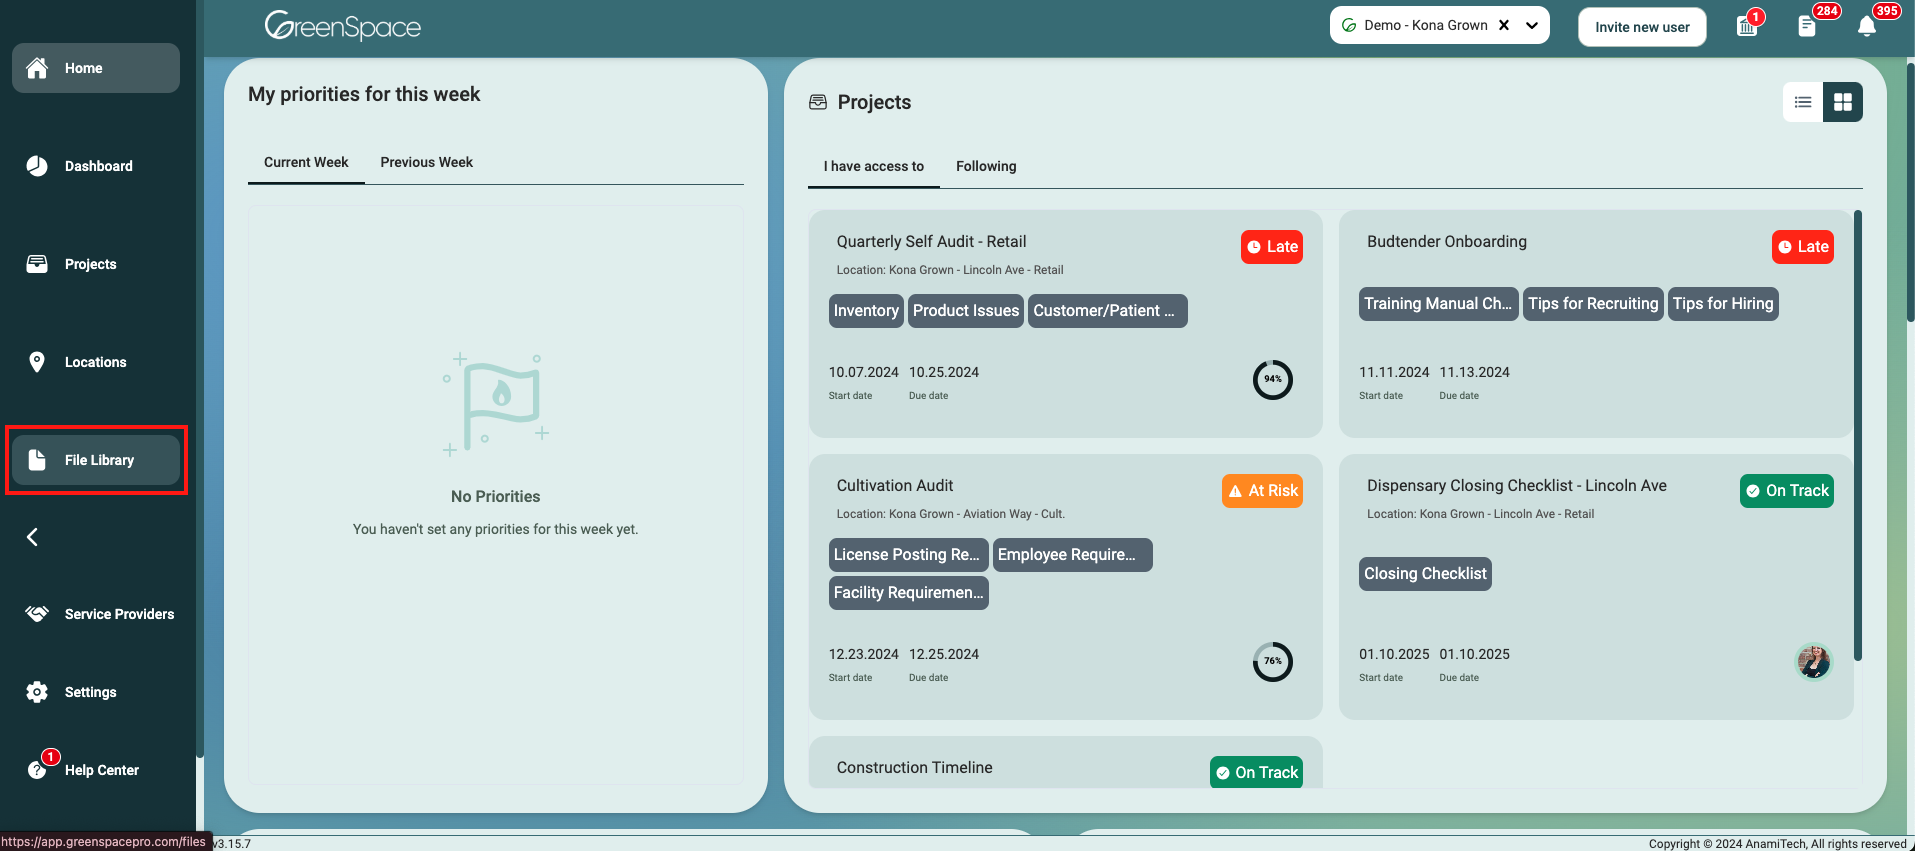
Click on the "File Library" option located in the main menu to the left of your screen.
Navigate to the desired folder and click on the file you would like to assign a user.
A pop-up window with the file details and available options will appear on the screen. Click the "Assigned To" option to assign the document to a user.
Select the users you would like to assign to the file and click "Done".
And that's it! You've successfully assigned a user to a file using GreenSpace. With this simple process, you can quickly save your important documents to the associated tasks, projects, and locations. If you have any questions or need further assistance, please don't hesitate to reach out to our support team. Happy file management!