
How to Add, Edit, and Delete Phases, Tasks, and Sub-Tasks
Accessing a Project
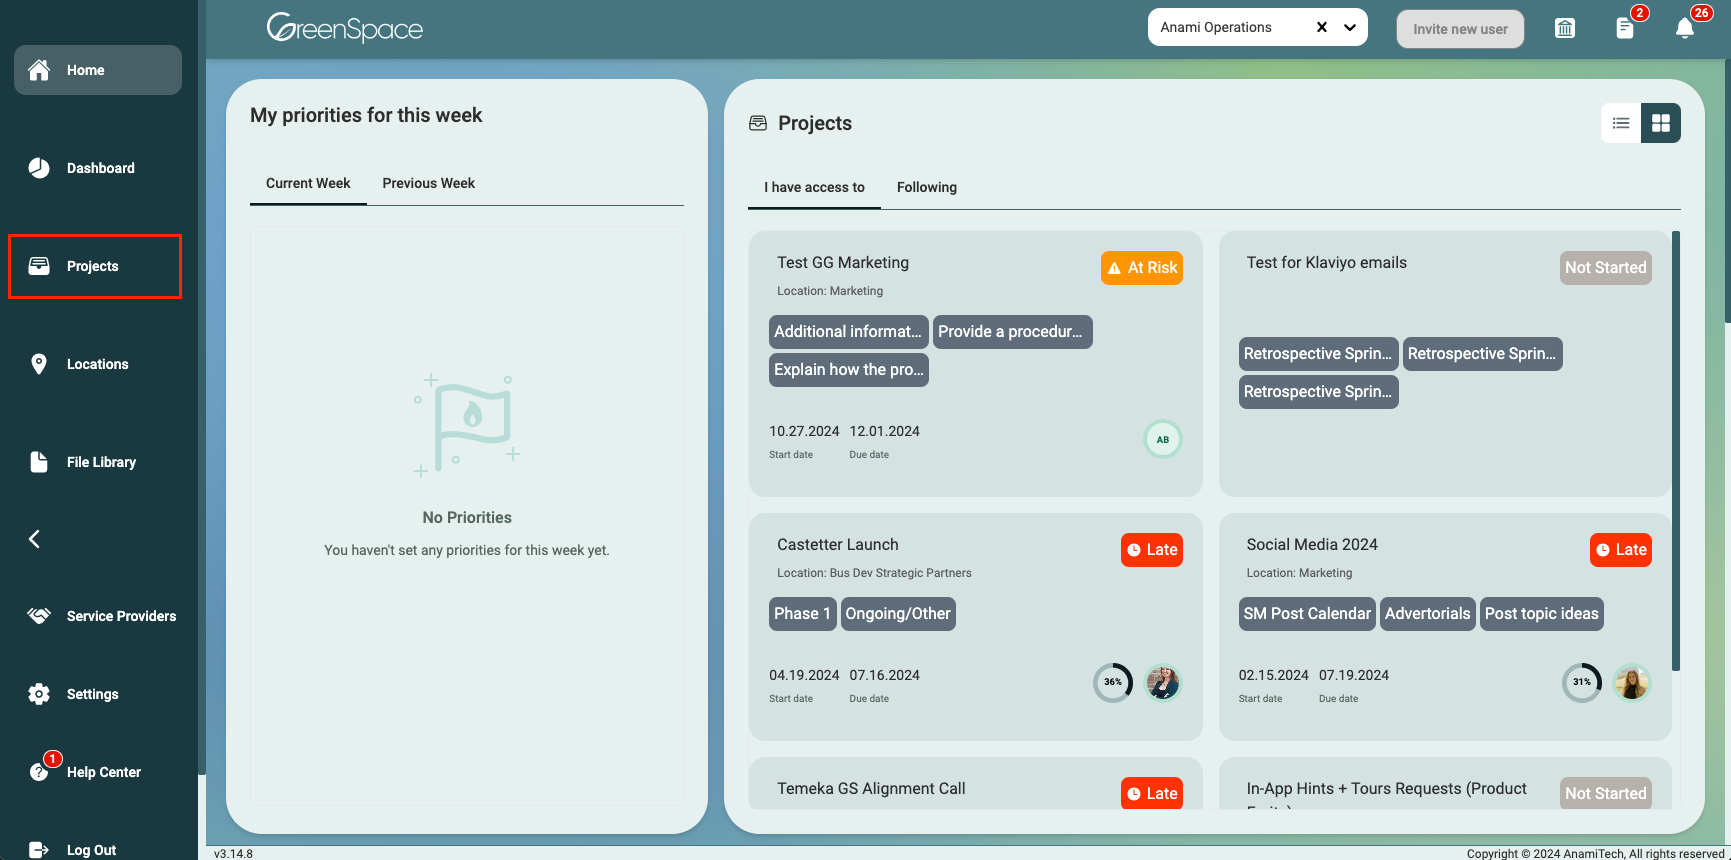
Click on "Projects" in the main menu on the left side of your screen.
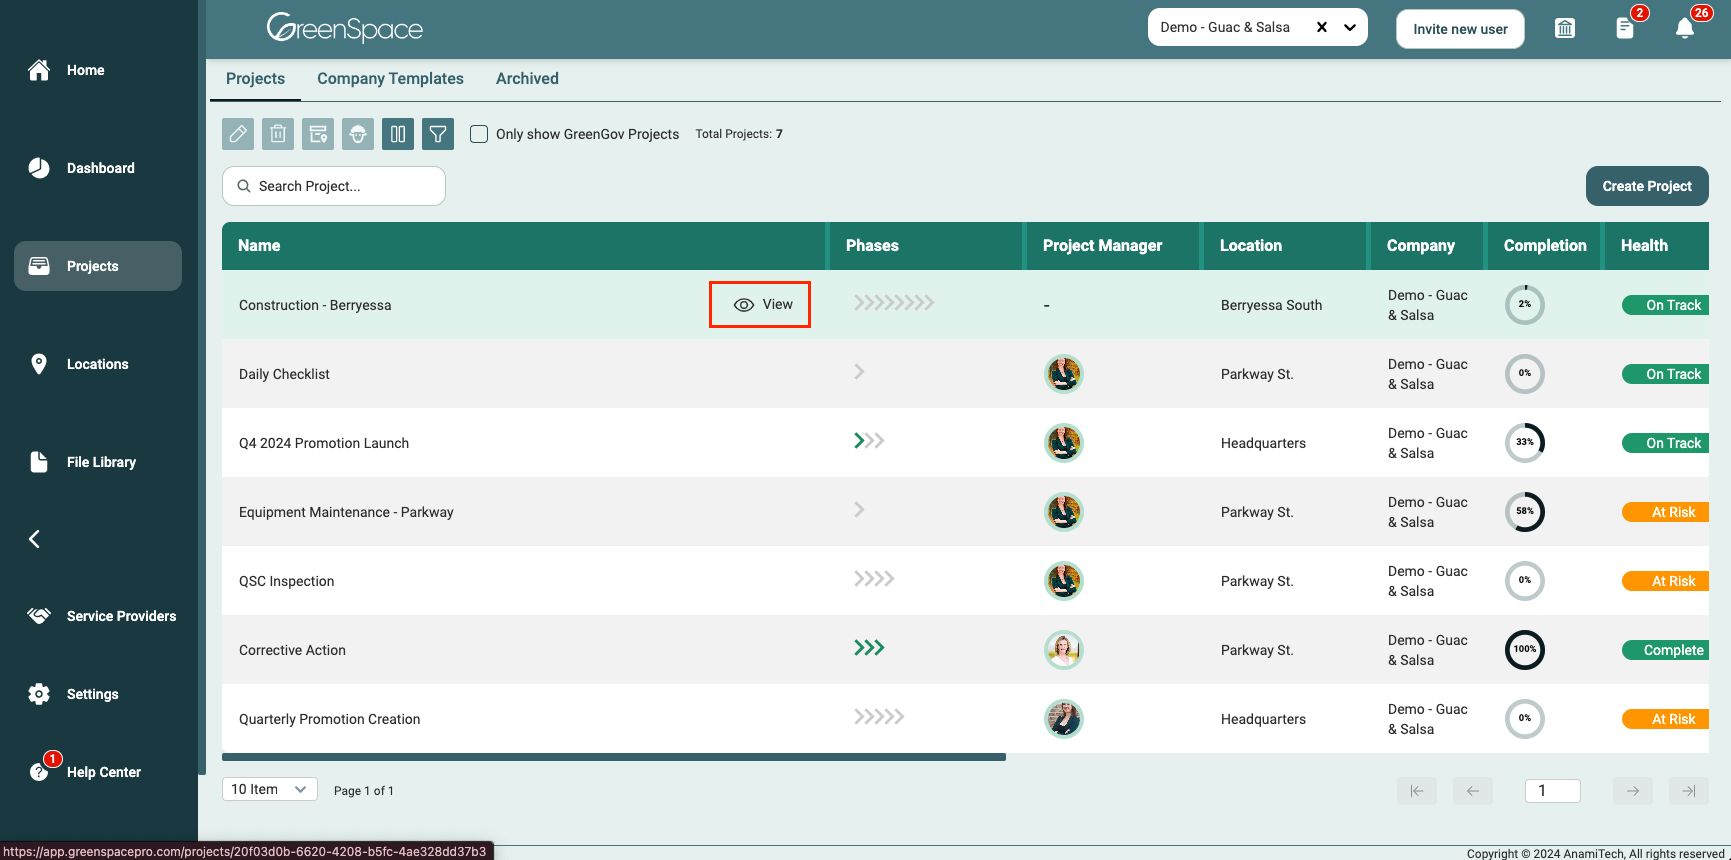
Hover over the project you want to edit in the Project List overview and click the "View" button when it appears.
Phases
Adding a Phase (Admin + Manager Only)
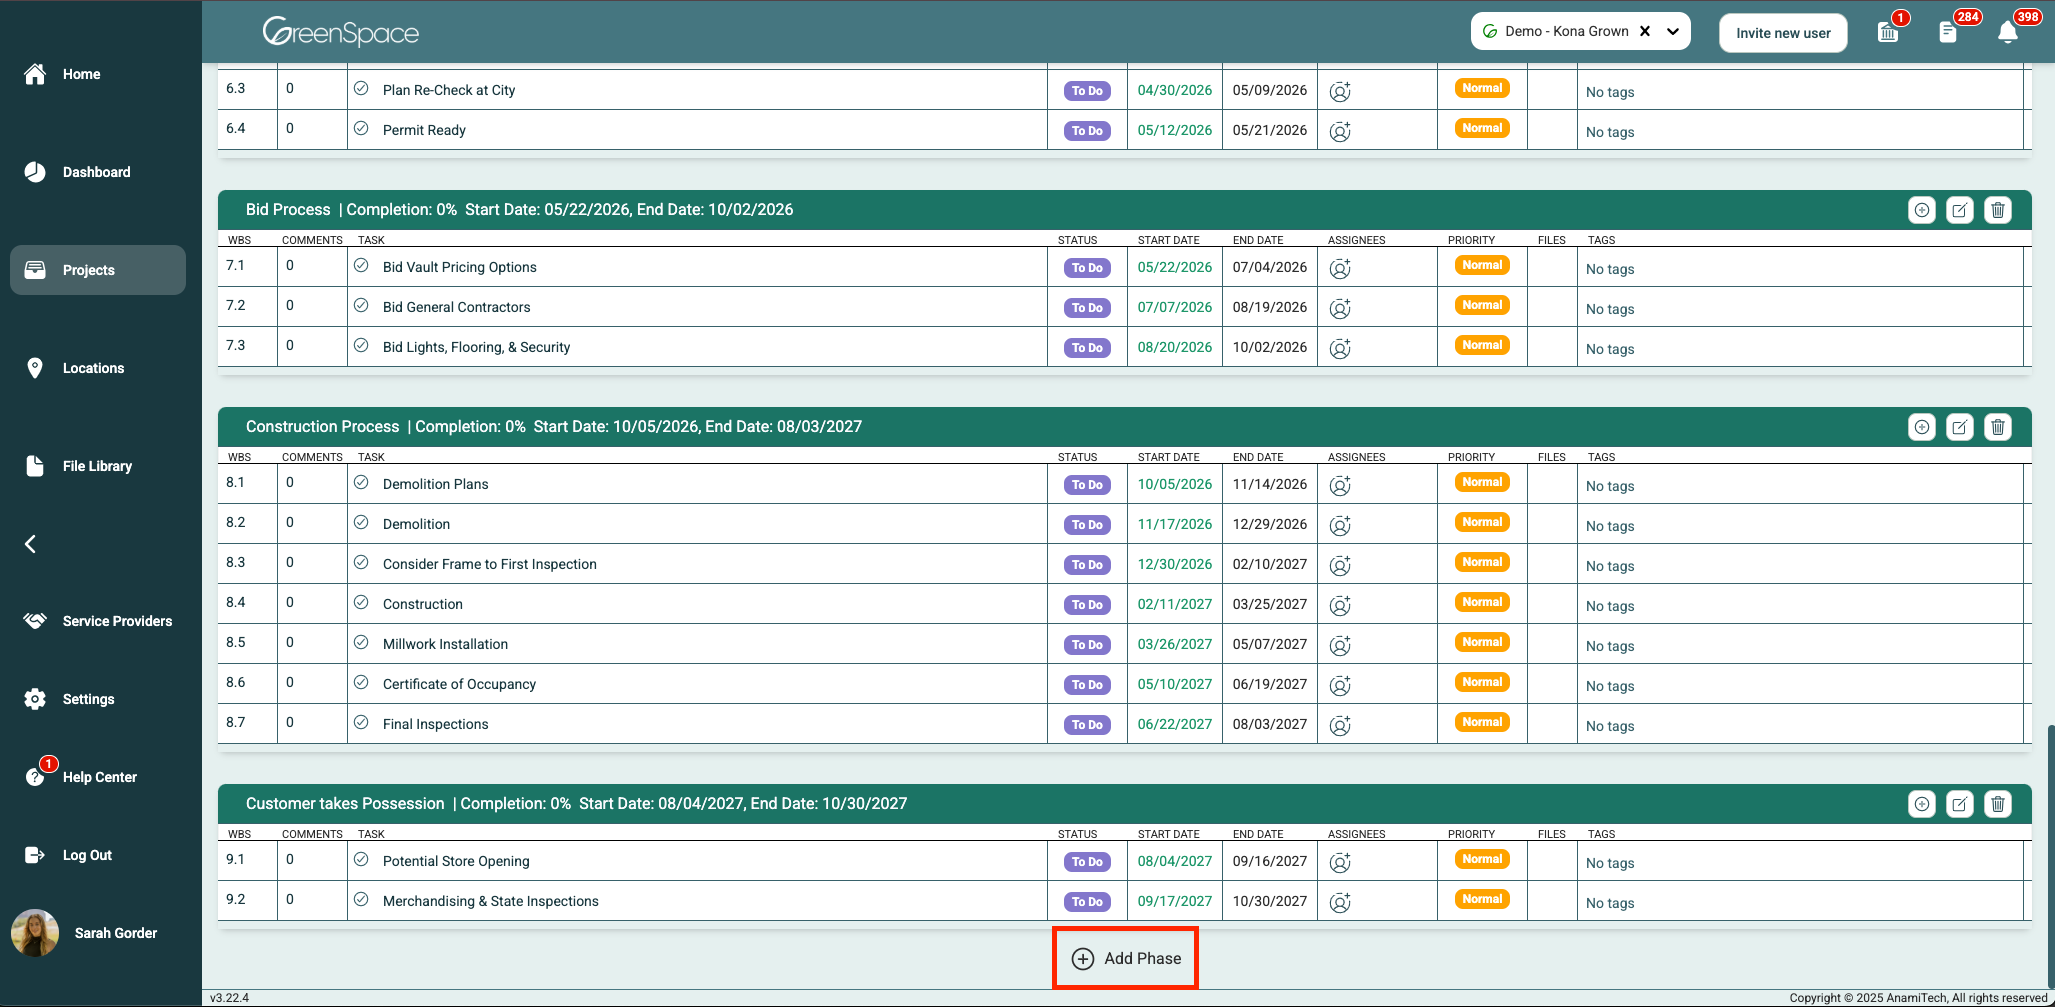
Scroll to the bottom of the screen and click "Add Phase." In the text field, enter the desired name for the new phase.
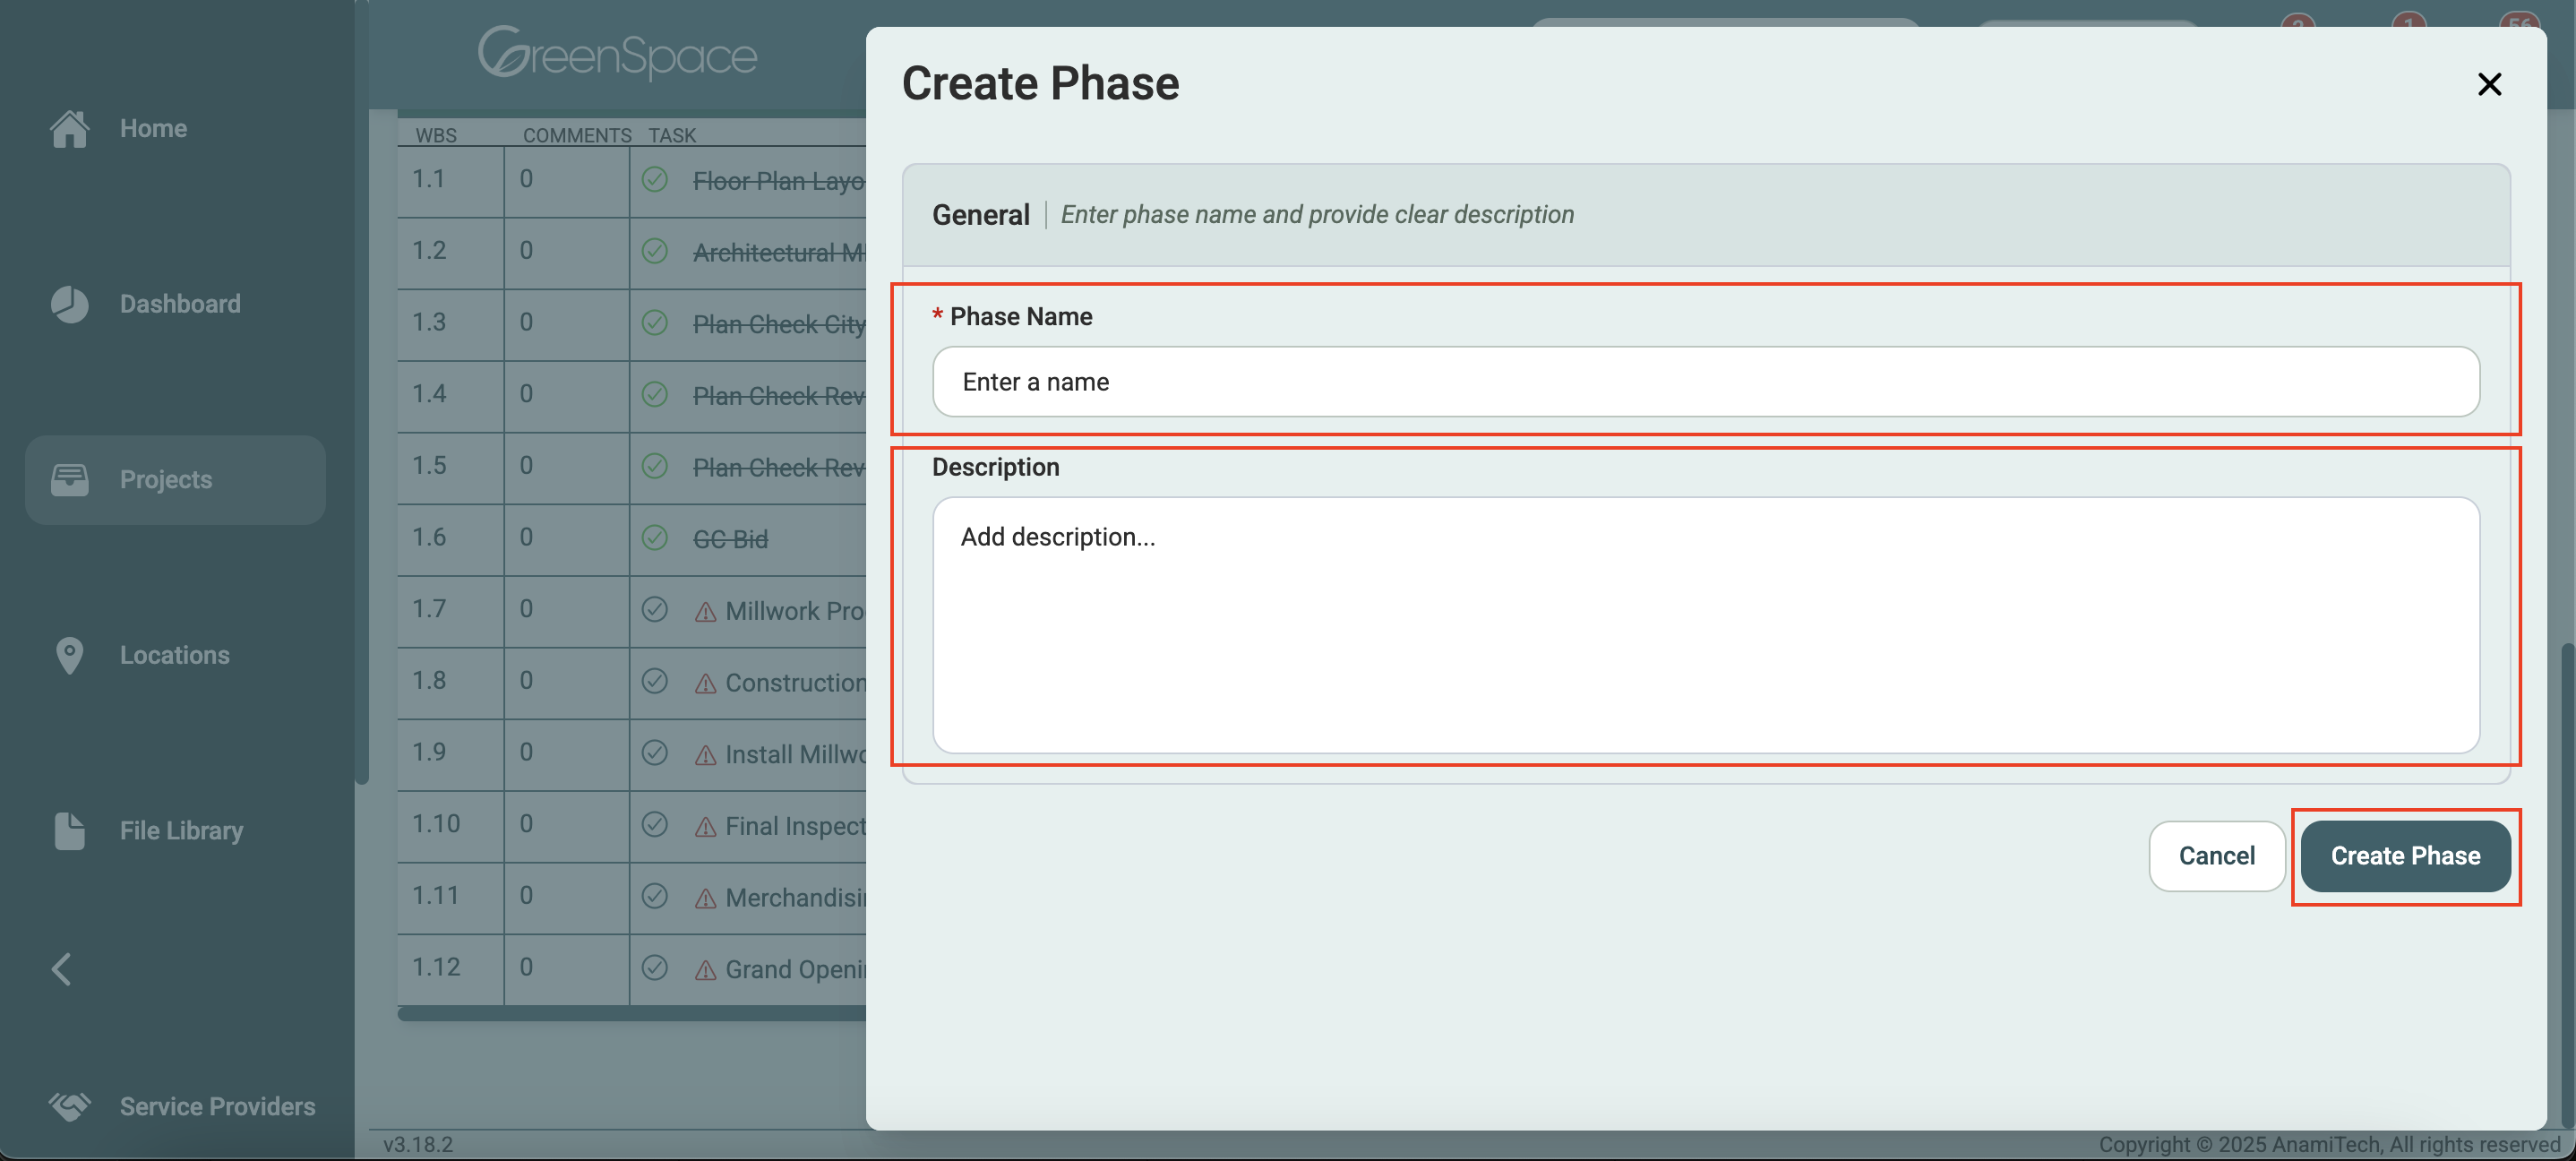
Name the phase and add a description, if applicable.
To assign this phase to users, you must first save it. Then, go back and edit the phase. See the next step for further instructions.
Click "Create" to save your new phase.
Editing a Phase
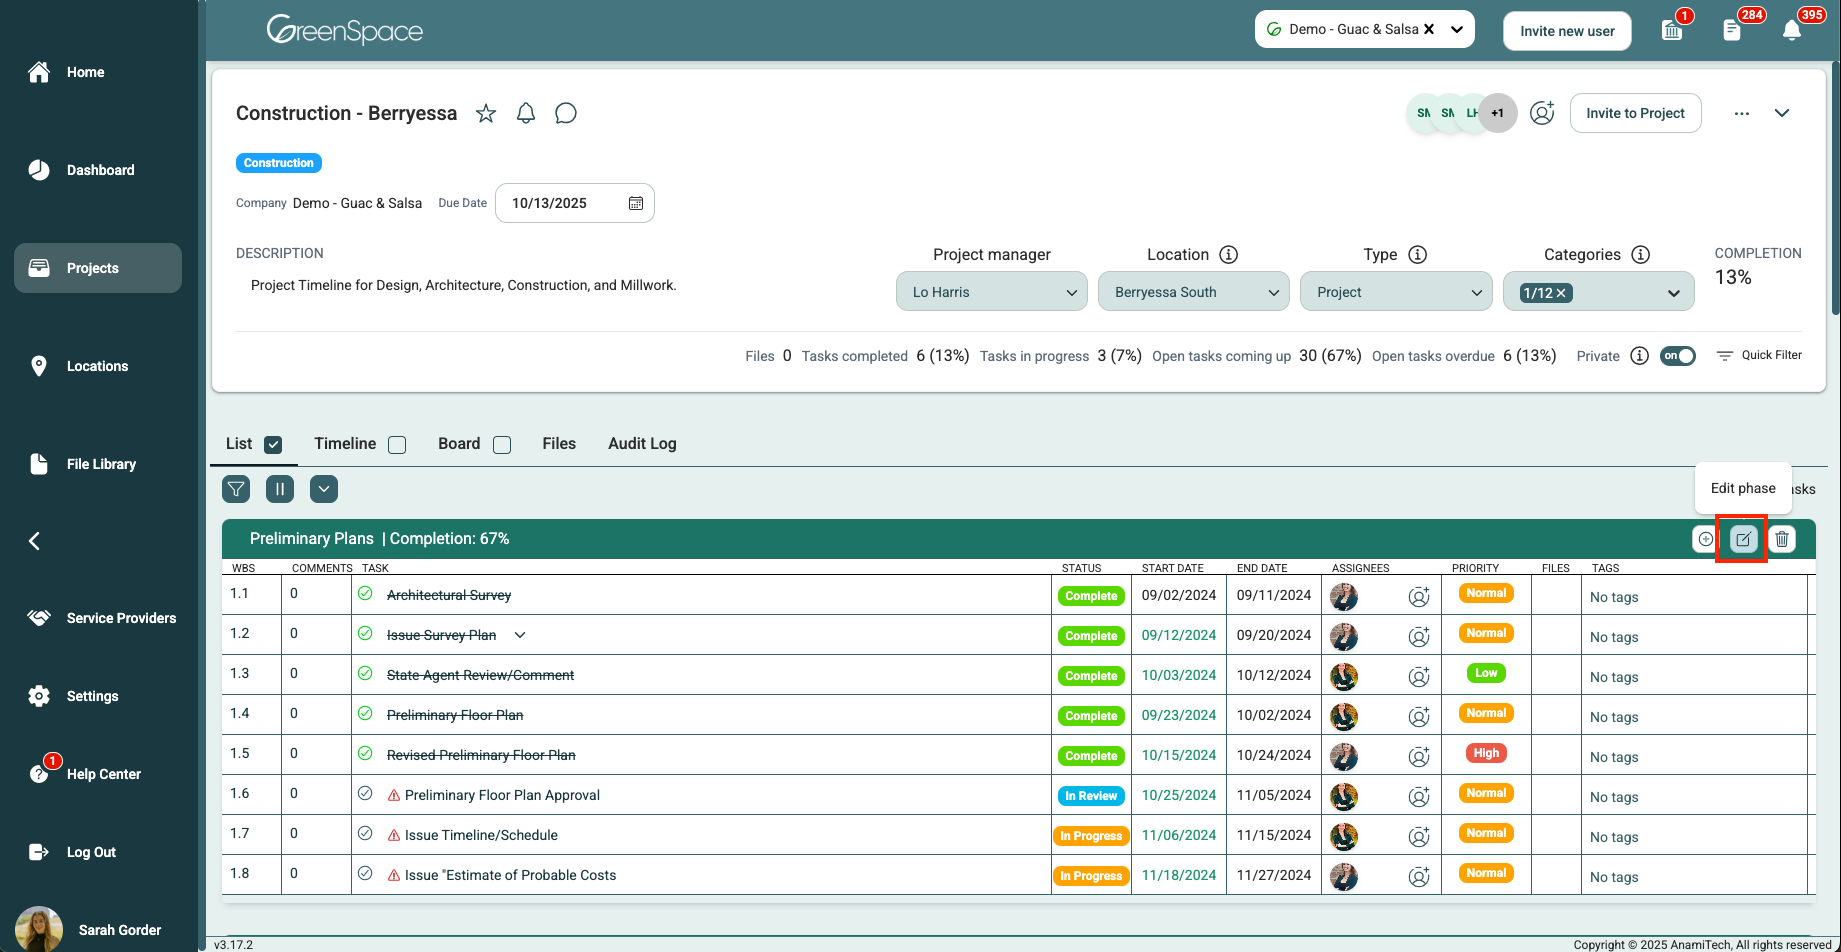
Click the pencil edit button on the phase you would like to edit.
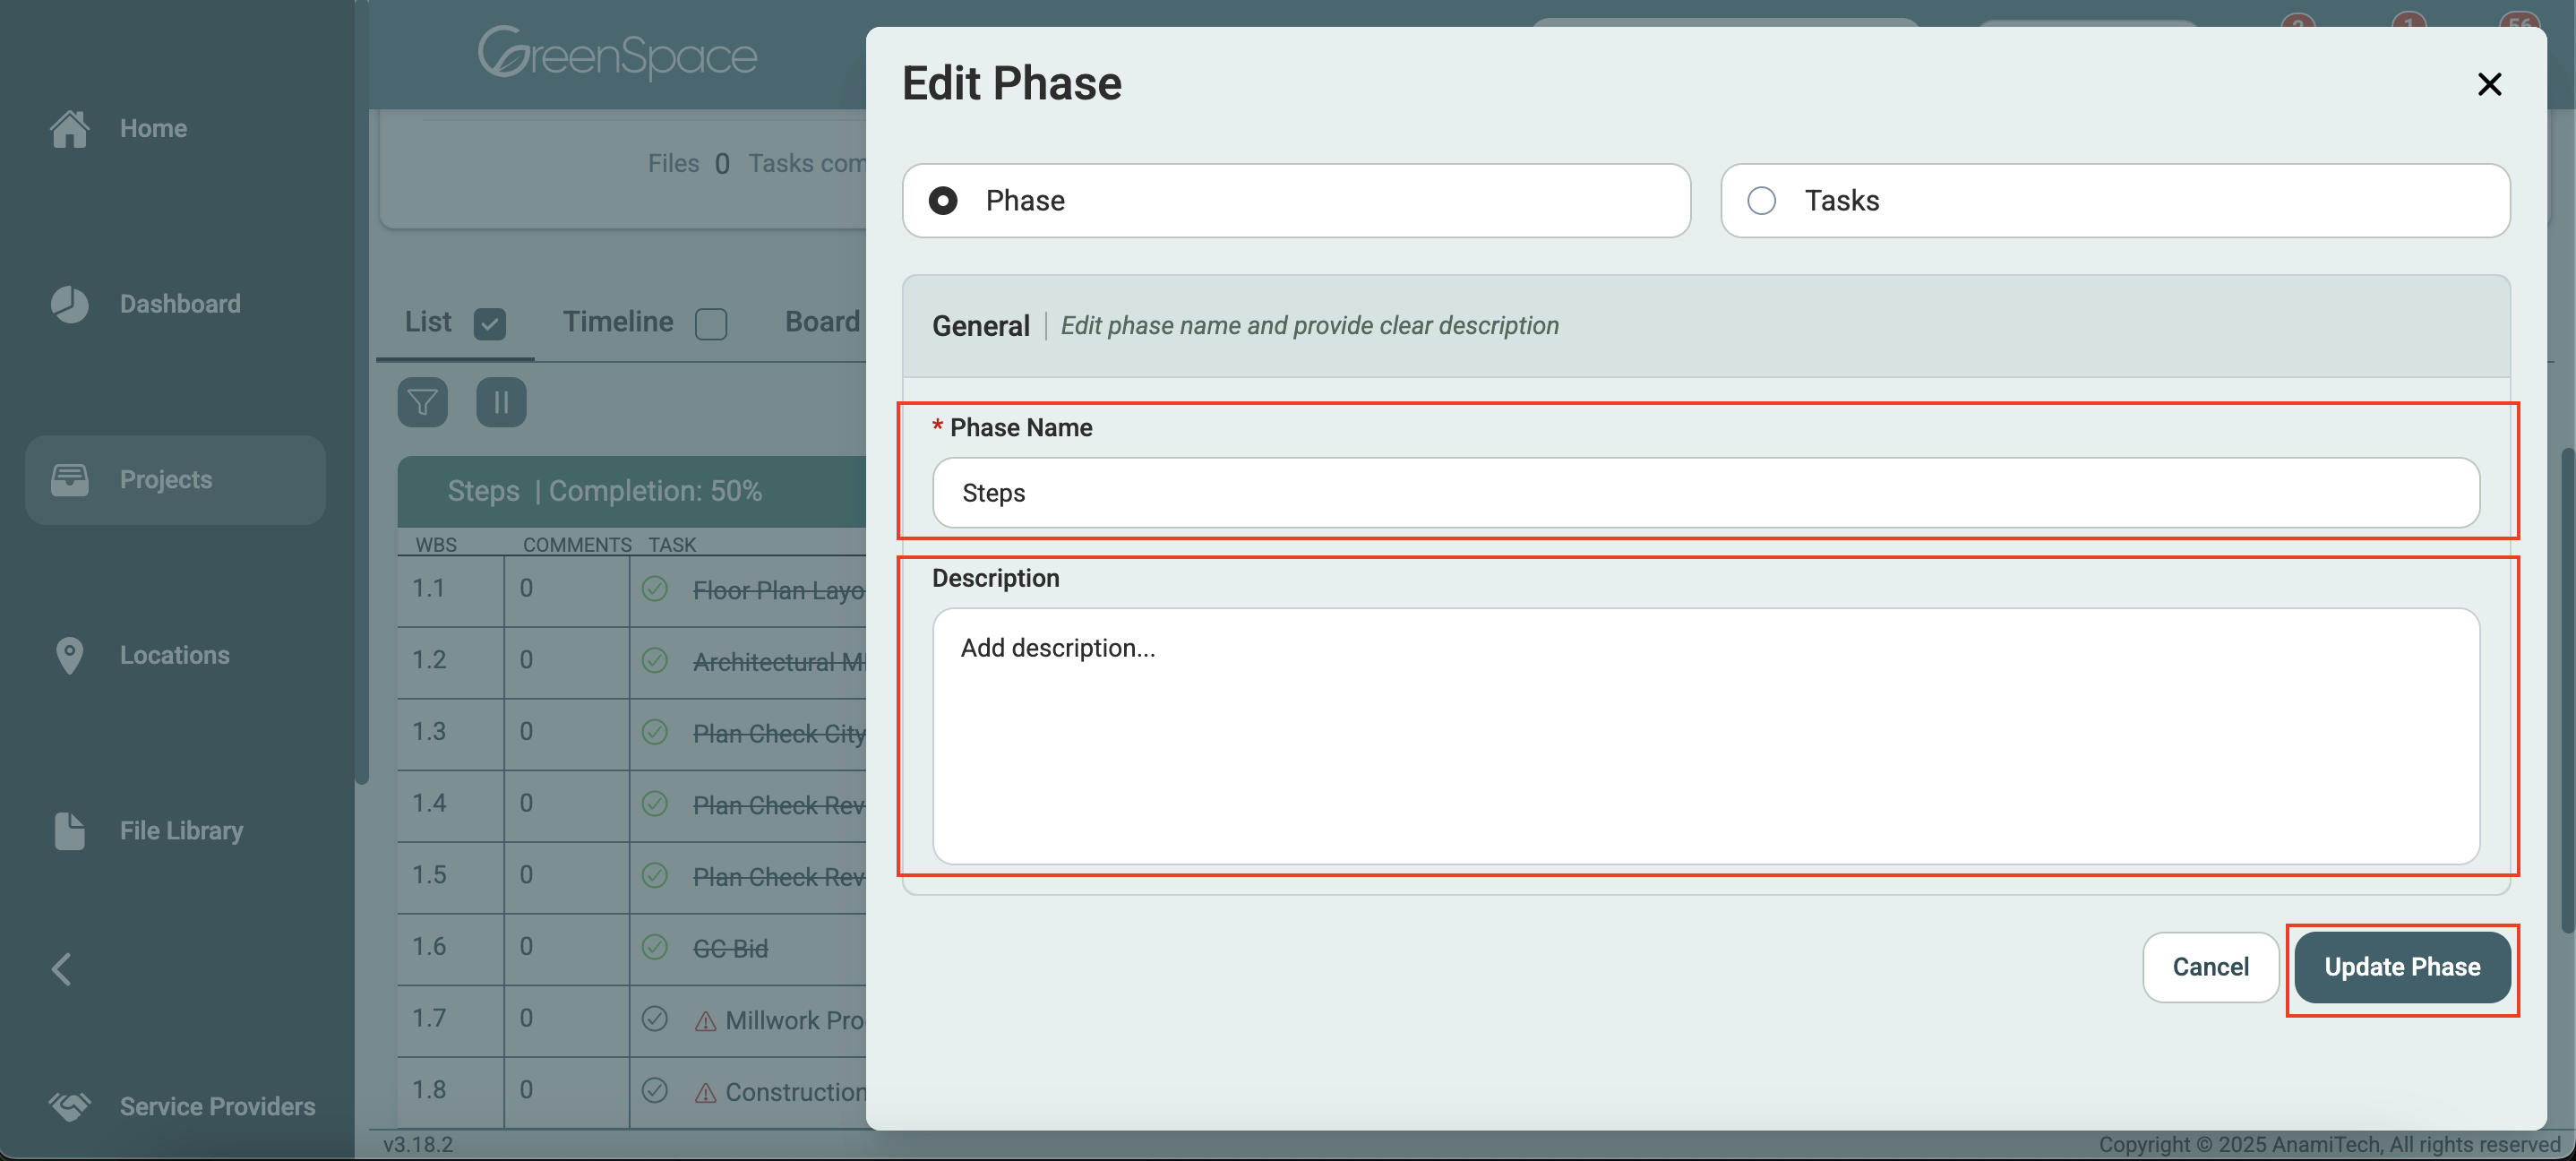
Modify the phase name and description. After making your changes, click "Update Phase" to save and exit.
Deleting a Phase
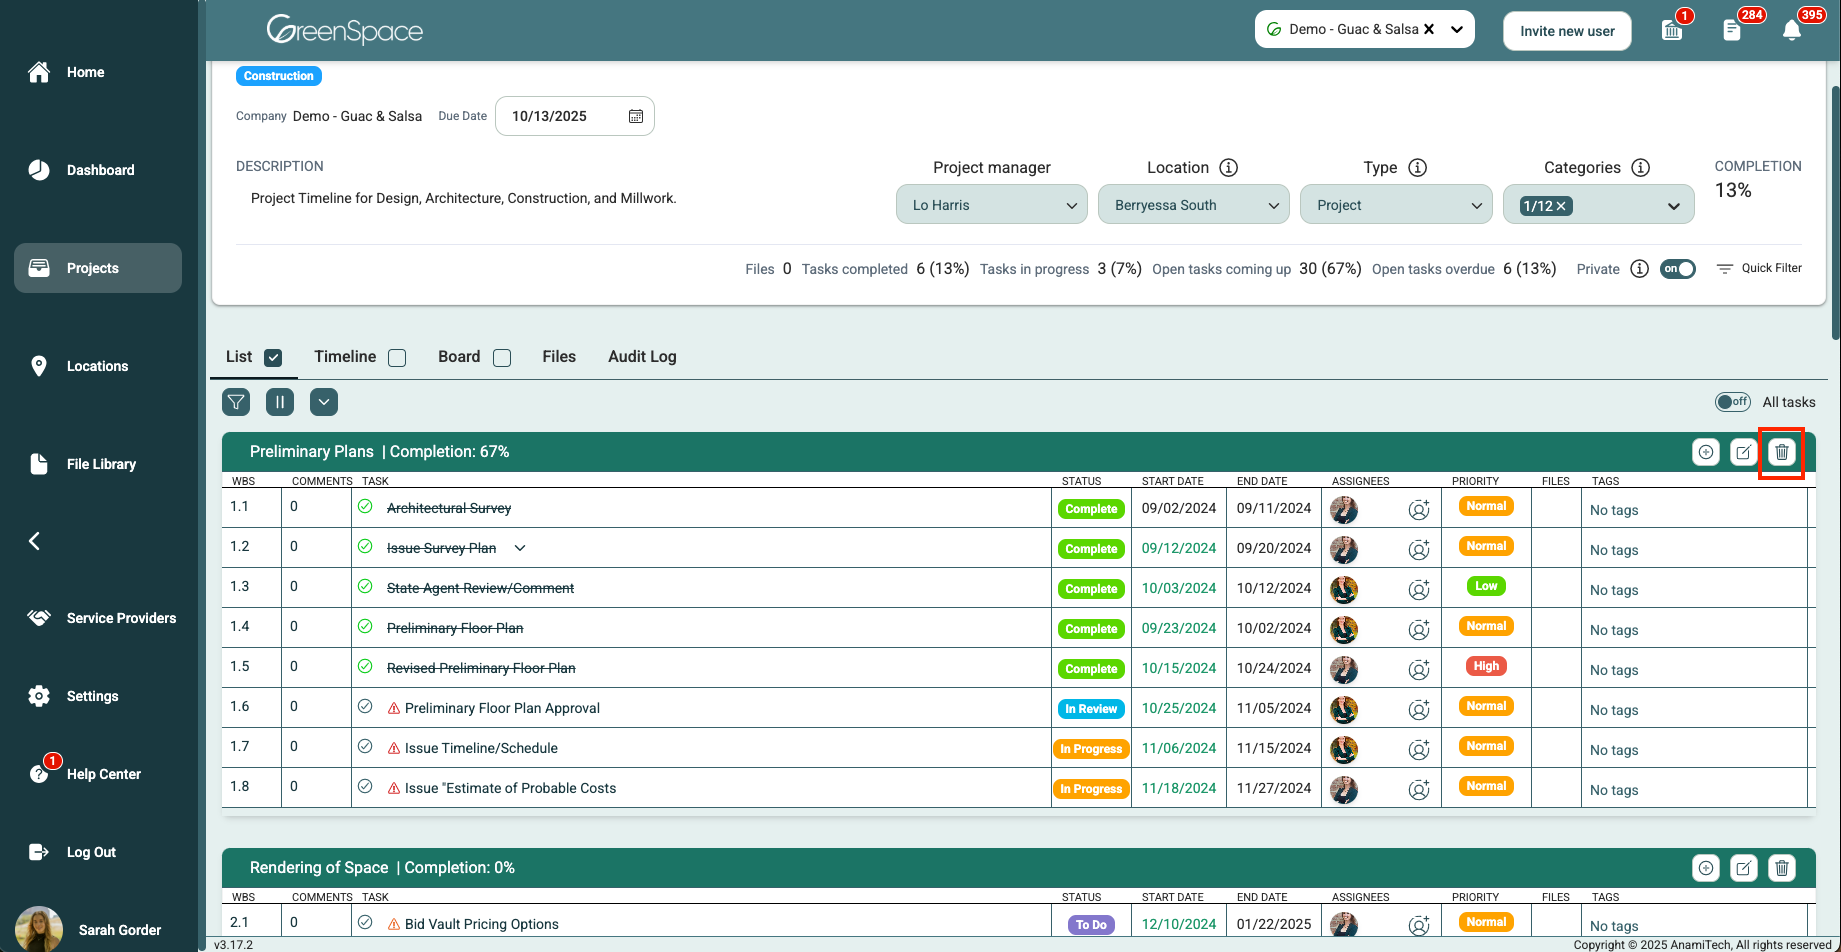
Click the trash can icon situated in the right-hand corner of the phase header.
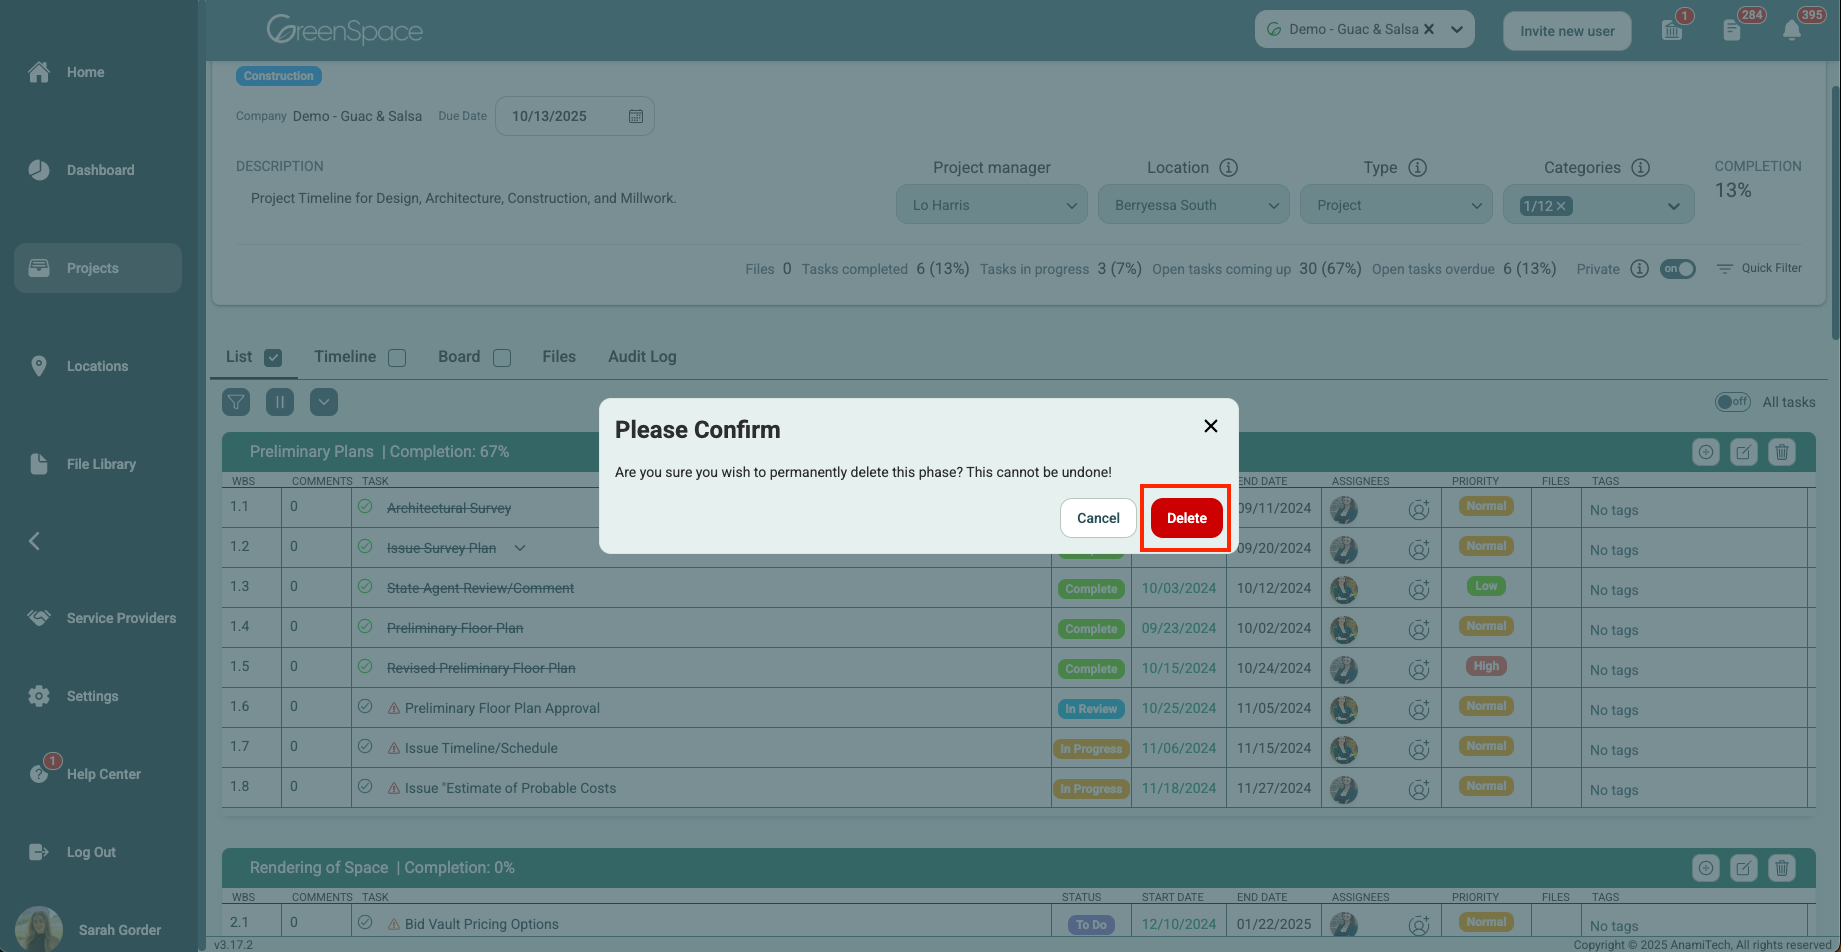
A confirmation pop-up will appear to ensure you would like to proceed, as this action cannot be undone. Click "Delete" to remove the phase from the project.
Tasks
Adding a Task (Admin + Manager Only)
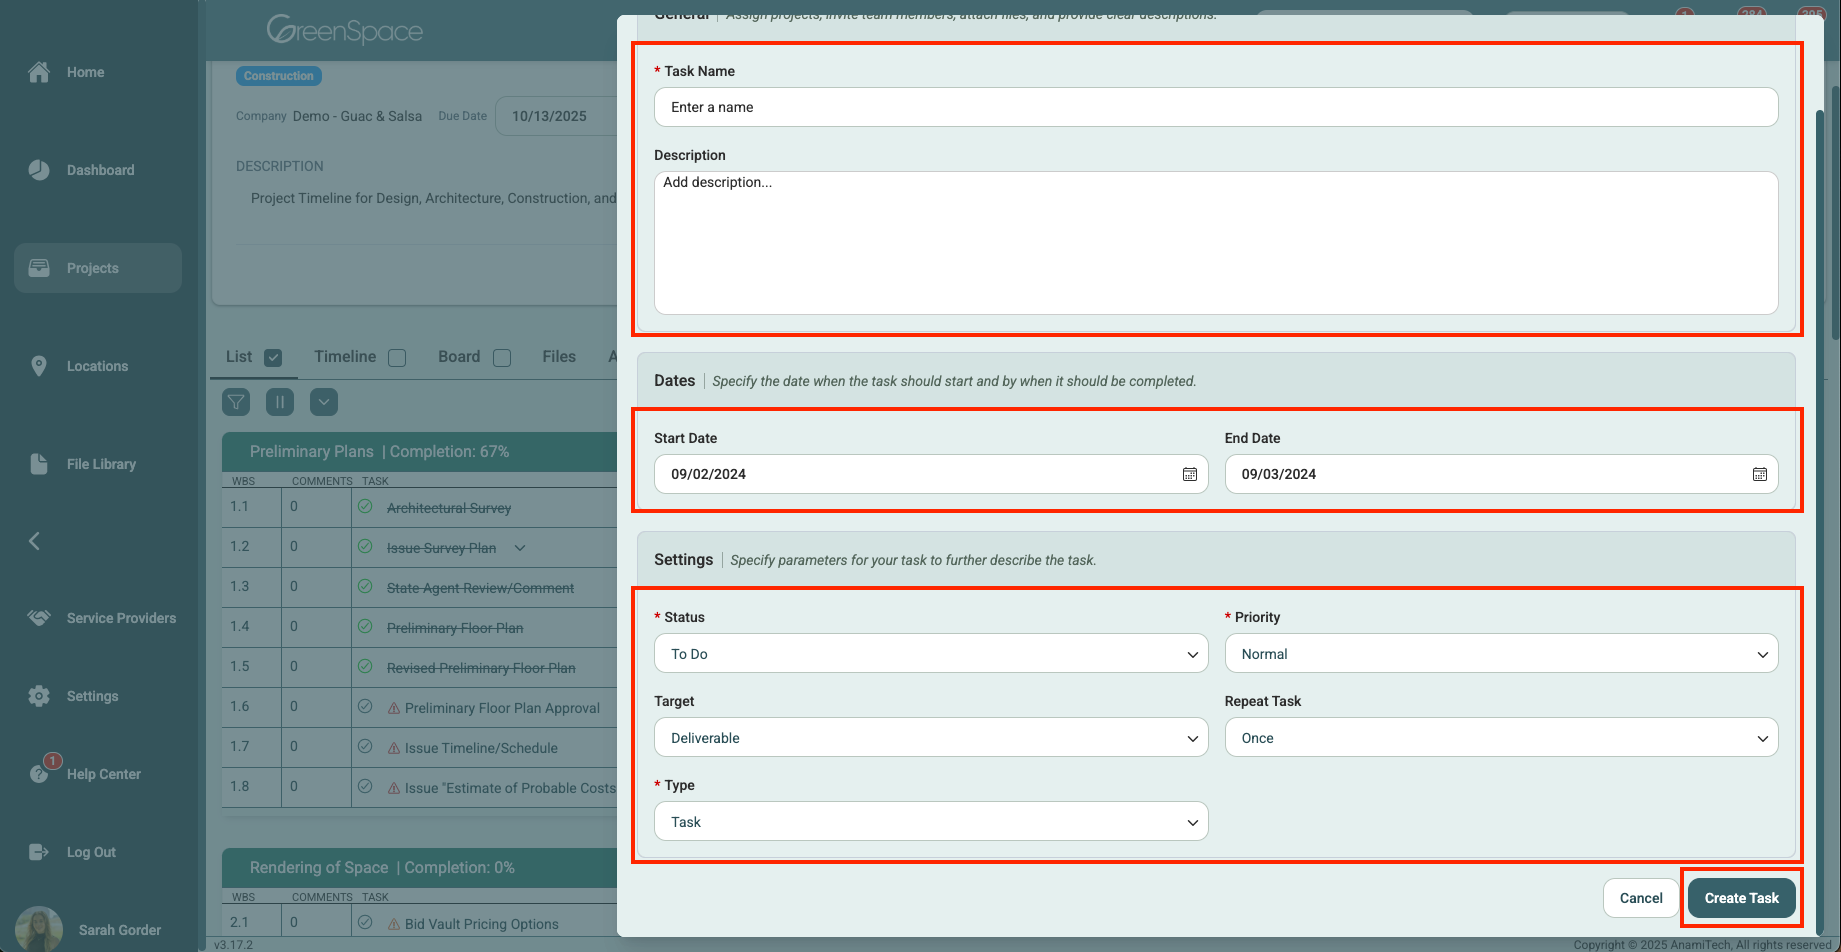
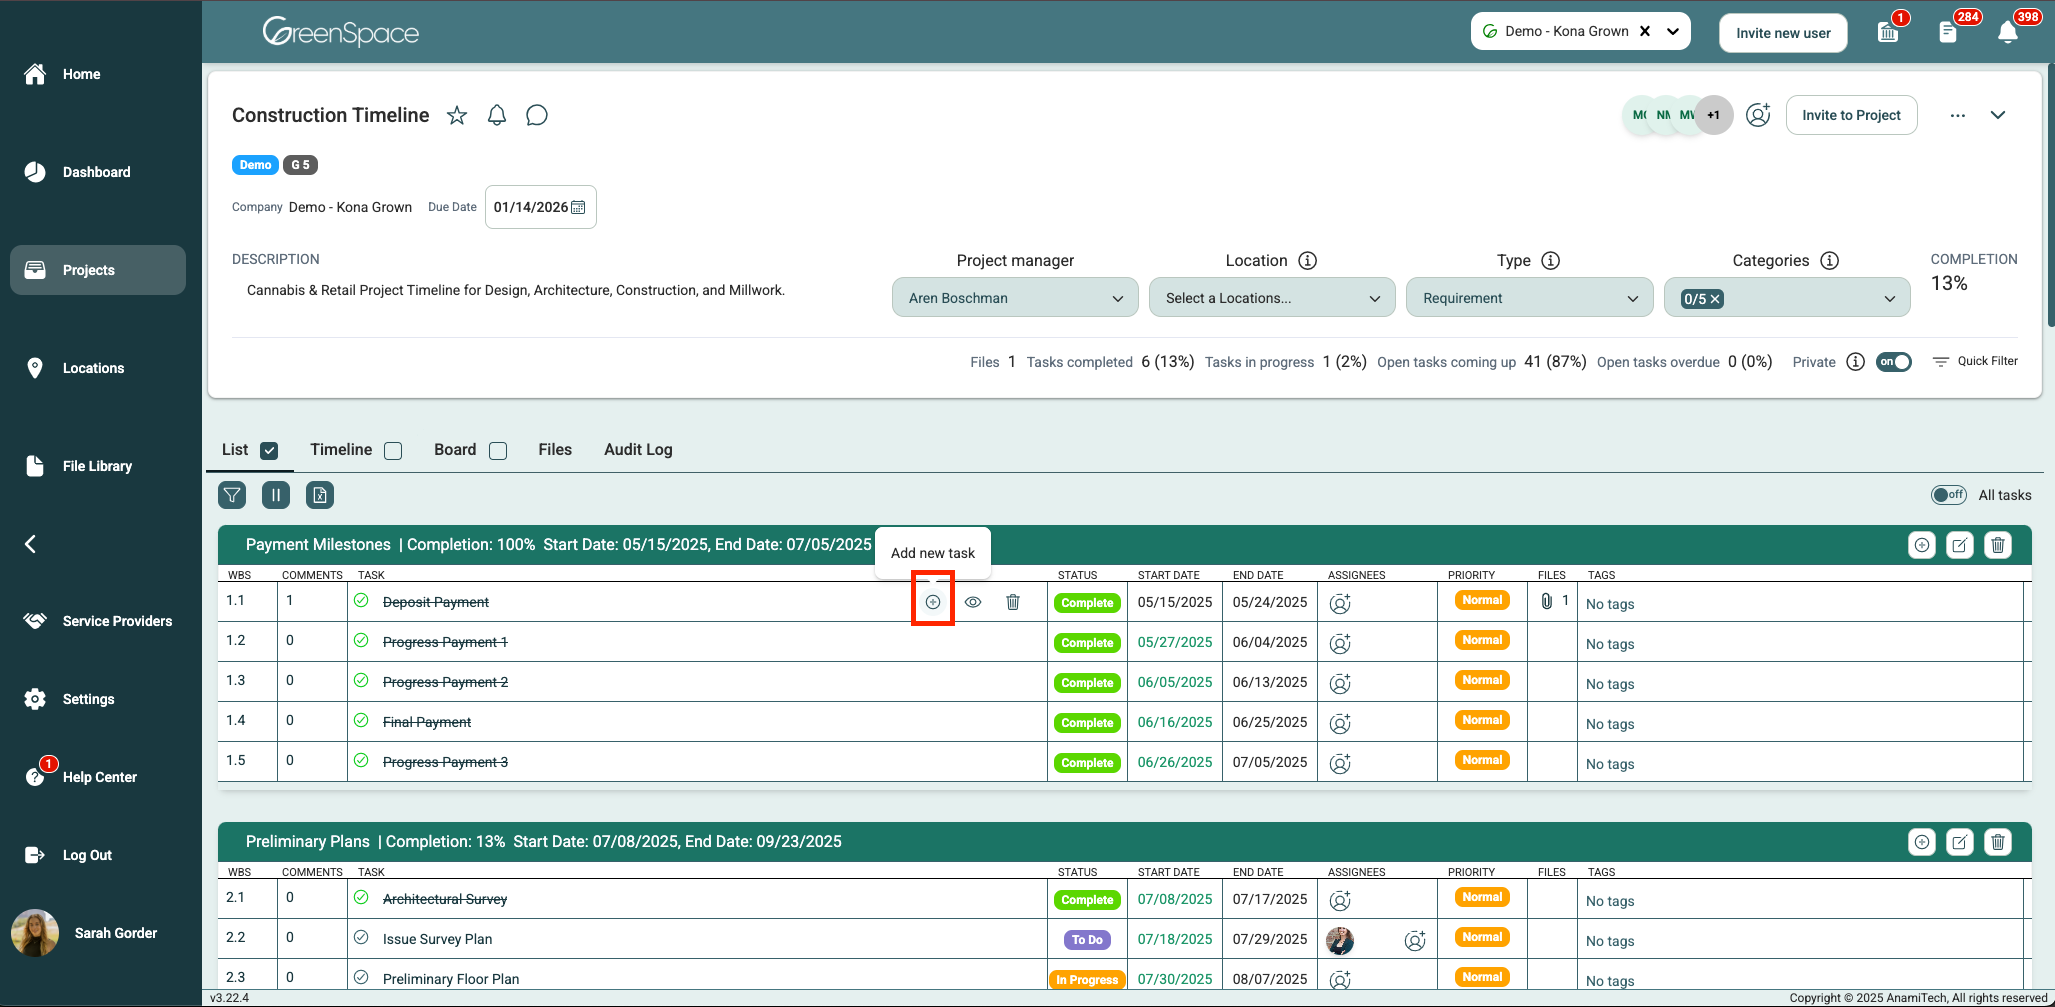
Click the plus sign enclosed in a circle located to the right of the phase name in the header.

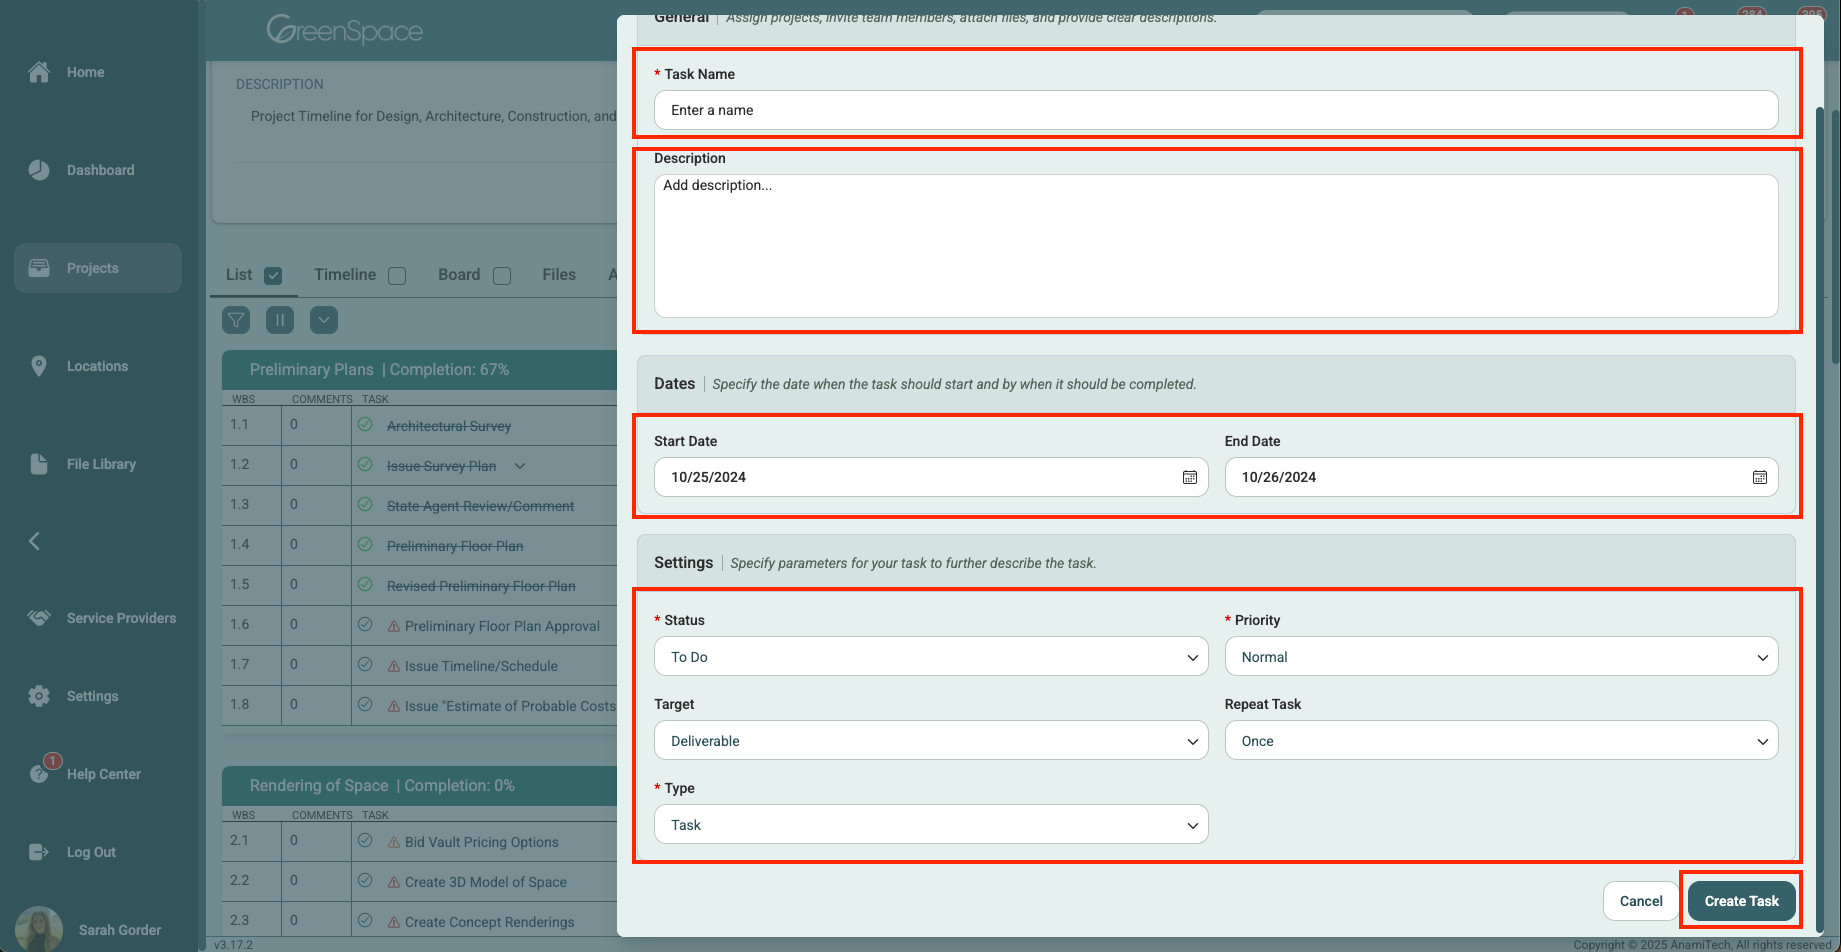
Click the name text field and type a name for the new task.
Click the description text field and type a description for the new task.
Specify the start and end dates for this task, if applicable.
Set the task status, priority level, target, frequency of task repetition, and the task type.
Click "Create Task" to save your new task.
Editing a Task
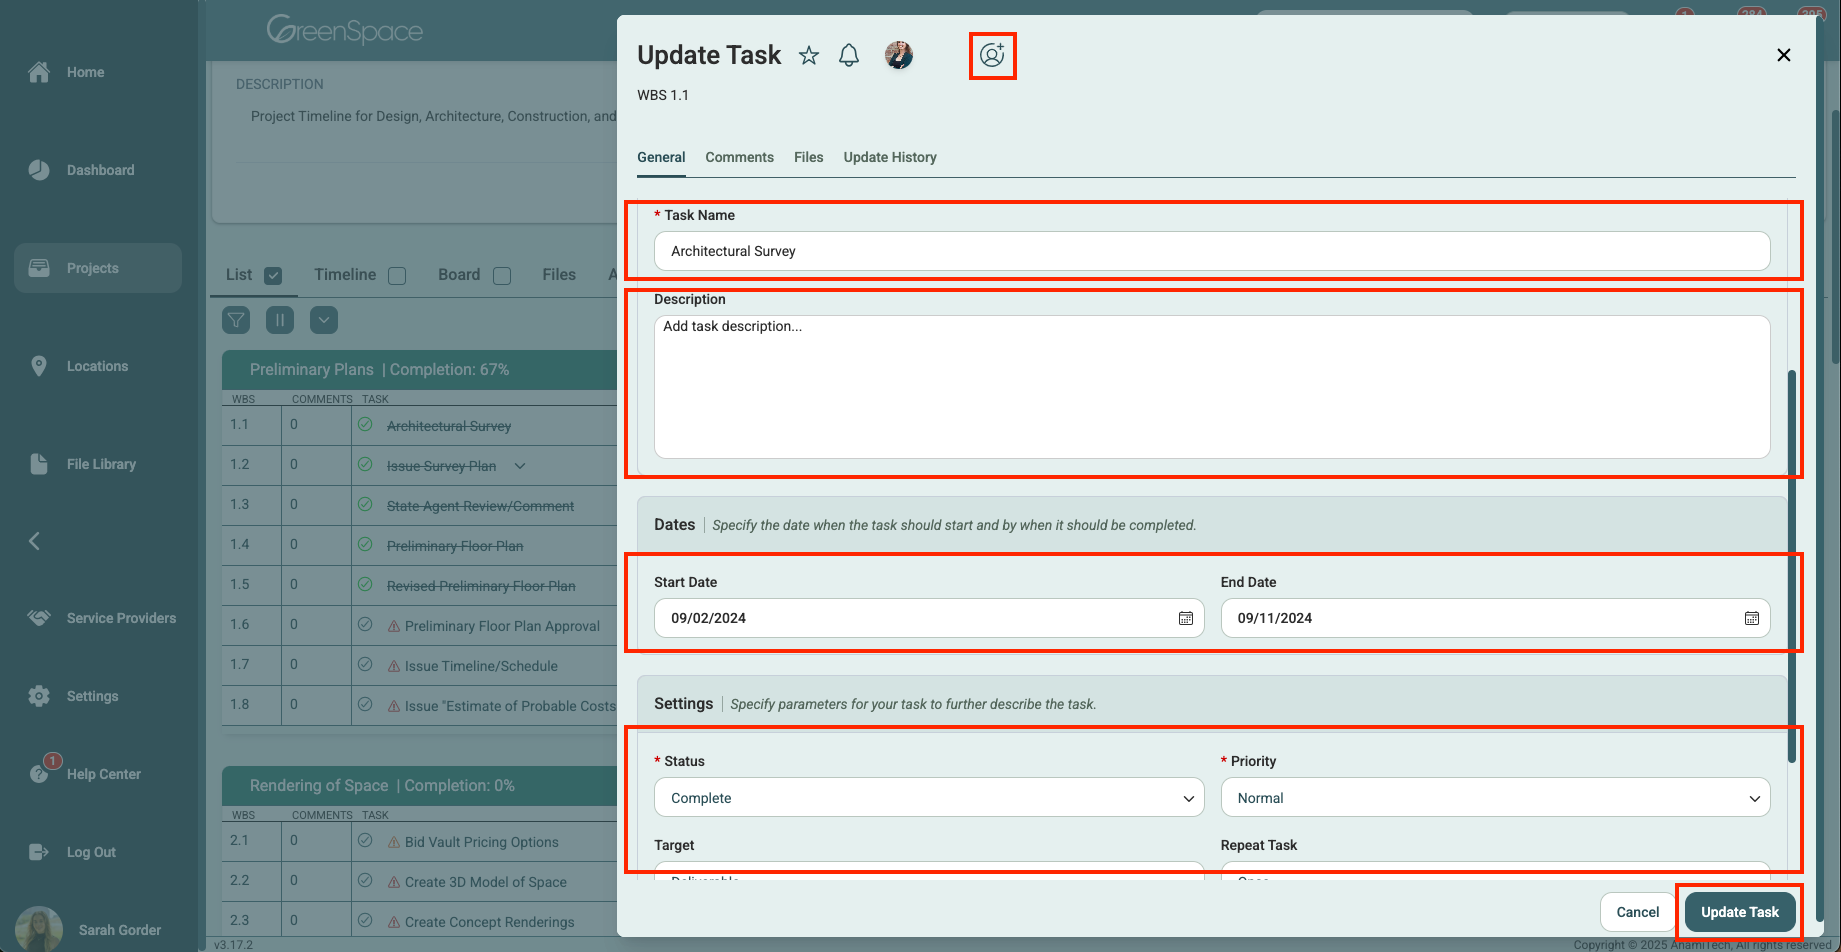
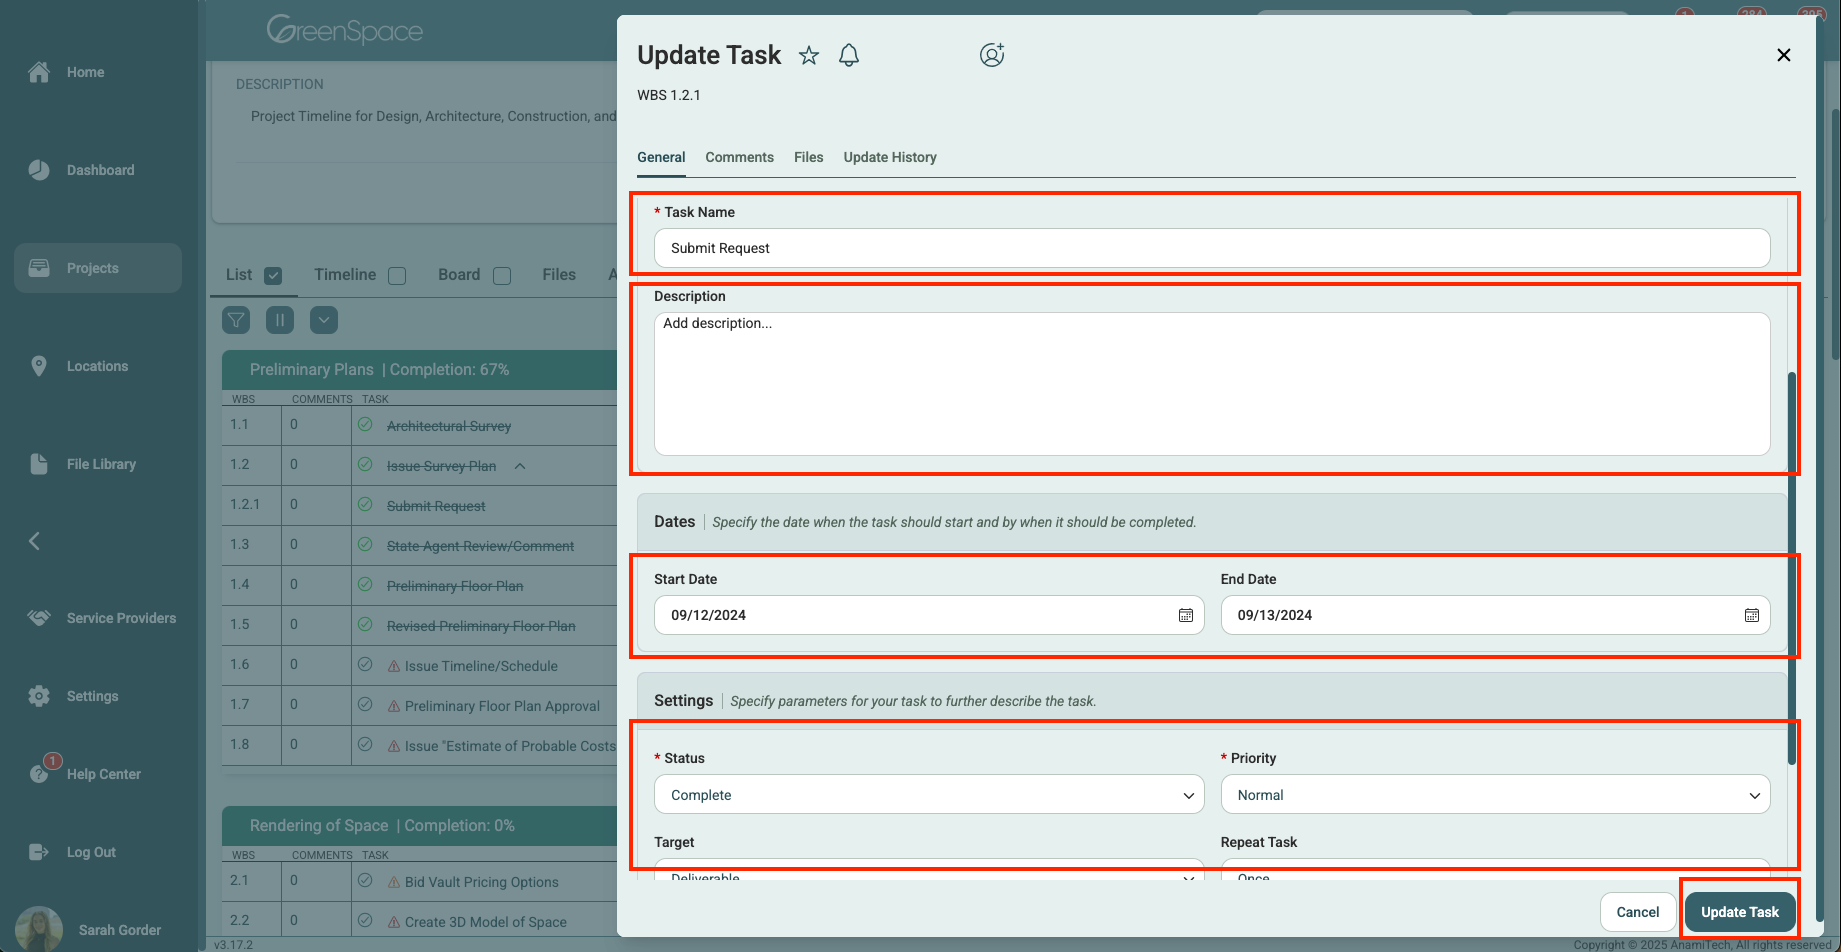
Hover over the task you wish to edit and click on the eye icon located to the right of the task name.

Modify any task details you need to change. You can assign team members, change the name, revise the description, manage sub-tasks, leave comments, attach files, and review the audit log.
After making your modifications, click "Update Task" to save and exit.
Deleting a Task
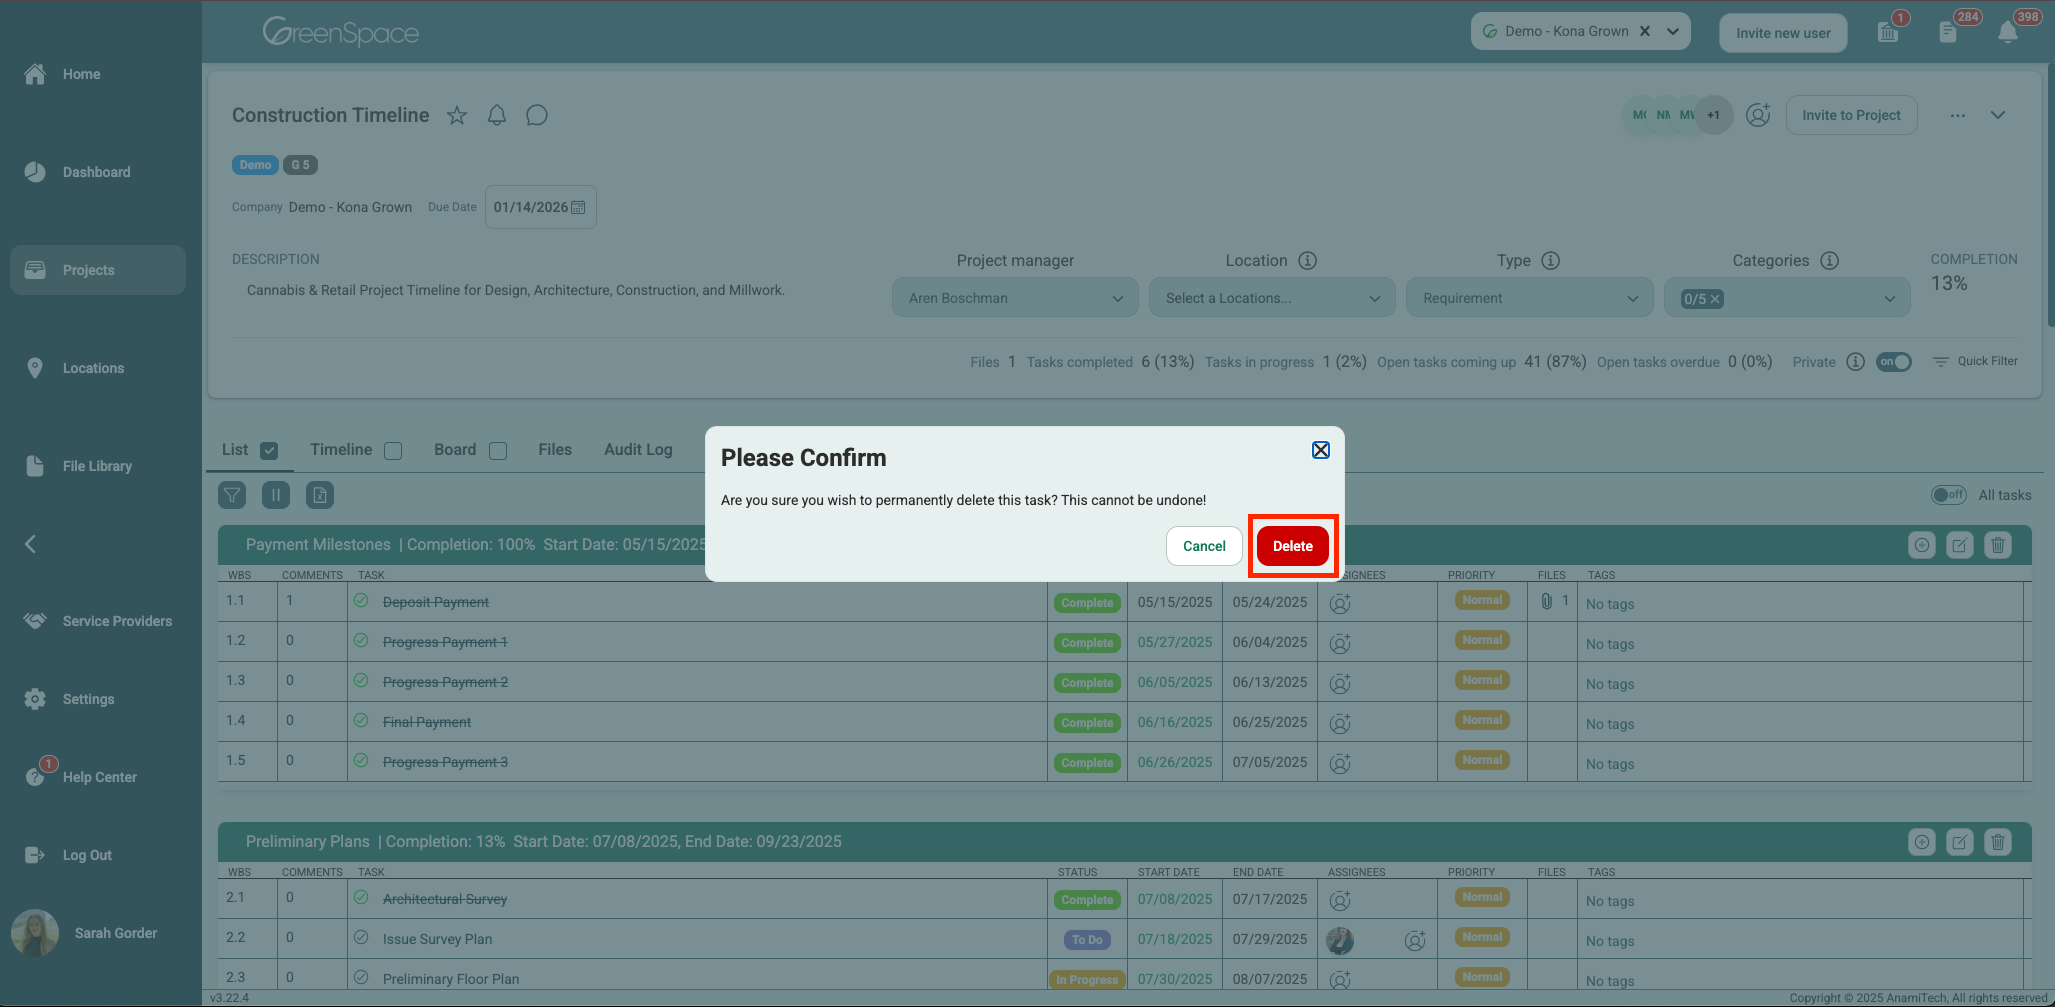
Option 1: Hover over the desired task and click the trash can icon to the right of the task name.

A confirmation pop-up will appear to ensure you would like to proceed, as this action cannot be undone. Click "Delete" to remove the phase from the project.
Option 2: Hover over the desired task and click the eye icon to edit the task.
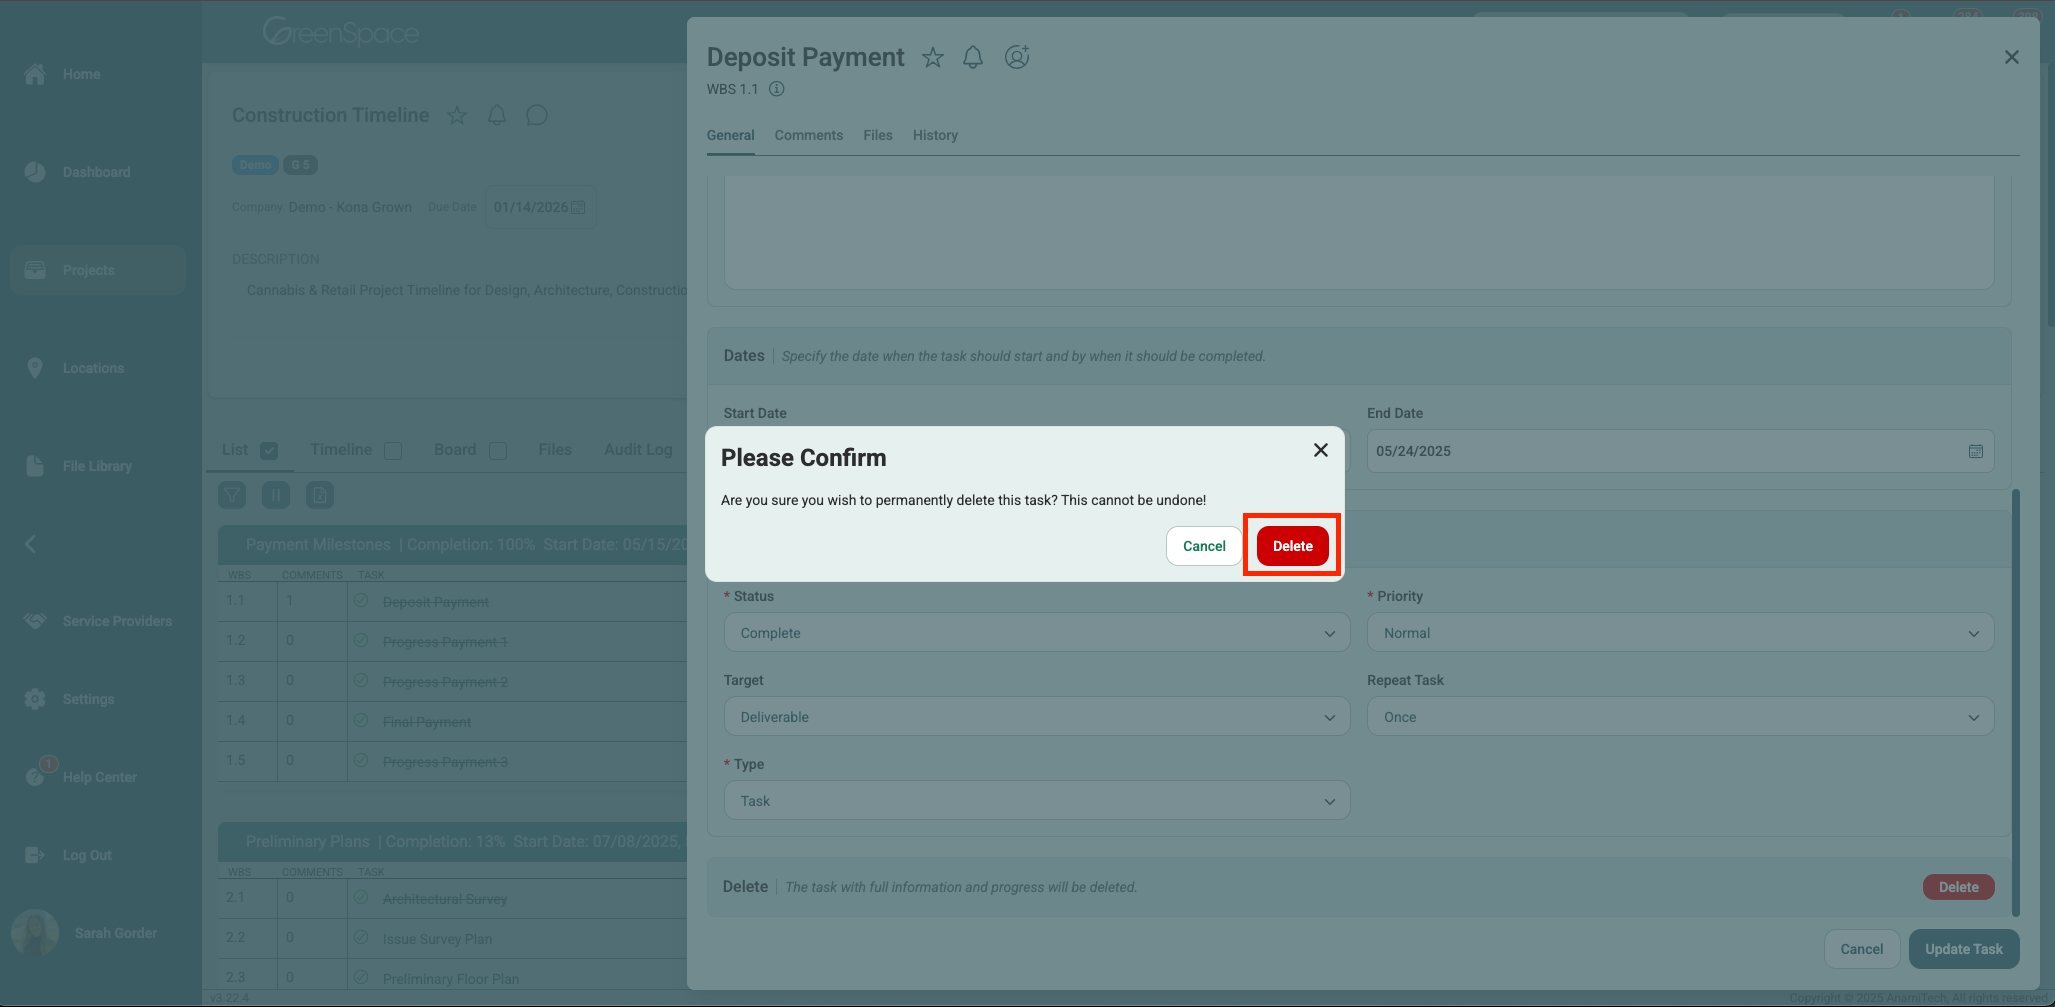
Scroll to the bottom of the pop-up window and you will find the delete option.
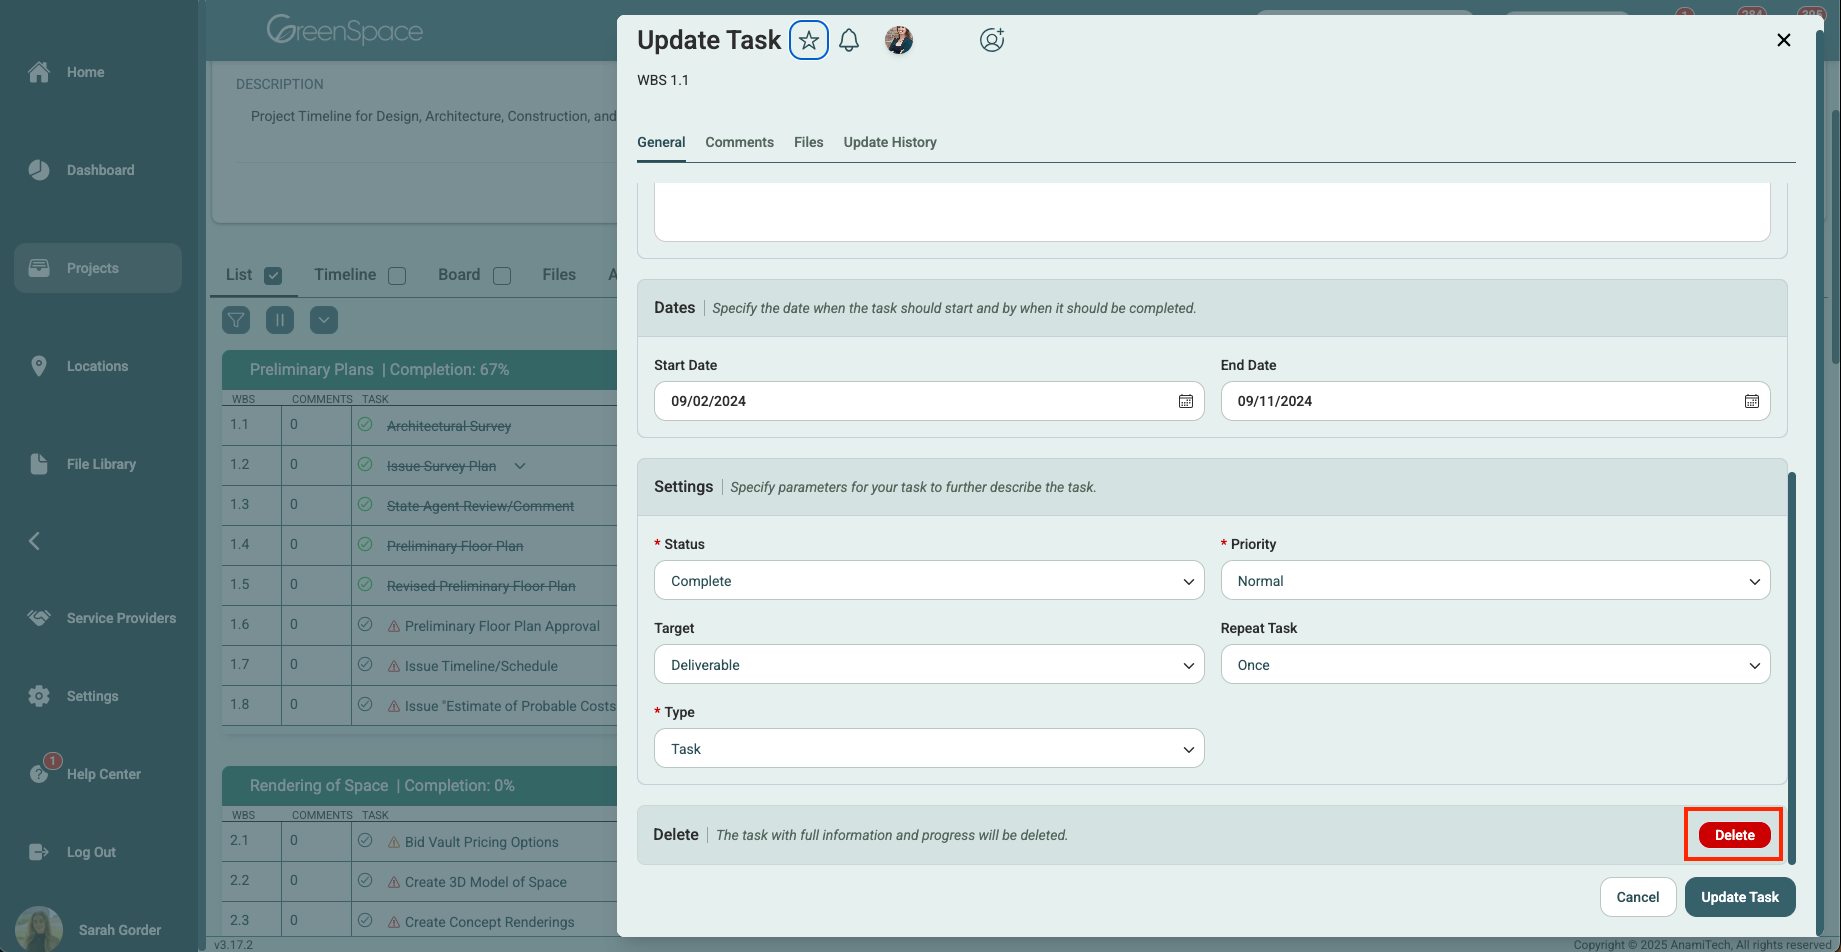
A confirmation pop-up will appear to ensure you would like to proceed, as this action cannot be undone. Click "Delete" to remove the phase from the project.
Sub-Tasks
Adding a Sub-Task (Admin + Manager Only)
Click the plus sign enclosed in a circle located to the right of the main task name in the header.
Click the name text field and type a name for the new sub-task.
Click the description text field and type a description for the new task.
Specify the start and end dates for this sub-task, if applicable.
Set the sub-task status, priority level, target, frequency of sub-task repetition, and the sub-task type.
Once all details are filled, click "Create Task" to save your new sub-task.
Editing a Sub-Task
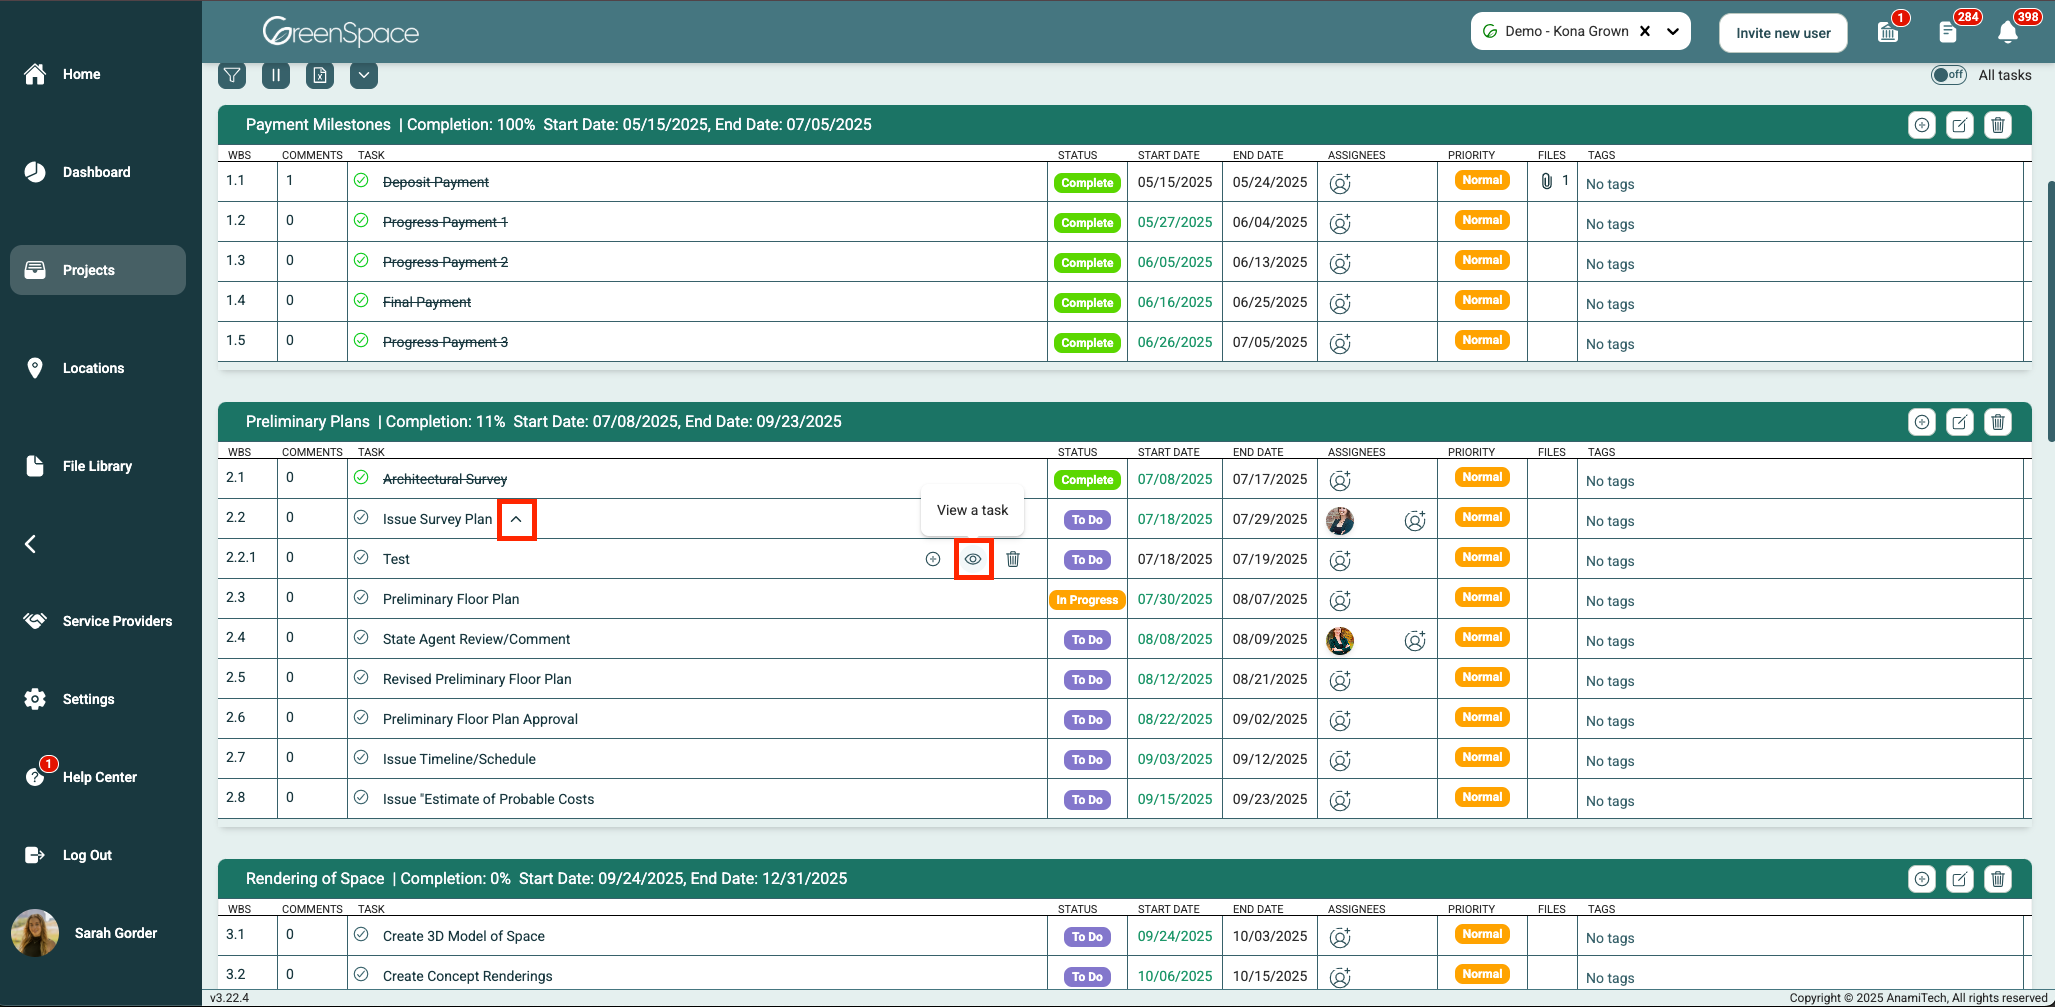
Click the expand button over the task the sub-task is attached to. Hover over the sub-task you wish to edit and click on the eye icon located to the right of the sub-task name.
Modify any sub-task details you need to change. You can assign team members, change the name, revise the description, manage secondary sub-tasks, leave comments, attach files, and review the audit log.
After making your modifications, click "Update Task" to save and exit.
Deleting a Sub-Task
Option 1: Click the expand button over the task the sub-task is attached to. Hover over the desired sub-task and click the trash can icon to the right of the sub-task name.

Option 2: Click the expand button over the task the sub-task is attached to. Hover over the desired sub-task and click the eye icon to edit the sub-task. Within the "more actions" option in the top right-hand corner of the sub-menu, you will find the delete option.
Scroll to the bottom of the pop-up window and you will find the delete option.
A confirmation pop-up will appear to ensure you would like to proceed, as this action cannot be undone. Click "Delete" to remove the phase from the project.
That's it! You're now equipped to add, edit, and delete phases, tasks, and sub-tasks in GreenSpace. If you have any questions or need further assistance, please don't hesitate to reach out to our support team. Happy project management!