
How to Edit User Roles + Permissions
Admin Only: If you have a manager or member account in GreenSpace, your role does not allow access to these options. Please contact your admin for assistance.
Editing User Roles + Locations/Projects Access
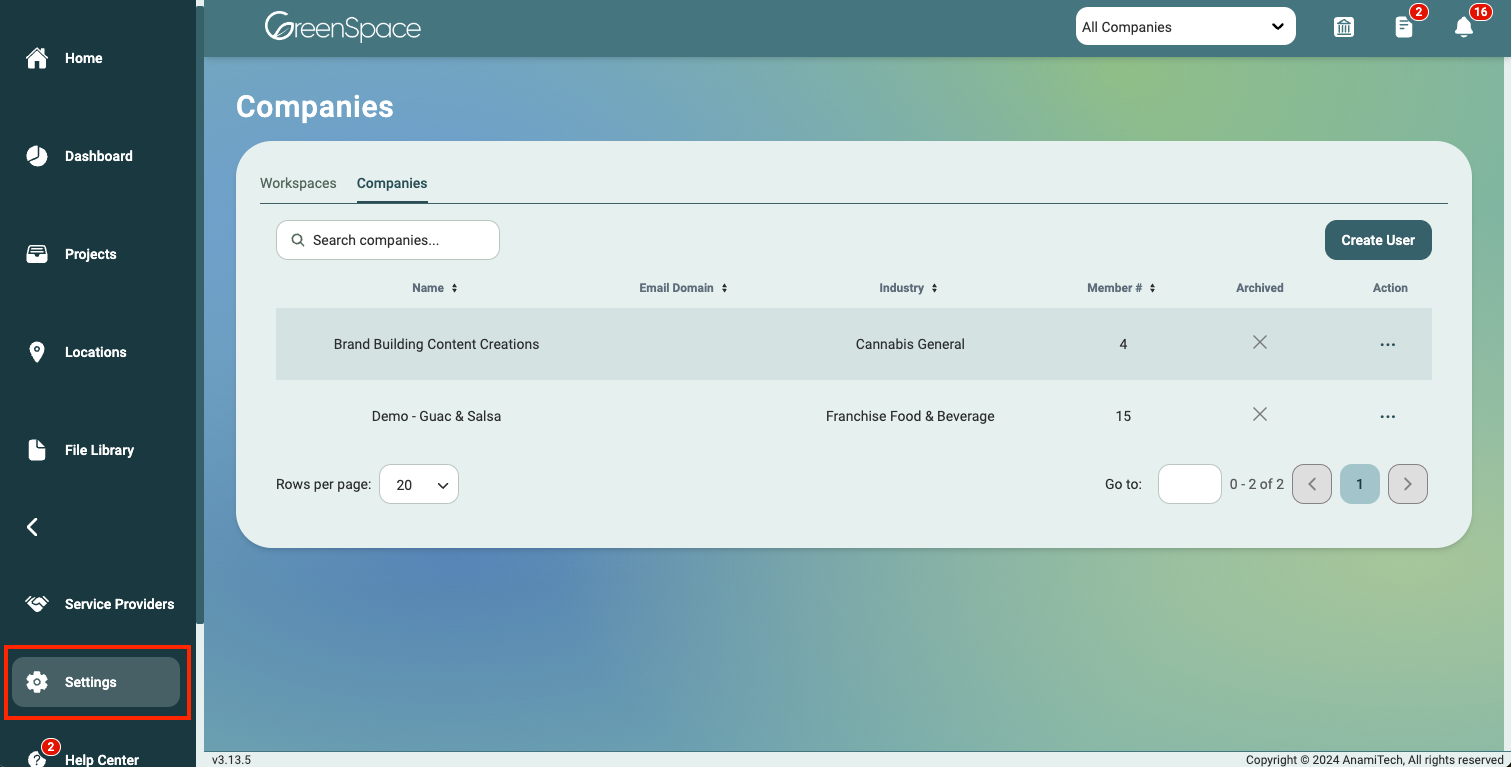
Navigate to the left side of the screen and click on "Settings" to reach the Settings Overview page.
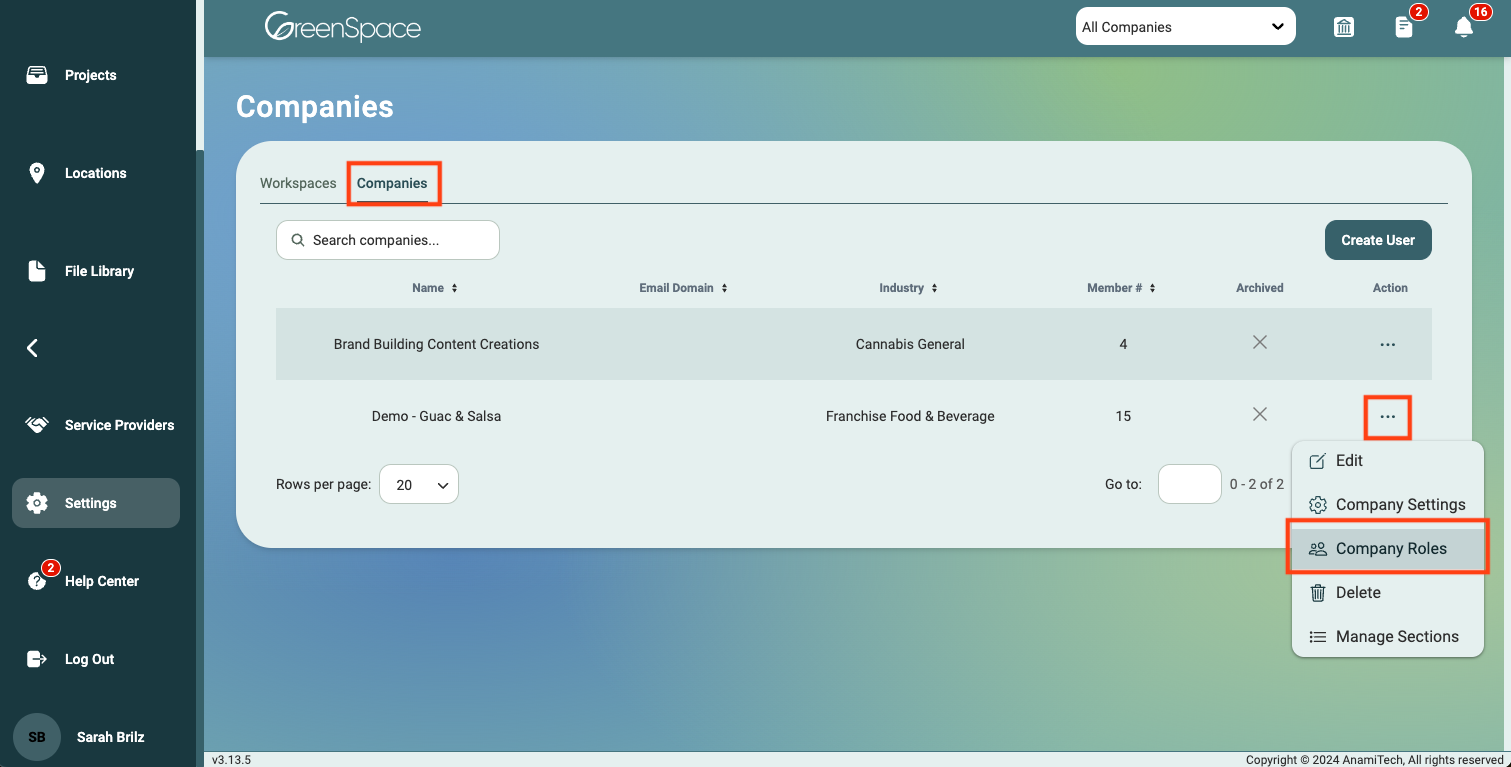
From the Companies tab, click the three dots under the Action column on the company you would like to adjust the user's role. Select "Company Roles" from the drop-down menu.
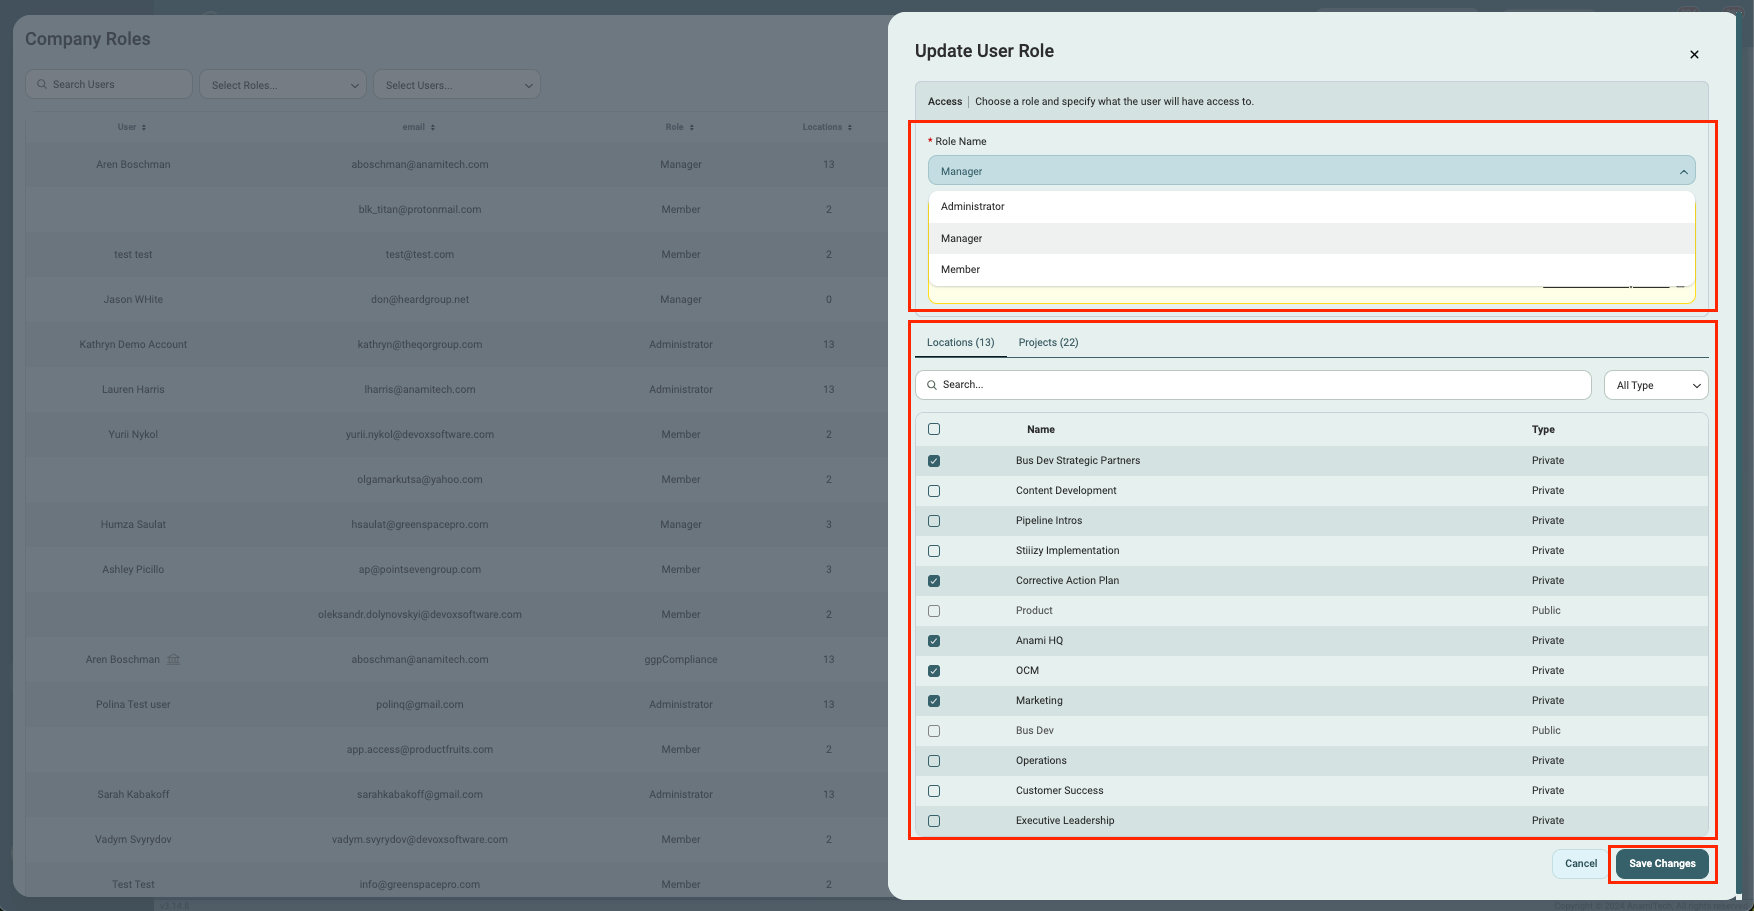
Locate the user you would like to edit by utilizing the search bar or dropdown menus.

Click the three dots under the Actions column on the user you would like to edit. Select "Edit" from the drop-down menu.
From the drop-down menu, select the user role you would like to assign.
Role Access Overview:
- Administrator: The user gets access to all private and public locations, projects, and files within the company. The user will also have full access to all information about your company.
- Manager: The user gets access to all private and public projects, only to public locations, and access to files in those projects and locations to which the user will have access.
- Member: The user only gets access to all public projects, locations, and files.
You can also edit what locations and projects the user has access to. Granting a user access to a Location includes all public info. To give access to private sections, adjust permissions within the Location.
IMPORTANT: You must first grant the user access to a Location in the Company Settings, then open the Location to assign them to specific private sections.
Then click "Save Changes" when you are done.
Grant Users Access to Private Sections of a Location
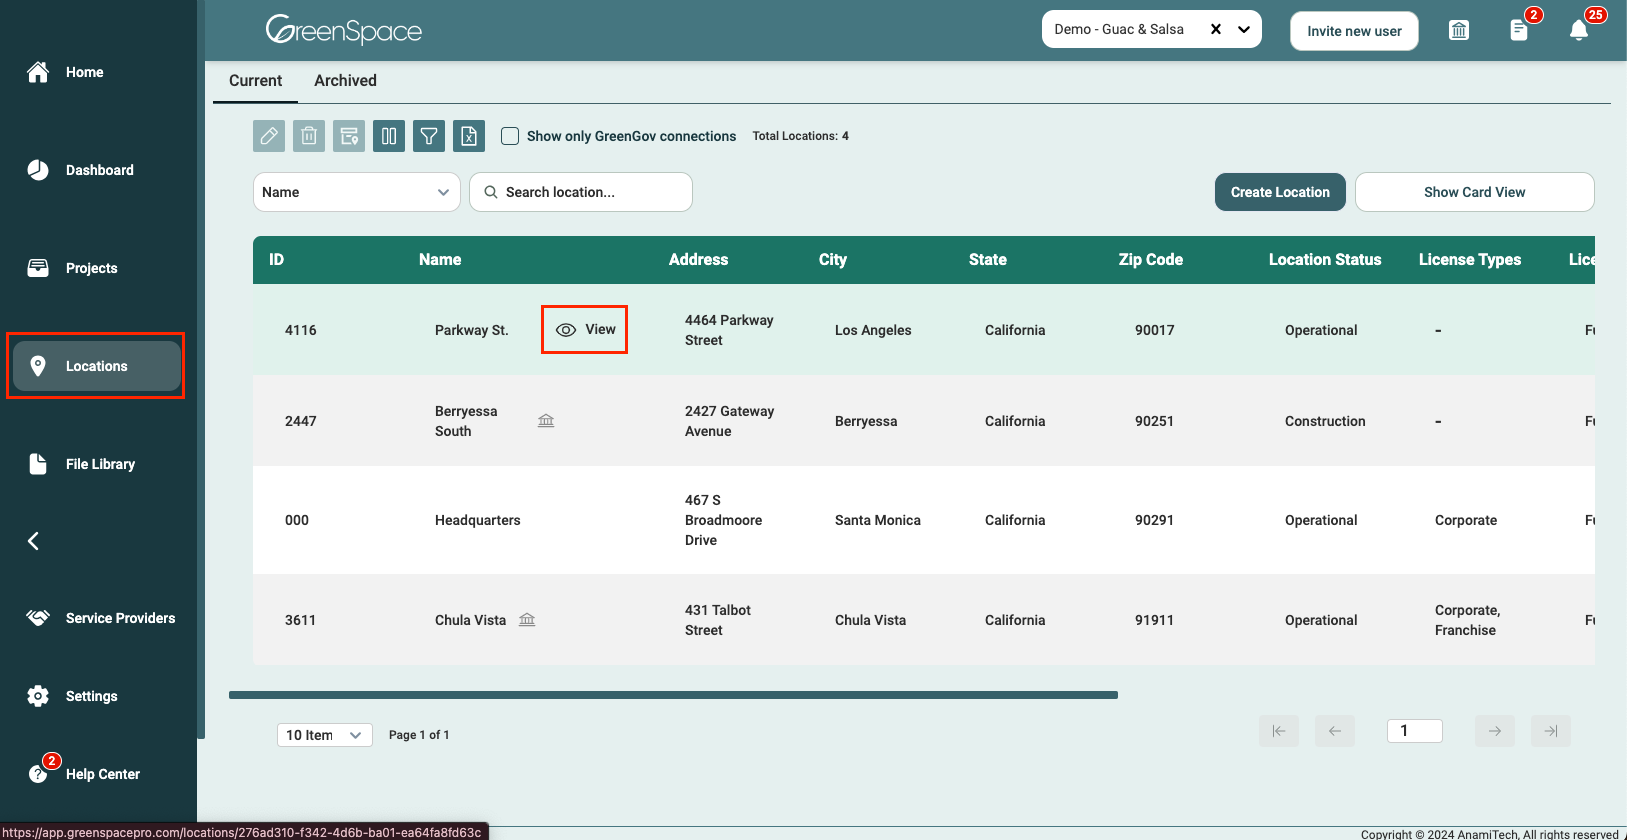
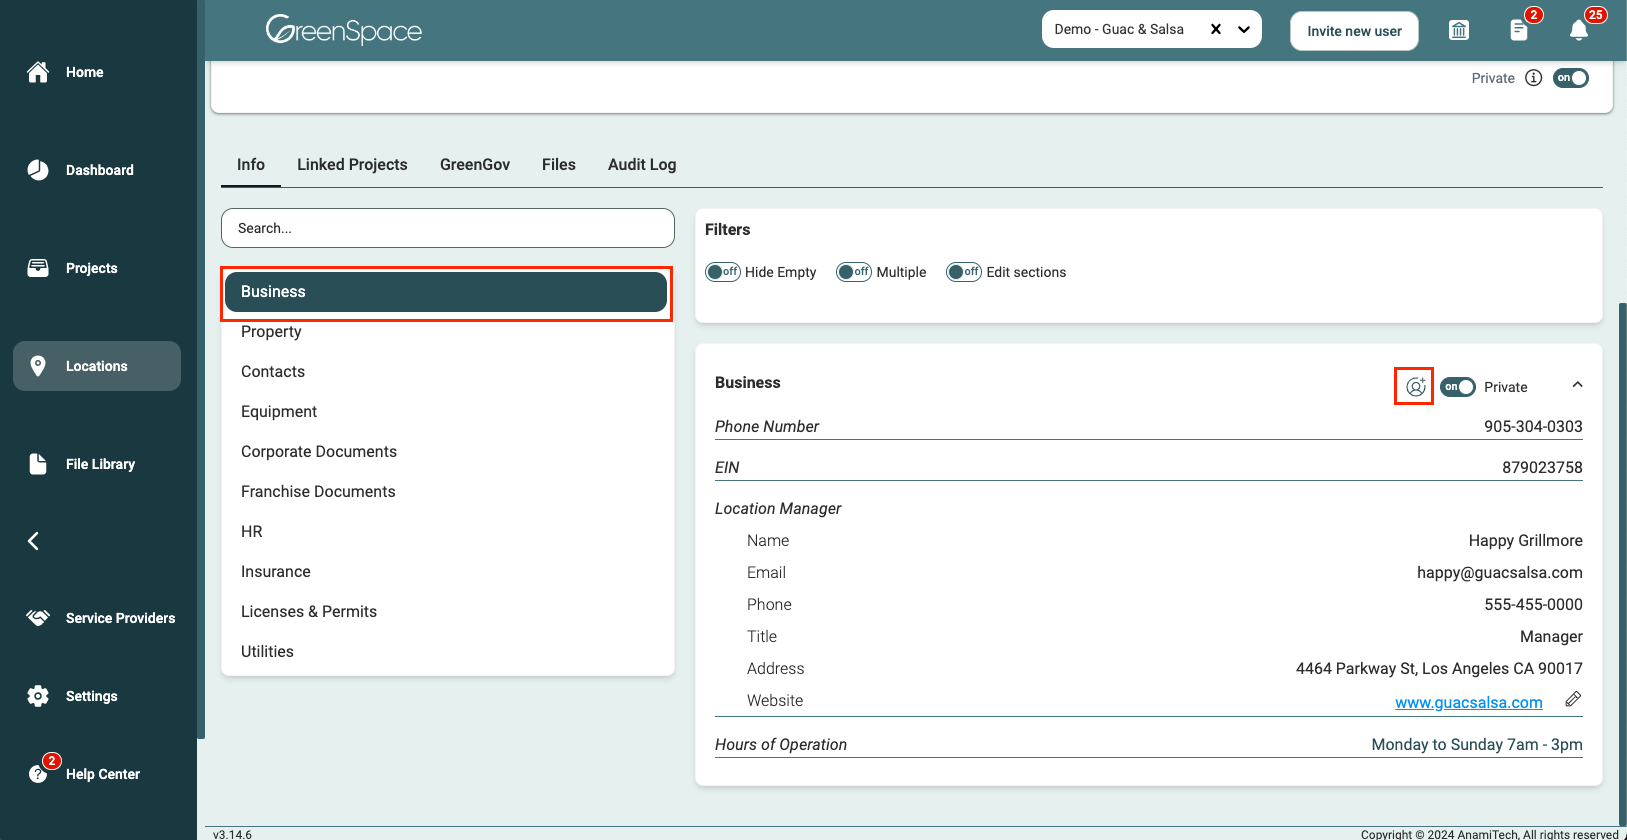
After you have given the necessary permissions for the specific private location, click on the Locations option in the main menu to view a list of all available locations. Hover over the location where you want to give the user access and click the view eye icon to open the Location.
Select the private section you want to grant access then click the add user button next.
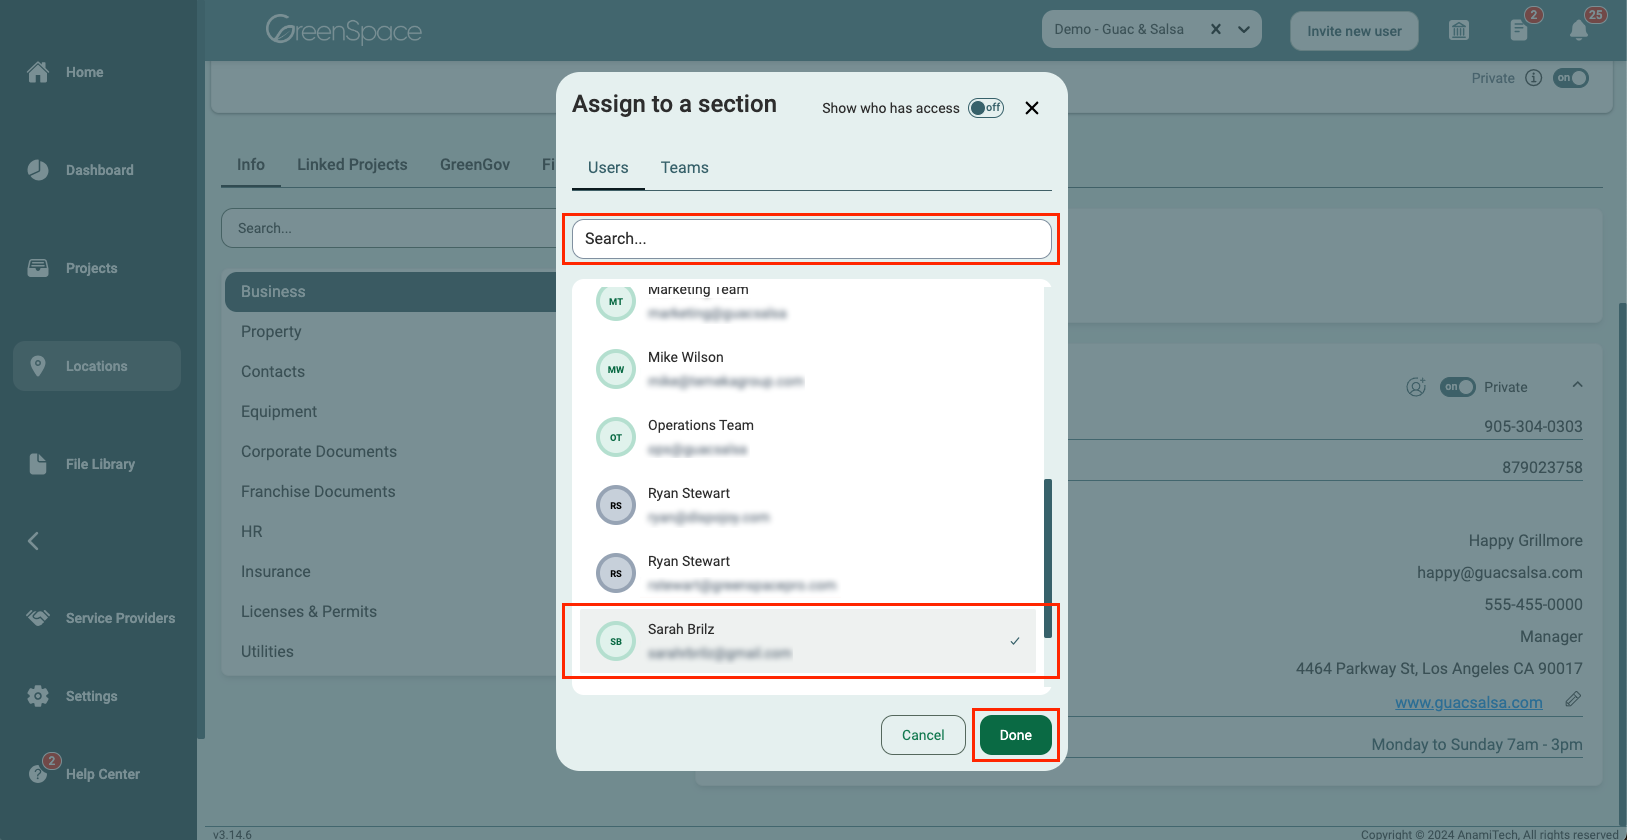
Select the user(s) you want to grant access to by checking their names. To quickly locate a specific user, use the search box at the top. Then click "Done" to save your changes.
Privacy
Project + Location
It is important to note a project or location, once created, will automatically be private unless made public. A private project or location can only be viewed by a user if they are assigned. The only exemption to this rule are Administrators, which can view and edit all locations or projects in any invited company.
User Role Project Permissions
| Administrator | Manager | Member | |
|---|---|---|---|
| Create Project | Yes | Yes | No |
| Add Phase | Yes | Yes | No |
| Add Task | Yes | Yes | No |
| Update Task Status | Yes | Yes | Yes |
| Update Start & End Dates | Yes | Yes | Yes |
| Create, Add, & Remove Tags | Yes | Yes | Yes |
| Add Custom Column | Yes | Yes | Yes* |
| Upload Project & Task Files | Yes | Yes | Yes |
| Comment on Project | Yes | Yes | Yes |
| Edit Task/Phase Name | Yes | Yes | Yes |
| Edit Project Name | Yes | Yes | No |
| Update Task Priority | Yes | Yes | Yes |
| Archive and/or Delete Project | Yes | Yes | No |
| Add Collab User to Project | Yes | Yes | No |
| Change Project Privacy | Yes | Yes | No |
| Change Project Category | Yes | Yes | No |
| Change Project Type | Yes | Yes | No |
| Assign Project Manager | Yes | Yes | No |
| Submit Assignment/Inspection | Yes | Yes | No |
| Provide Attestation | Yes | Yes | No |
| Change Project Due Date | Yes | Yes | No |
| Assign Project Location | Yes | Yes | No |
| Invite User to a Project | Yes | Yes | No |
| Clone Project | Yes | Yes | No |
| Publish Project as Template | Yes | Yes | No |
| Manage Project Without Invite | Yes | No | No |
*In an assigned project
User Role Location Permissions

User Role File Permissions
