
How to Track Important Expiration Dates
Files
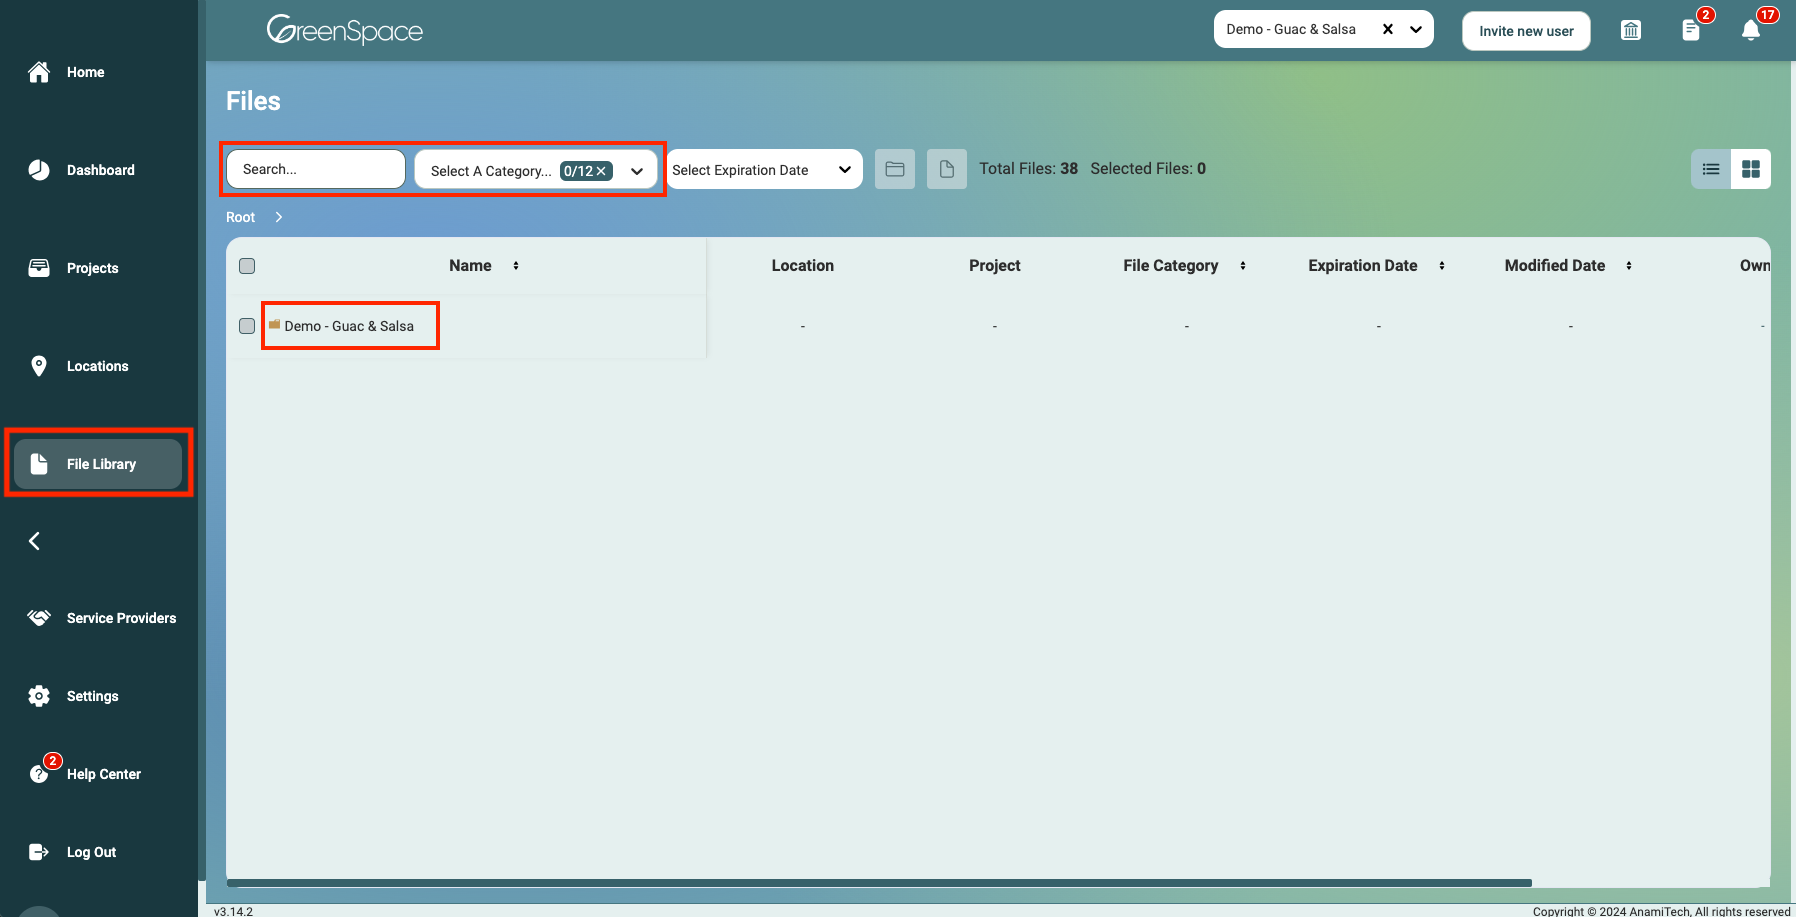
File Library
Click on the File Library option within the main menu to access all your stored files across your company. Locate your file by clicking through the files, typing the name in the search bar, or utilizing the category filter.
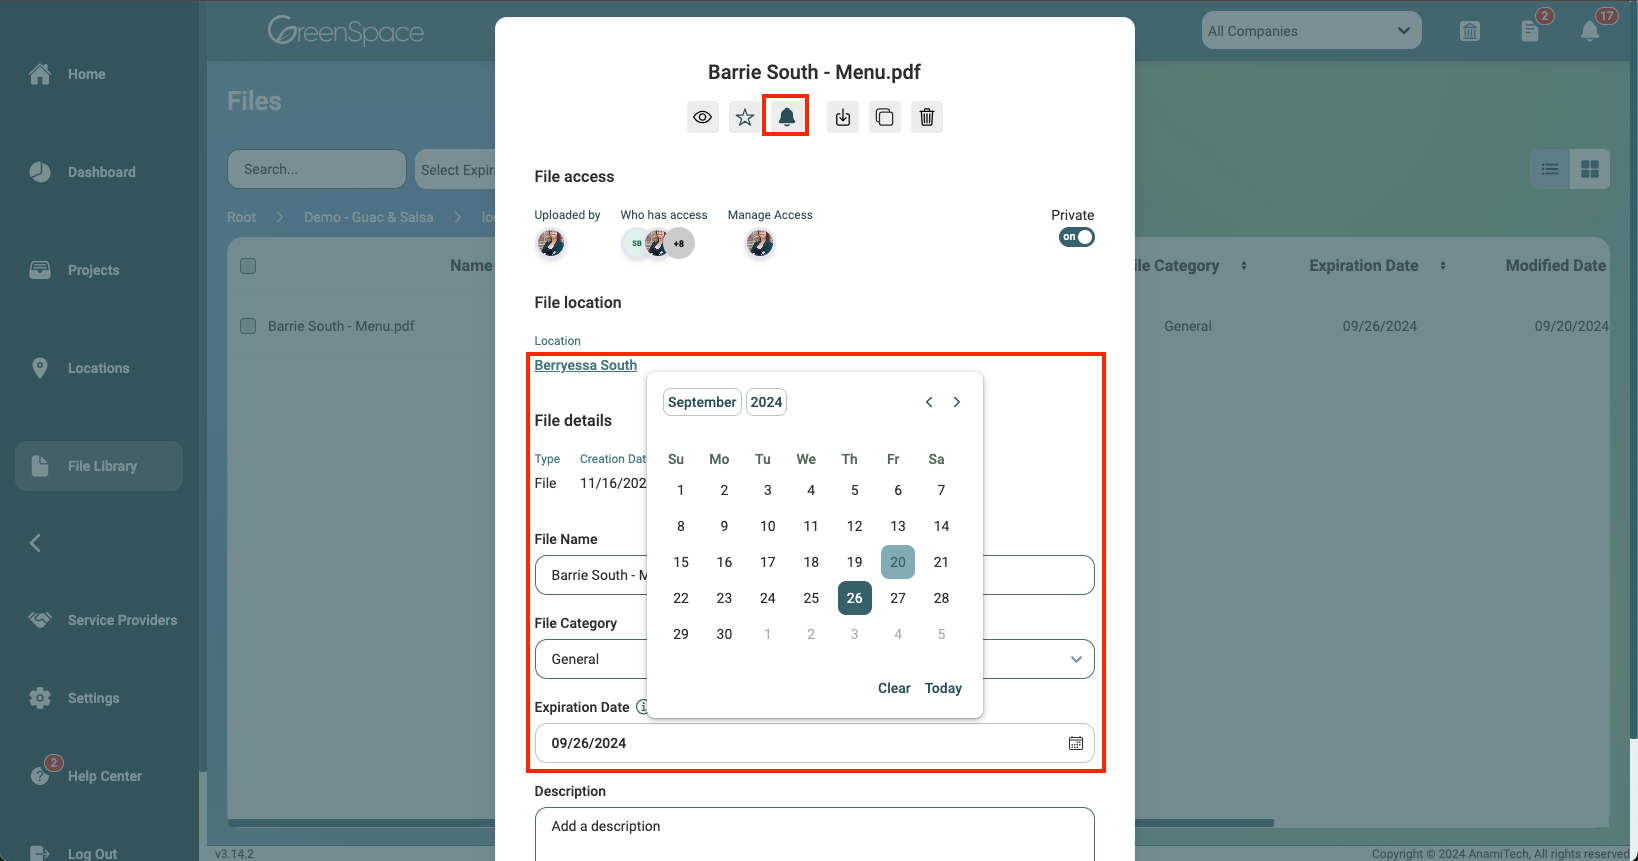
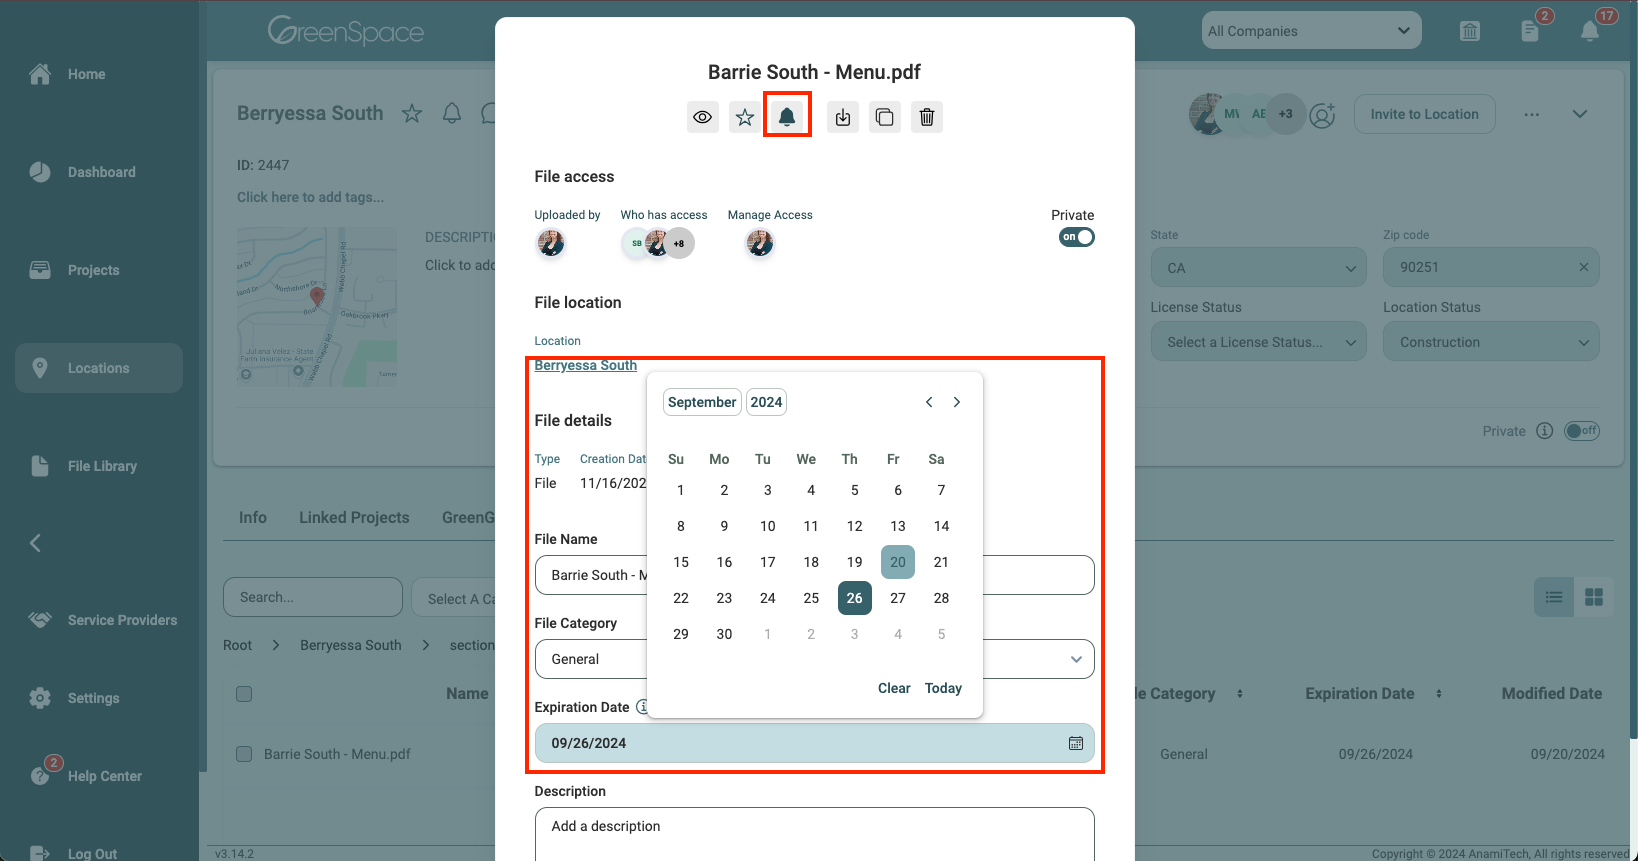
Click the file to expand the details and enter the expiration date. Ensure you receive notifications about the file expiration by selecting the subscribe bell button at the top of the window. You can adjust your notification preferences within your user profile.
Location Files
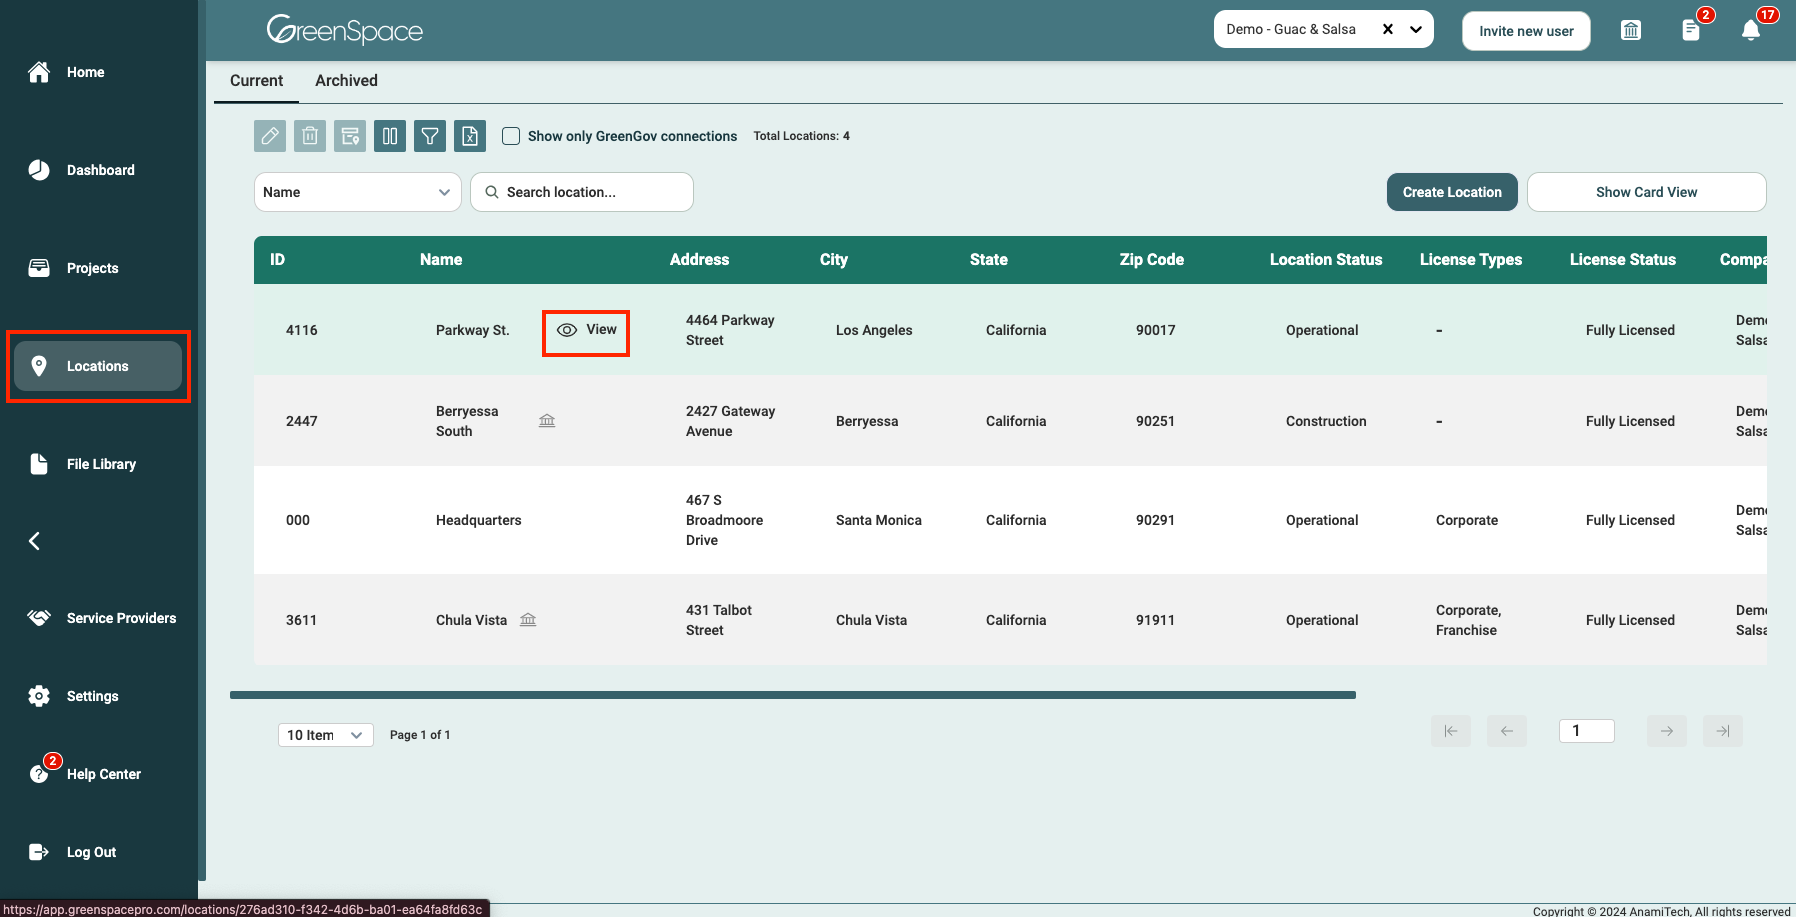
Select Locations from the main menu. Then hover over the location you would like to access the file within and click the eye icon to view.
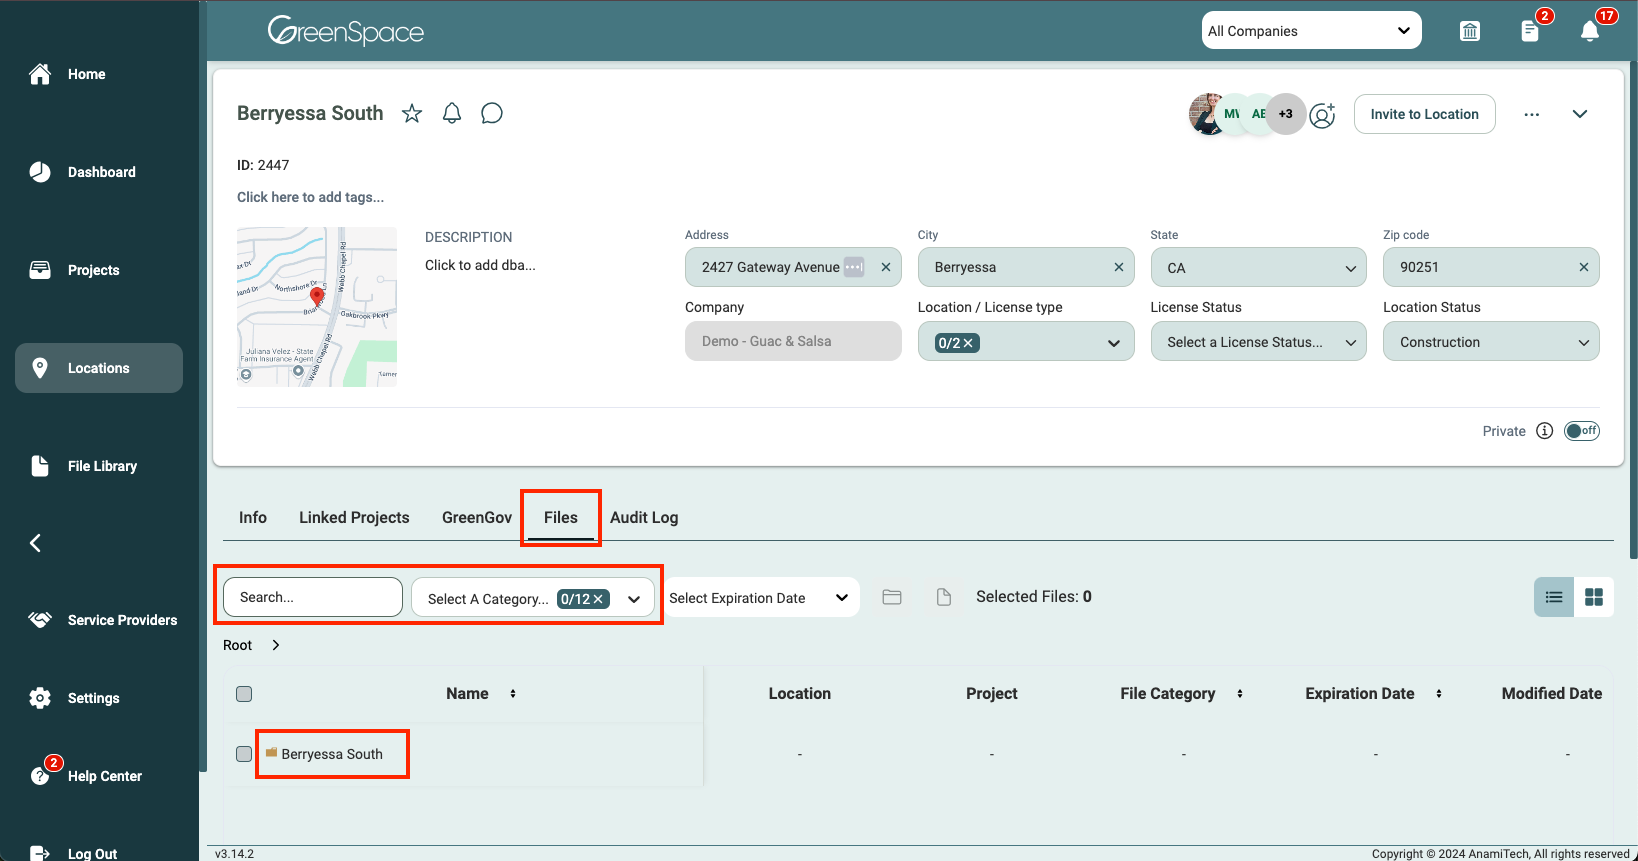
File Tab
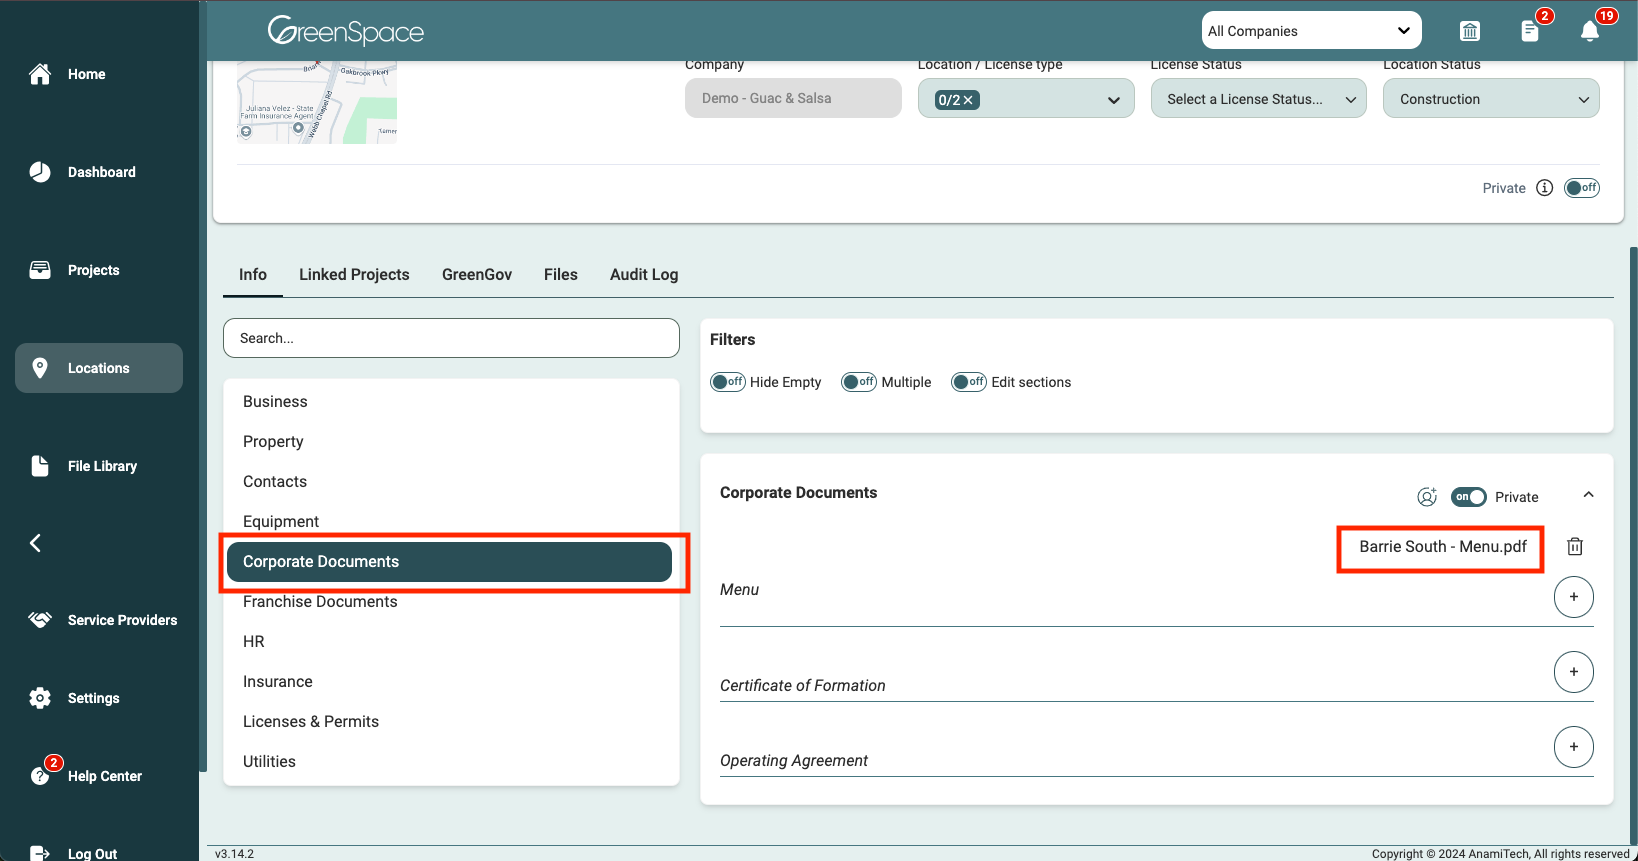
Click the File Tab to access all files associated with the desired Location. Locate your file by clicking through the files, typing the name in the search bar, or utilizing the category filter.
Click the file to expand the details and enter the expiration date. Ensure you receive notifications about the file expiration by selecting the subscribe bell button at the top of the window. You can adjust your notification preferences within your user profile.
Section Fields
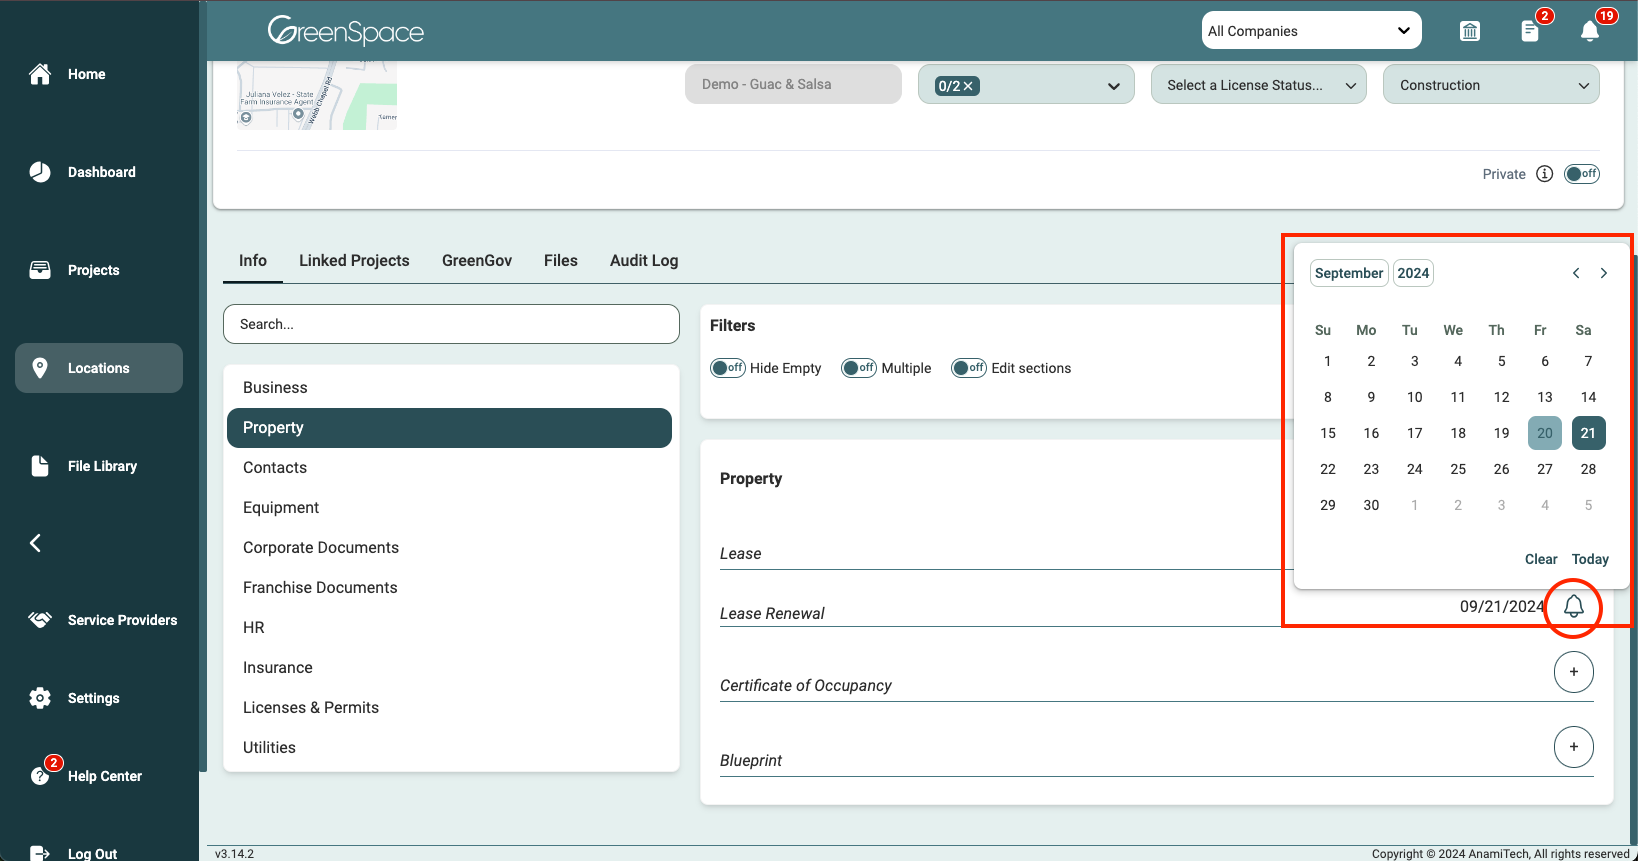
Find and click on the desired file within the relevant location section field.
You will be redirected to the files tab within the location. Click the file to expand the details and enter the expiration date. Ensure you receive notifications about the file expiration by selecting the subscribe bell button at the top of the window. You can adjust your notification preferences within your user profile.
Location Fields
Select Locations from the main menu. Then hover over the location you would like to access the file within and click the eye icon to view.
Existing Date Field
Simpl click on the date field and enter the relevant date you’d like to track. Ensure you receive notifications about the date by selecting the subscribe bell button to the right. You can adjust your notification preferences within your user profile.
Creating a Date Field
Toggle “Edit sections” to edit the sections and fields. Select the desired section you would like to add the date field and click "Add Field".
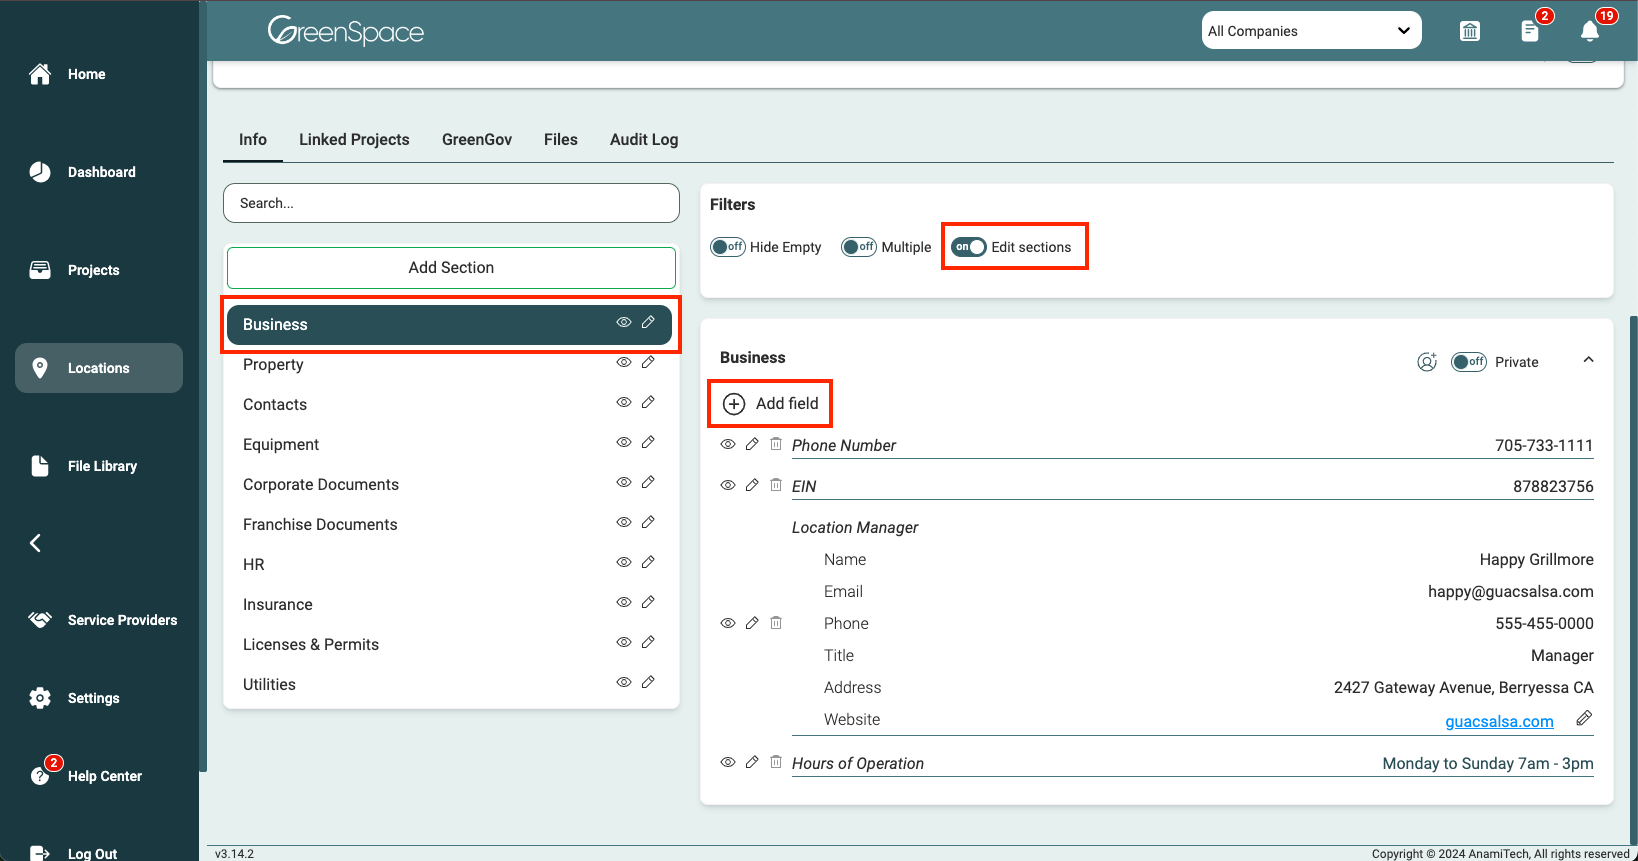
Add the title of the field and select “Date” as the type then click “add”.
Simply click on the date field and enter the relevant date you’d like to track. Ensure you receive notifications about the date by selecting the subscribe bell button to the right. You can adjust your notification preferences within your user profile.