
How to Customize Location Sections and Fields
Customize All Locations (Admin Only)
Accessing Settings
Go to Settings located in the main menu on the left side of your screen. Click the section icon next to the relevant company.
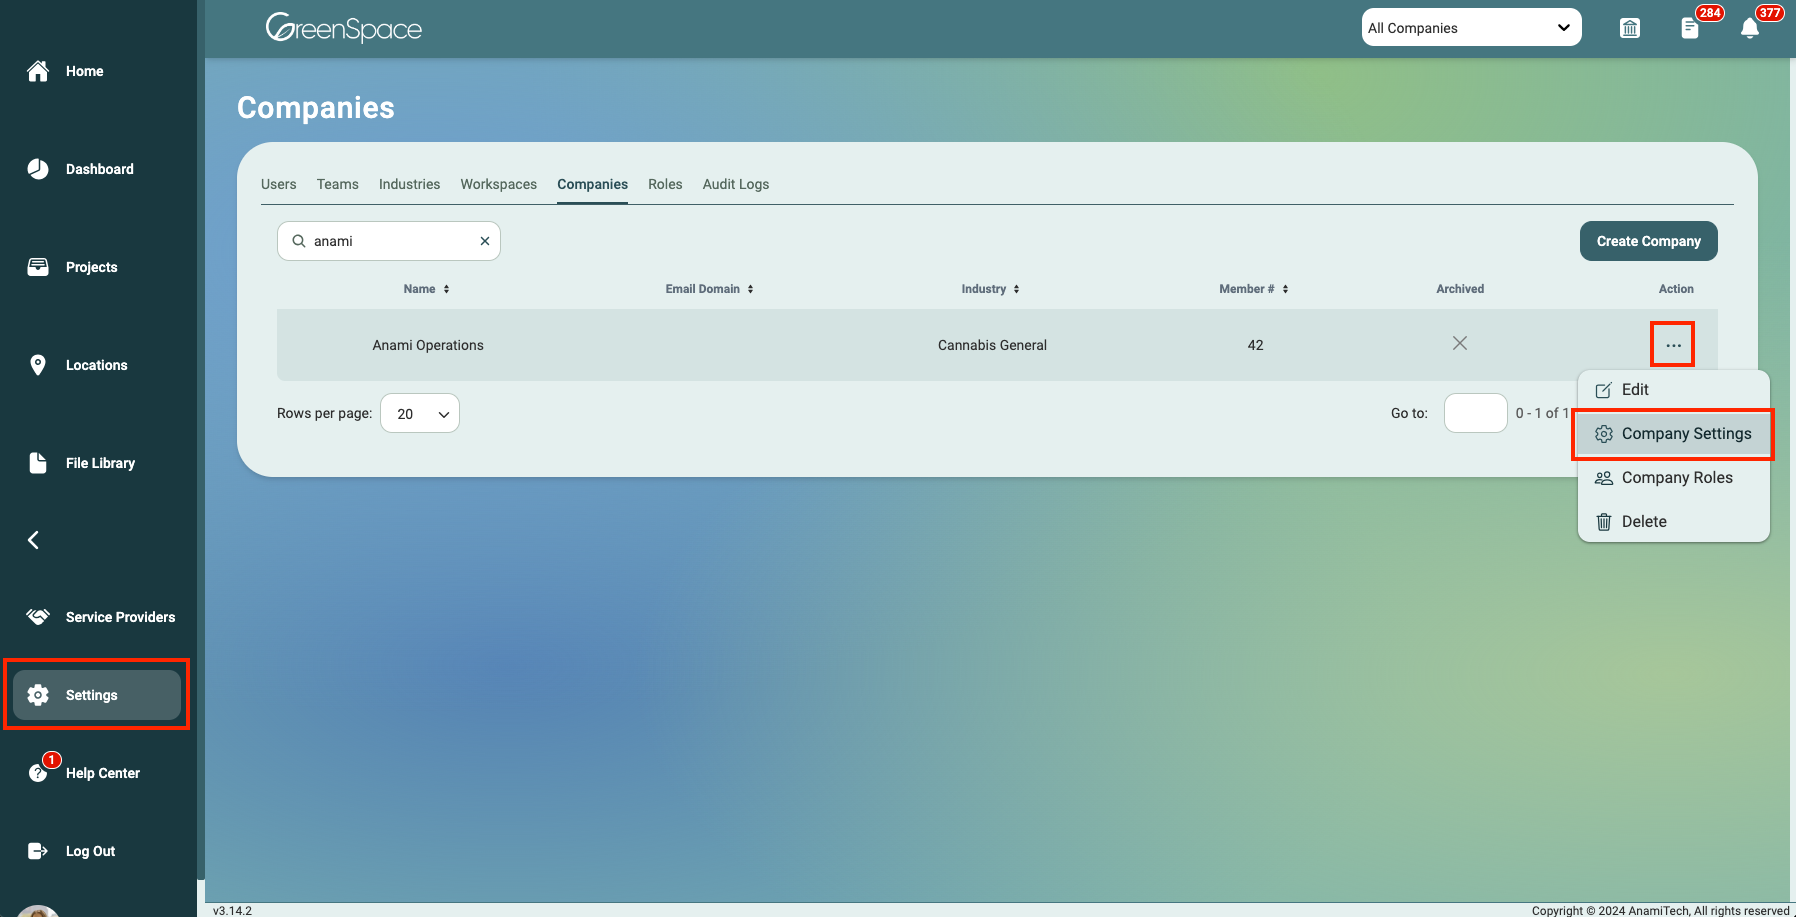
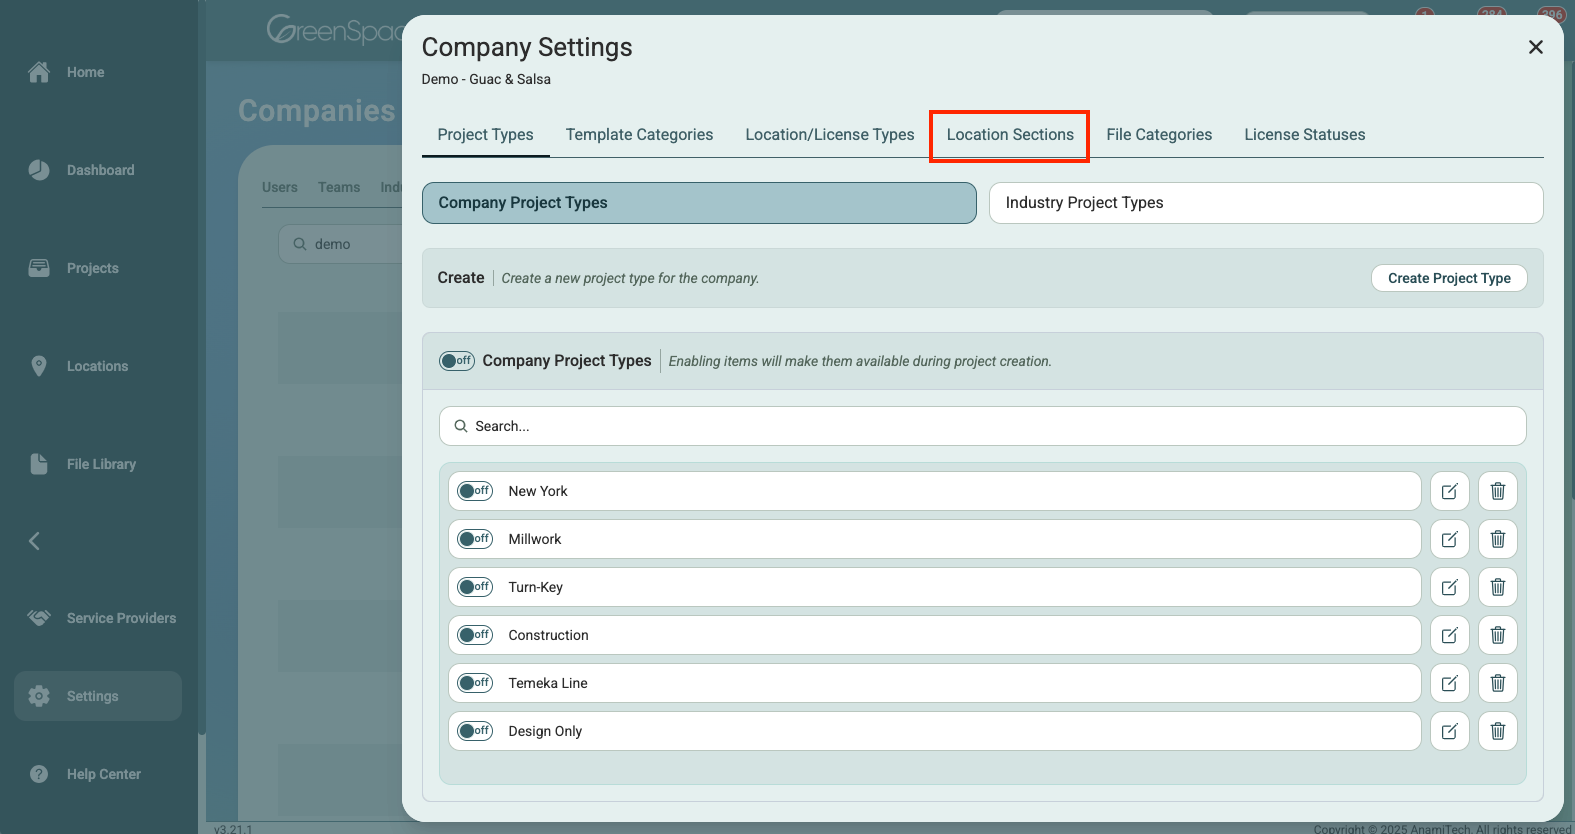
Select the "Locations Settings" tab.
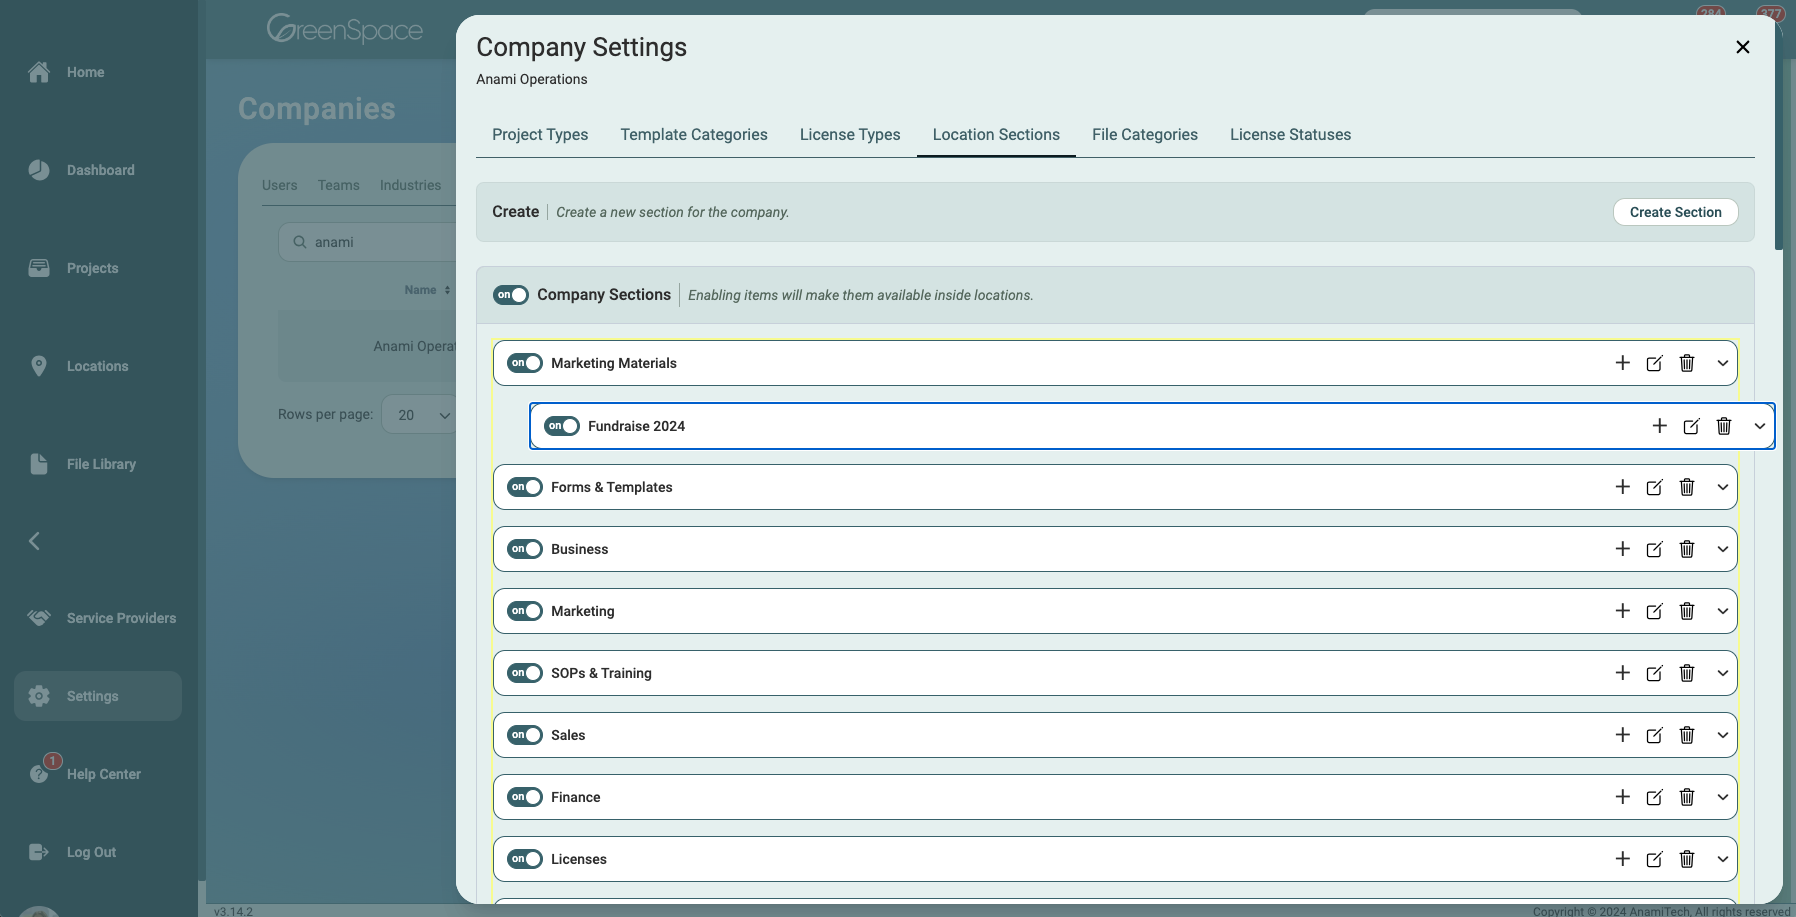
Sections (Add, Edit, or Delete)
All adjustments made in the company settings will apply to all locations.
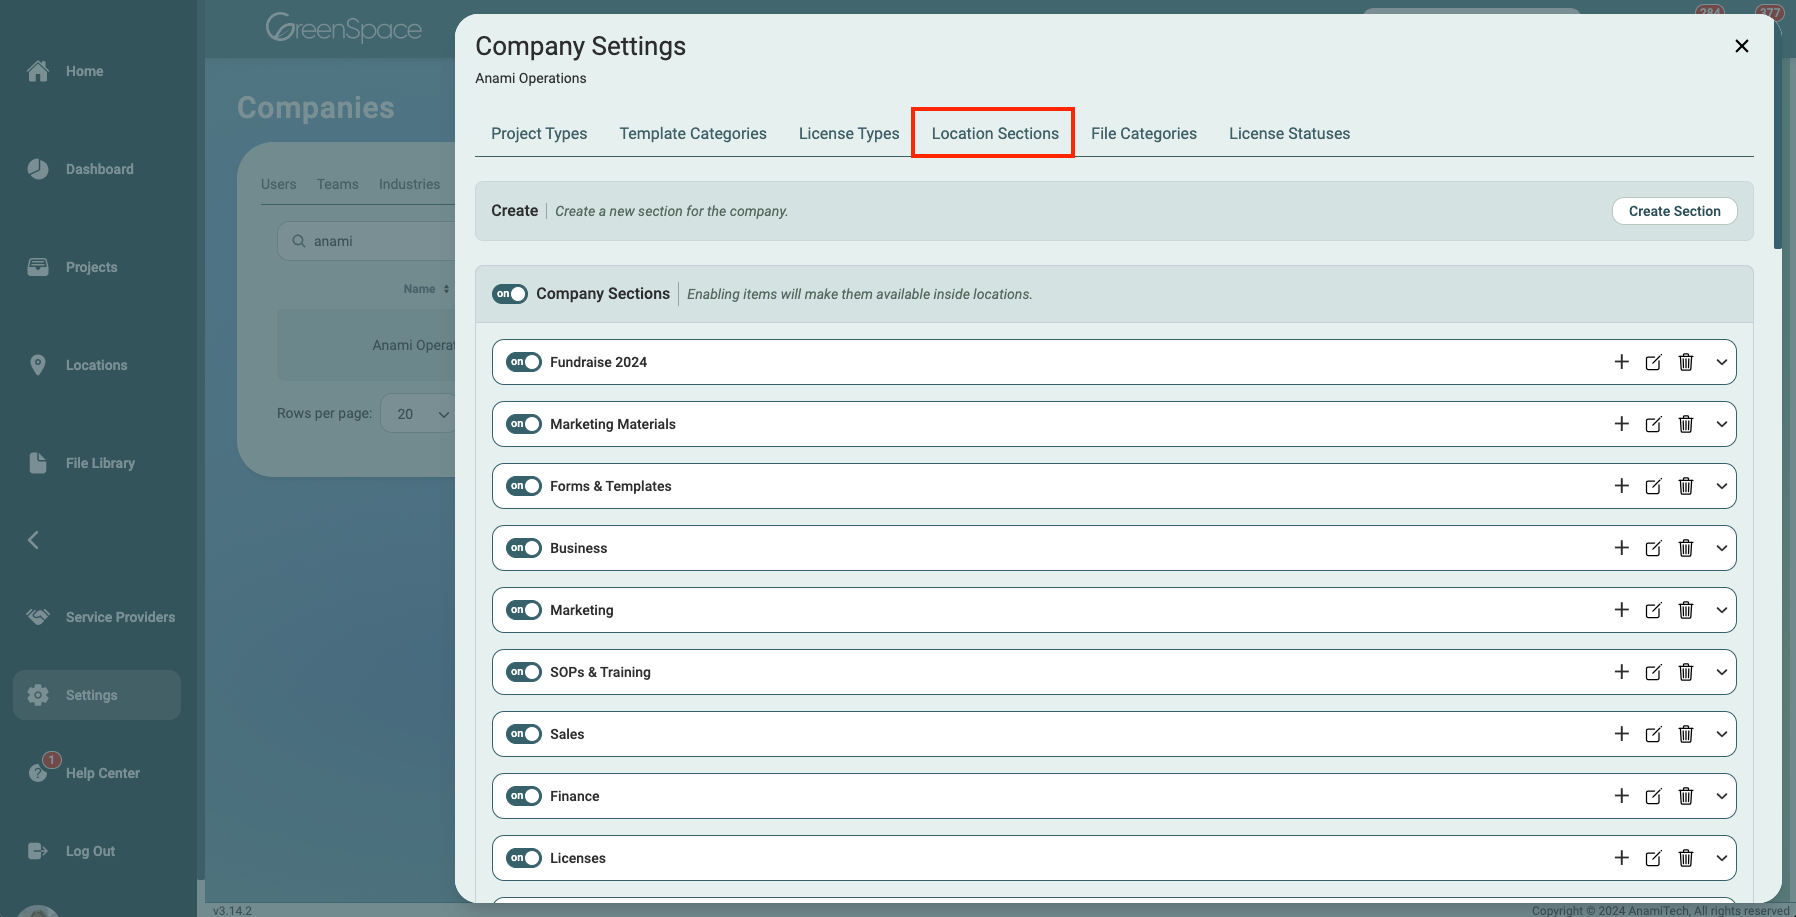
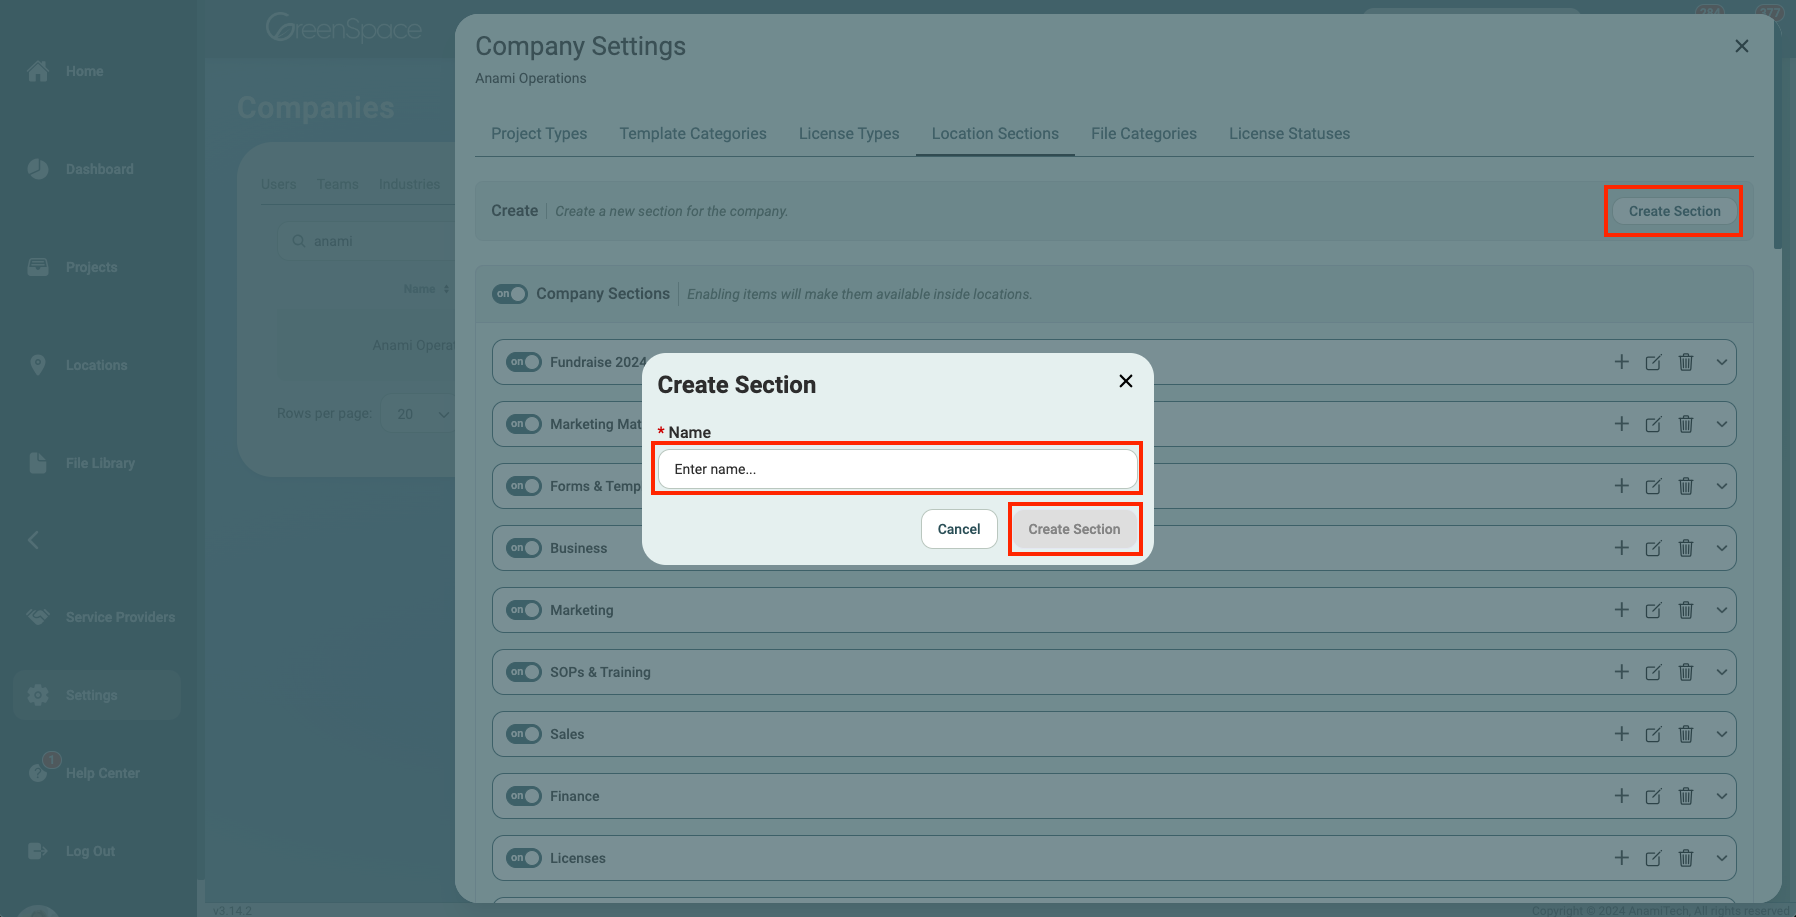
To add a new section, click "Create Section" at the top of the sub-menu. Enter the name of the new section in the pop-up menu that will appear in the middle of the screen and click "Create Section".
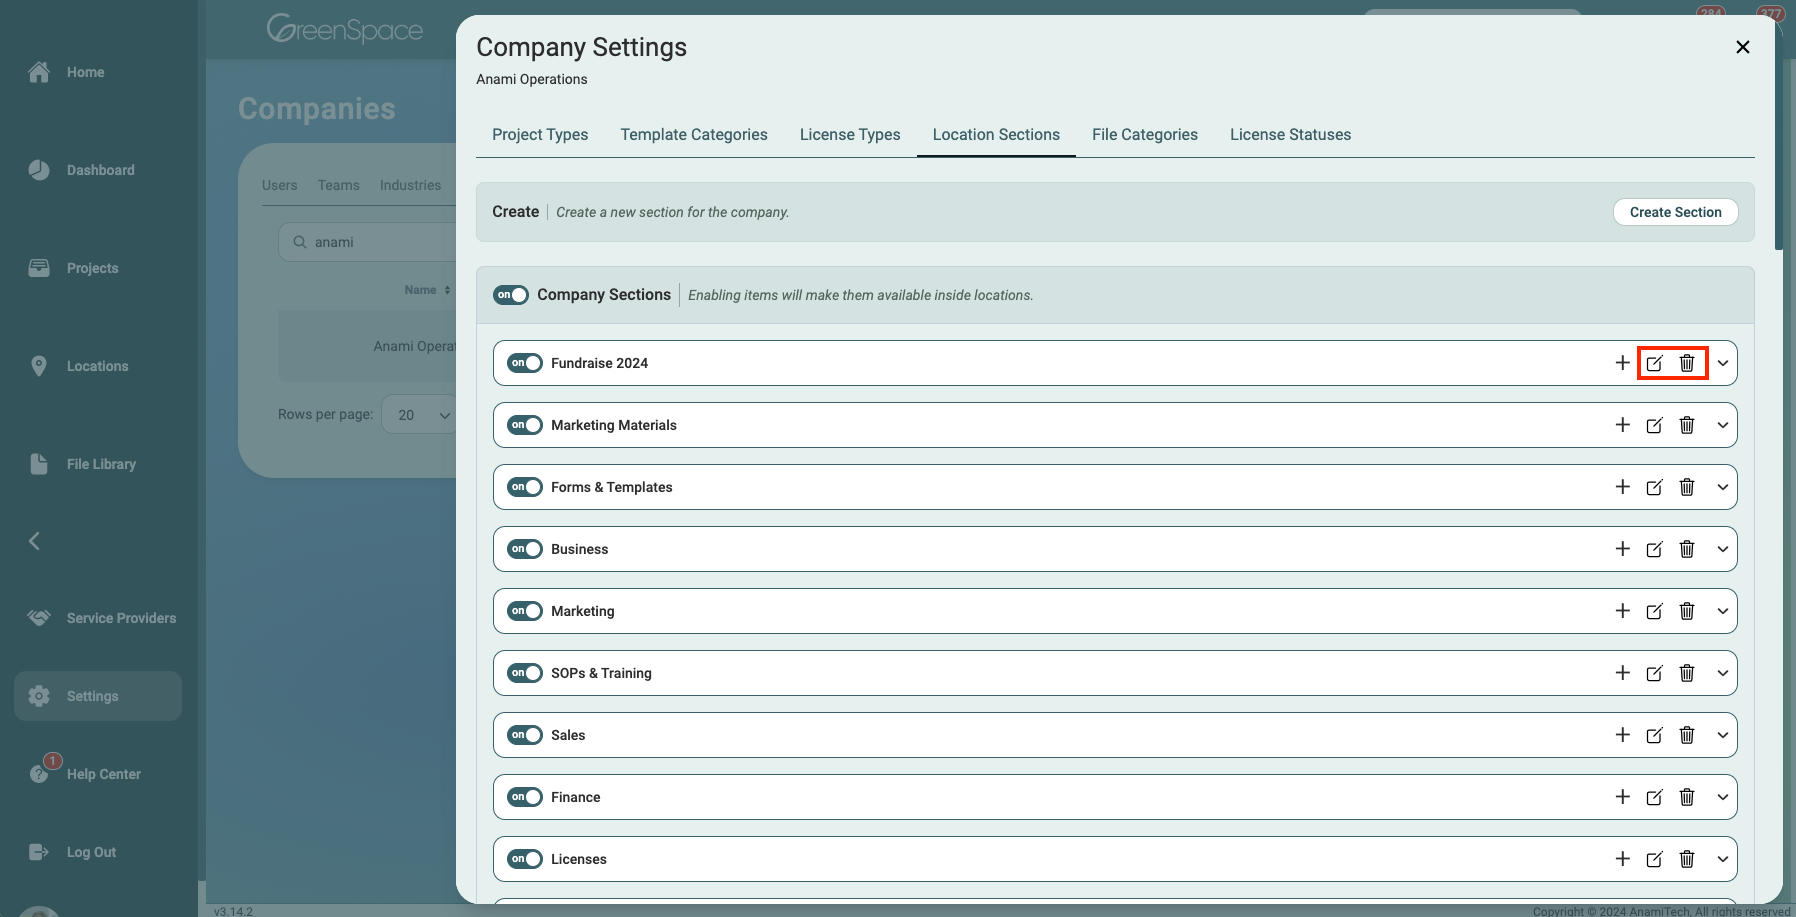
To edit a section name, select the edit icon of a pencil writing on paper on the desired section.
To delete a section, select the trash bin icon on the desired section.
Best Practices: When archiving or deleting a section, ensure there are no associated files, links, etc.
To arrange the sections, click and hold the section you would like to move, then drag to the desired placement and release the mouse.
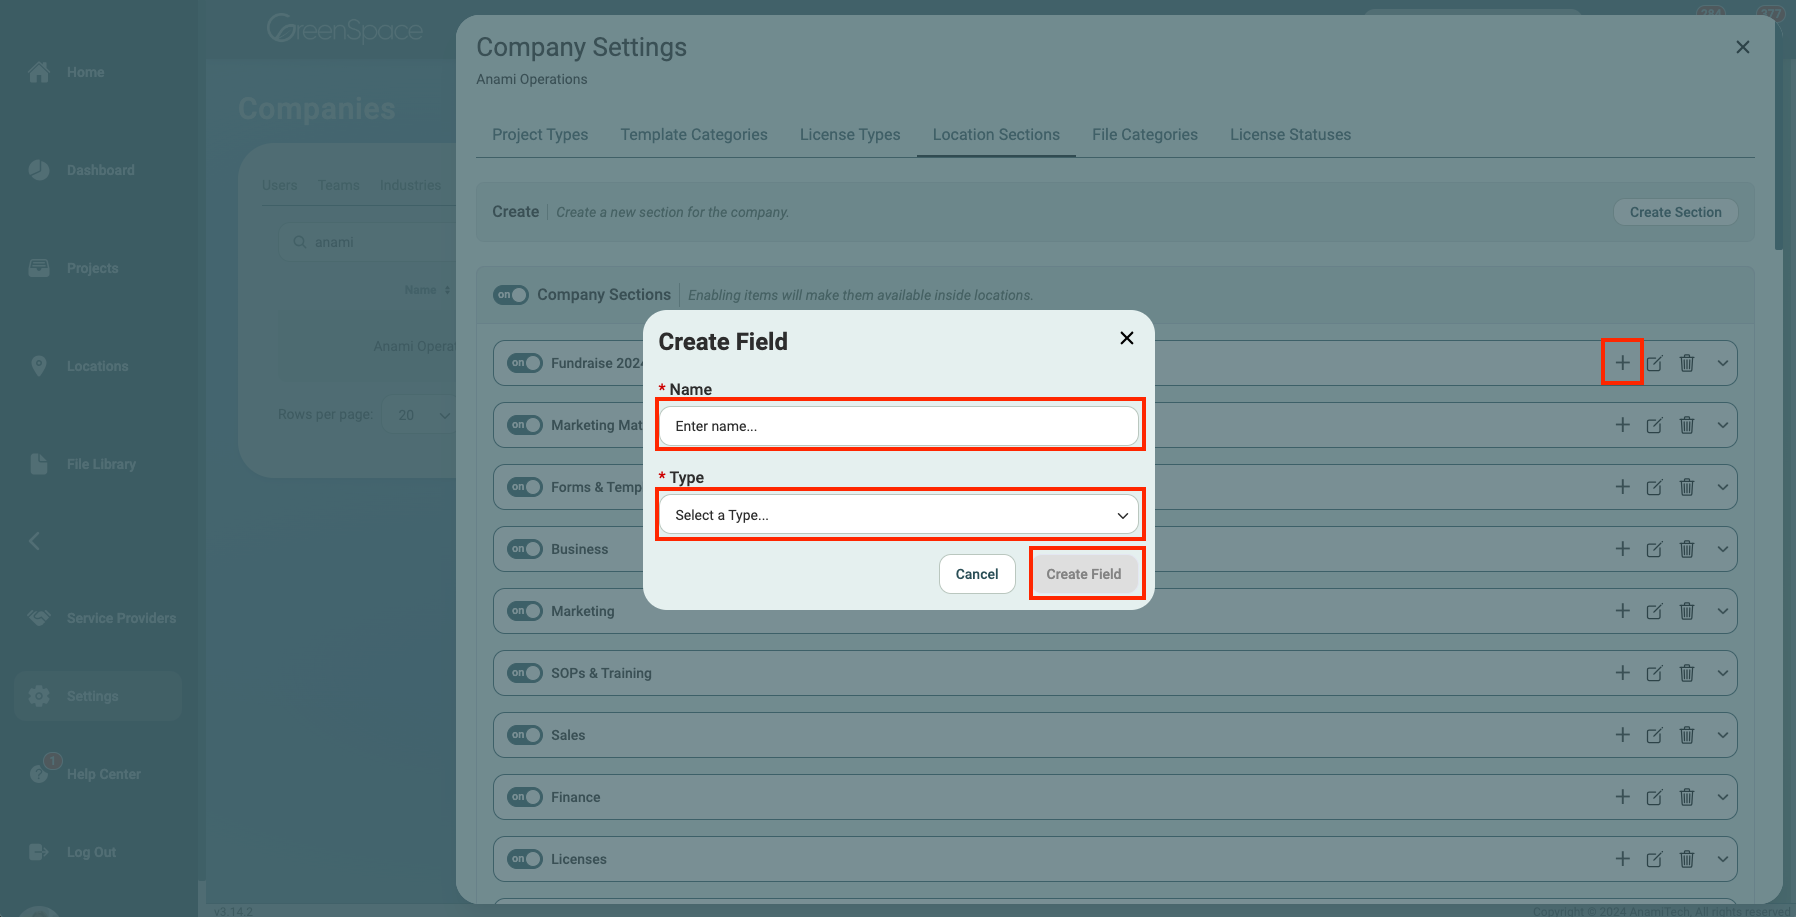
Fields (Add, Edit, or Delete)
All adjustments made in the company settings will apply to all locations.
To add a field, click the plus icon on the desired section. Then enter the name of the field and select the desired type from the dropdown menu in the pop-up window that will appear in the middle of the screen. Click "Create Field" to save.
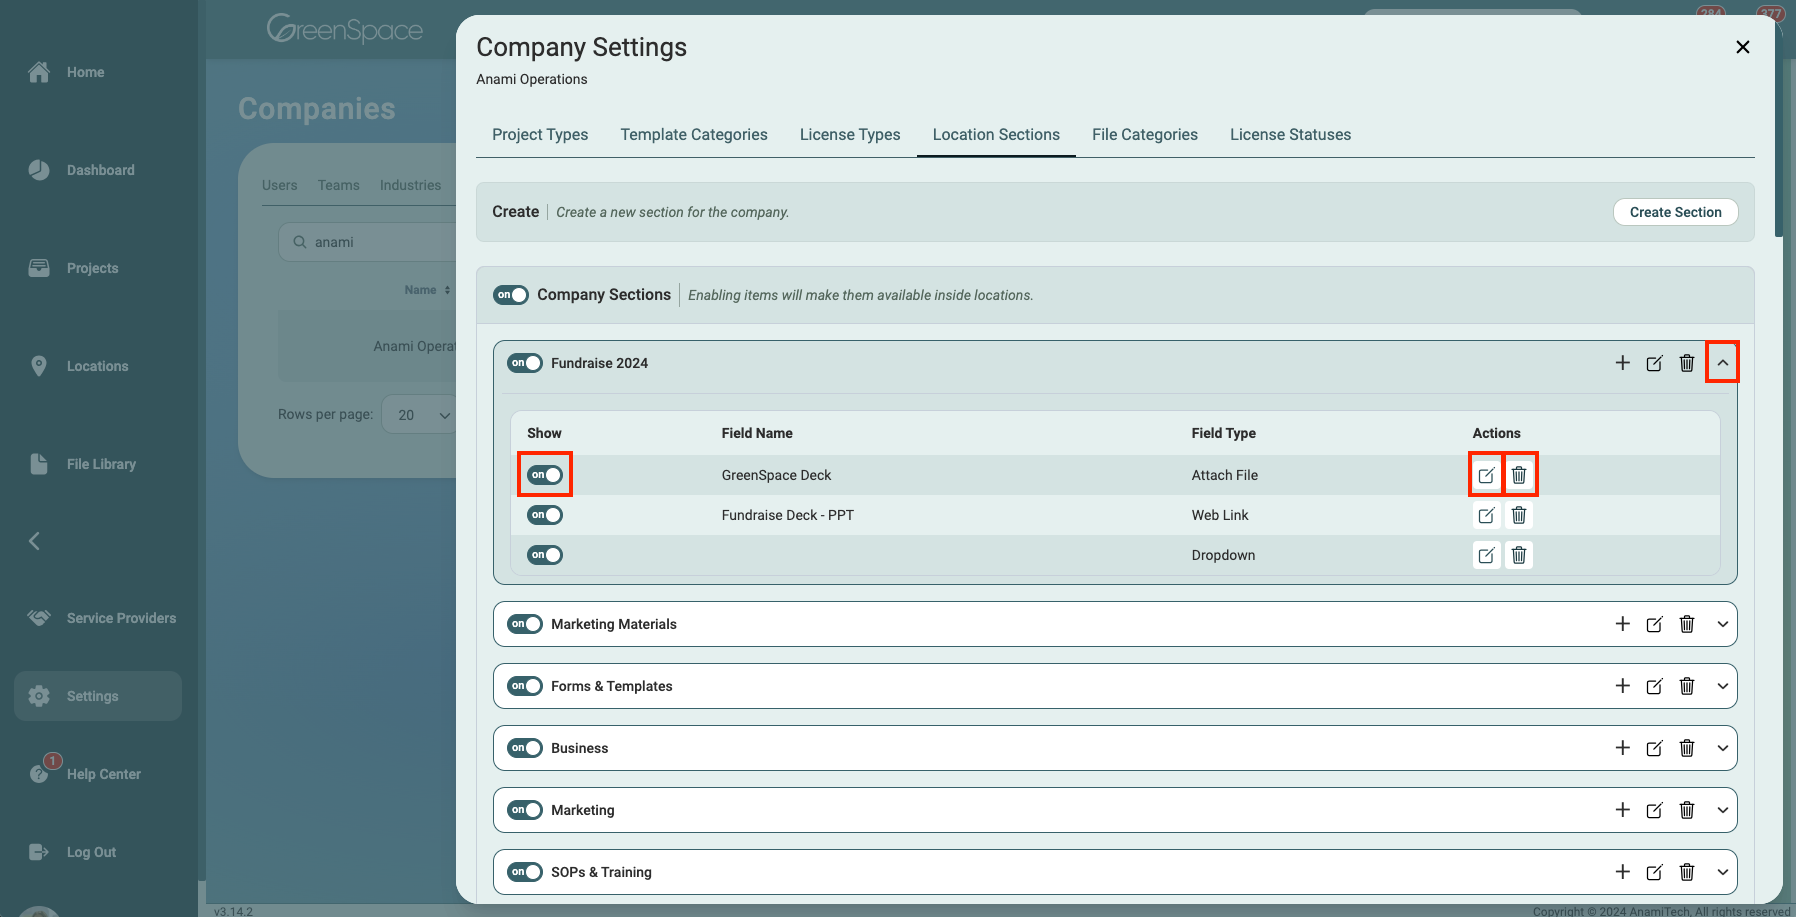
To edit, hide, or delete a field, expand the desired section and choose the appropriate icon.
When archiving or deleting a section, ensure there are no associated files, links, etc.
Hide or Show Location Sections
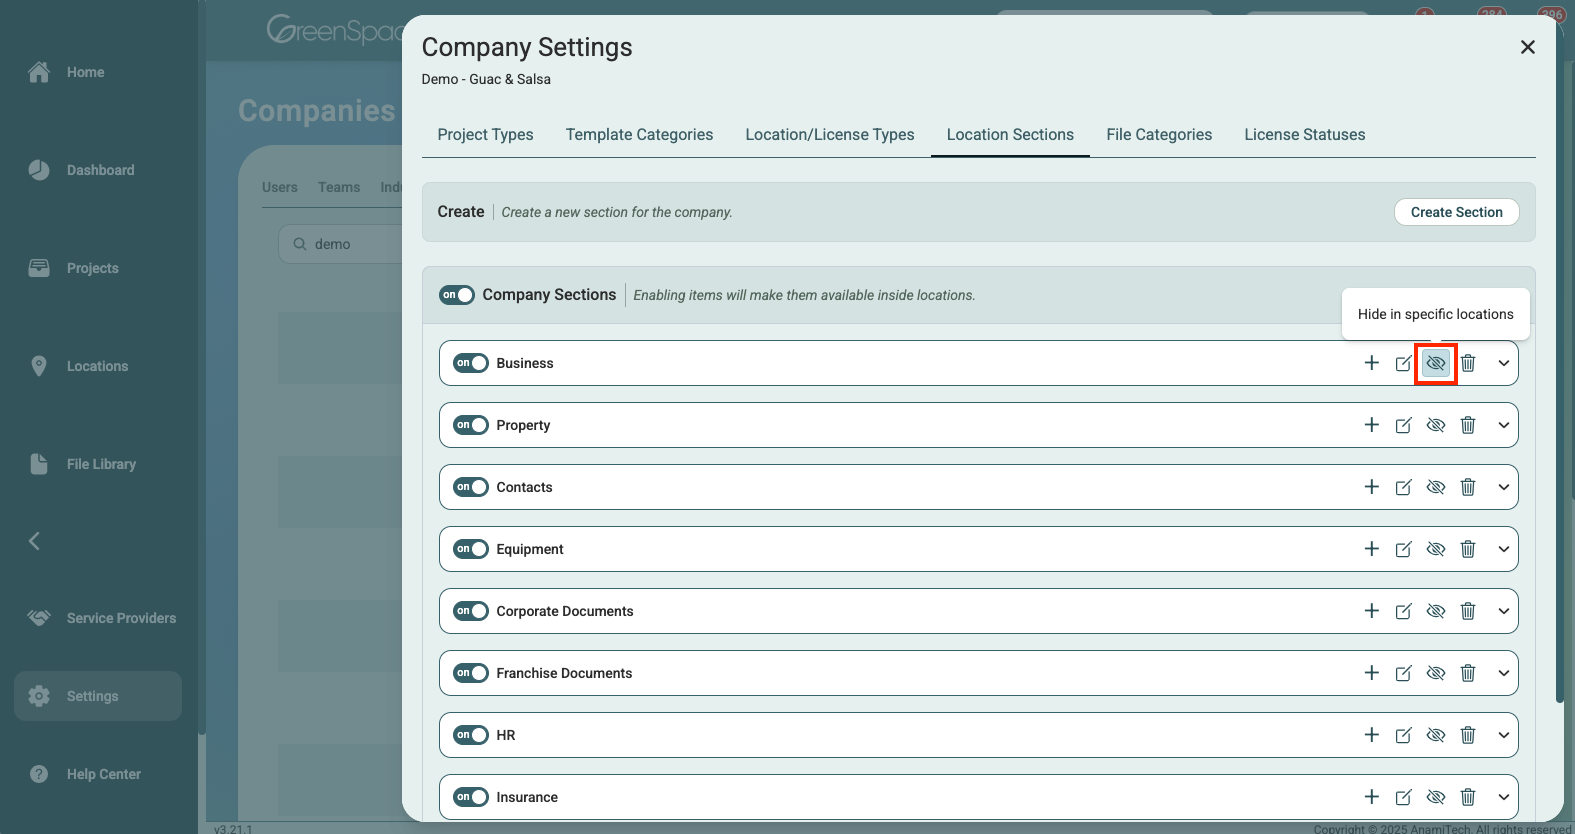
Select the Locations Sections tab from the Company Settings options.
Click the Hide/Show crossed out eye icon on the right of the Company Section you would like to hide or show from multiple locations.
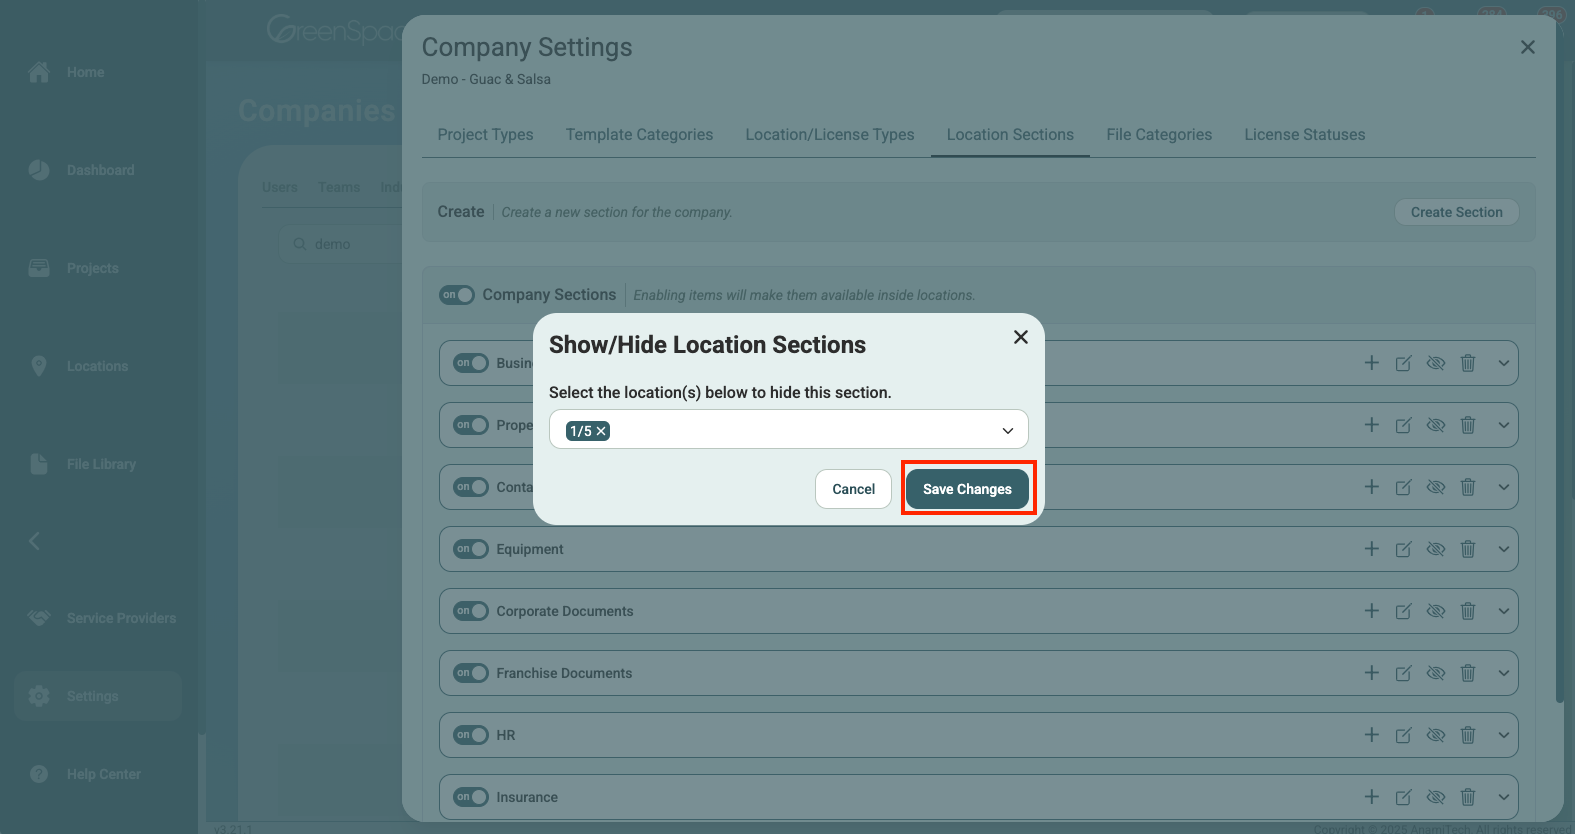
From the drop-down menu, check the boxes next to the locations where you want to hide the selected section. Ensure the locations you would lie to show the section is unchecked. Click the drop-down menu arrow to collapse the menu.

Click "Save Changes".
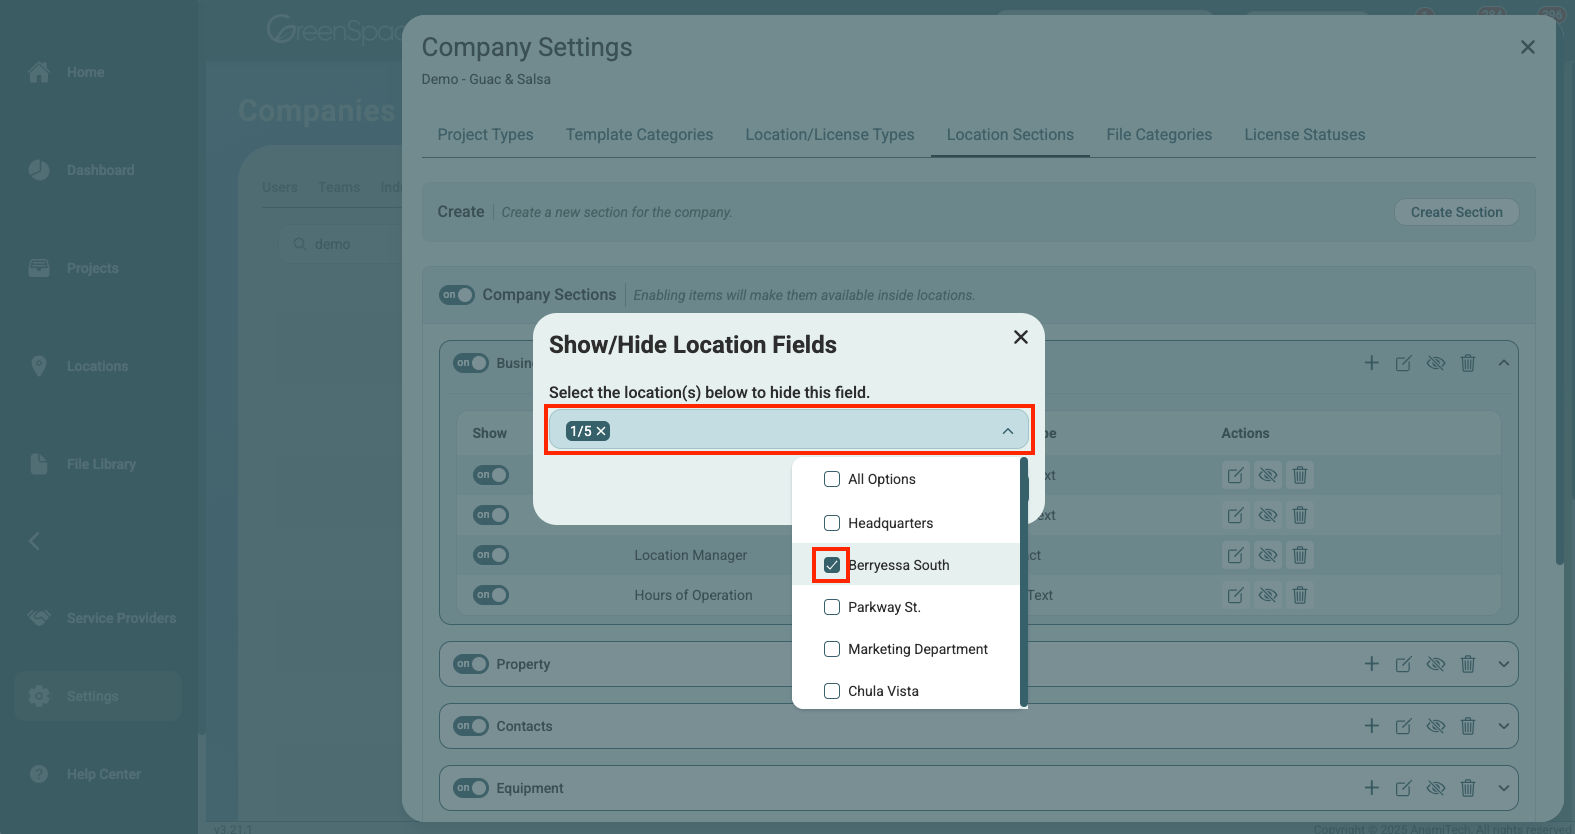
Hide or Show Location Fields
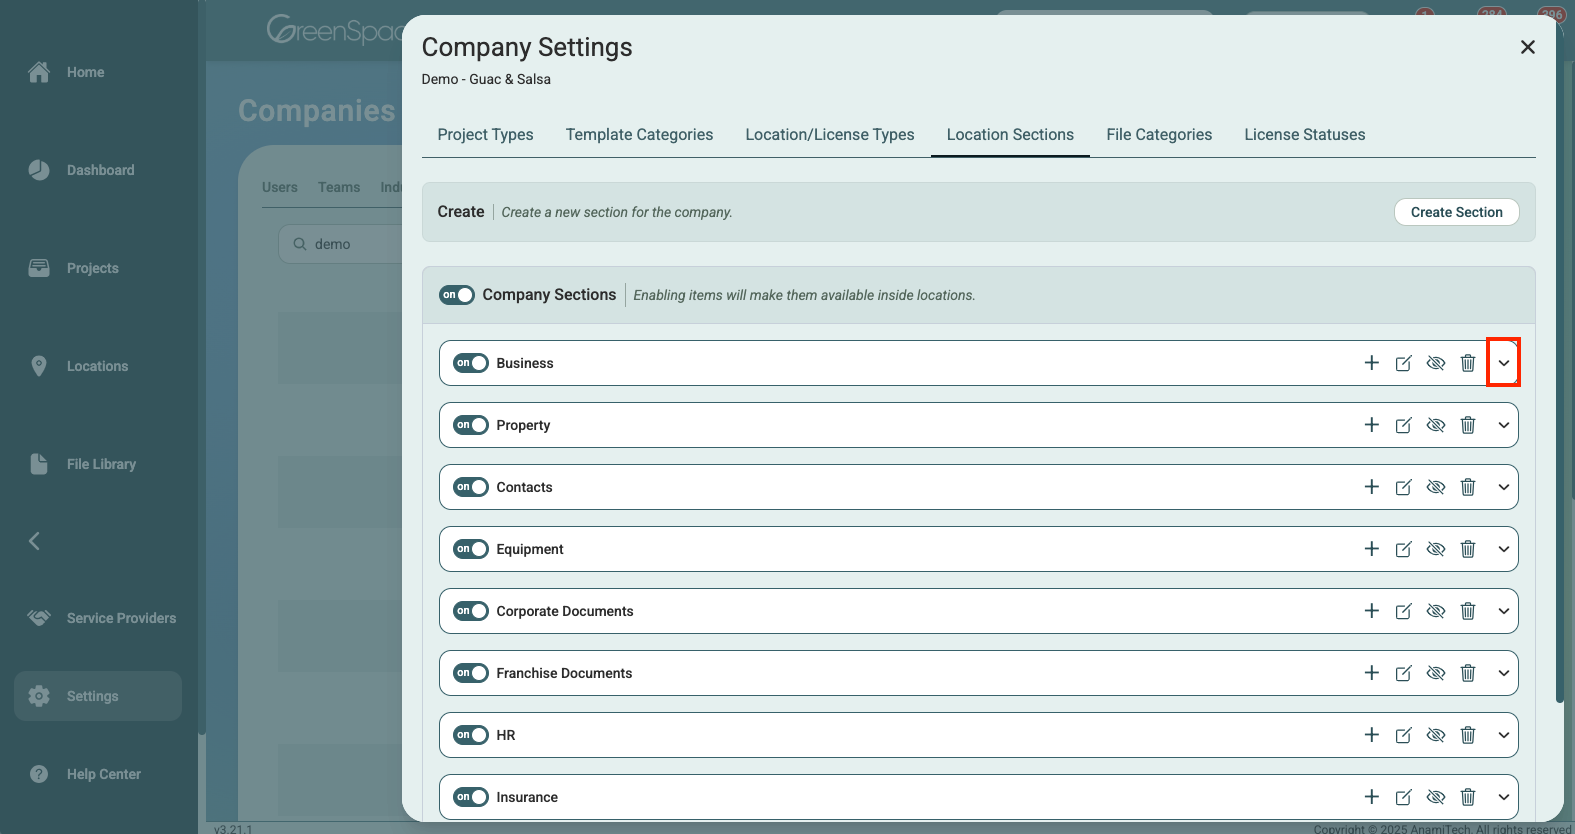
Select the Locations Sections tab from the Company Settings options.
Click the drop-down arrow for the Location section where you want to hide or show the field.
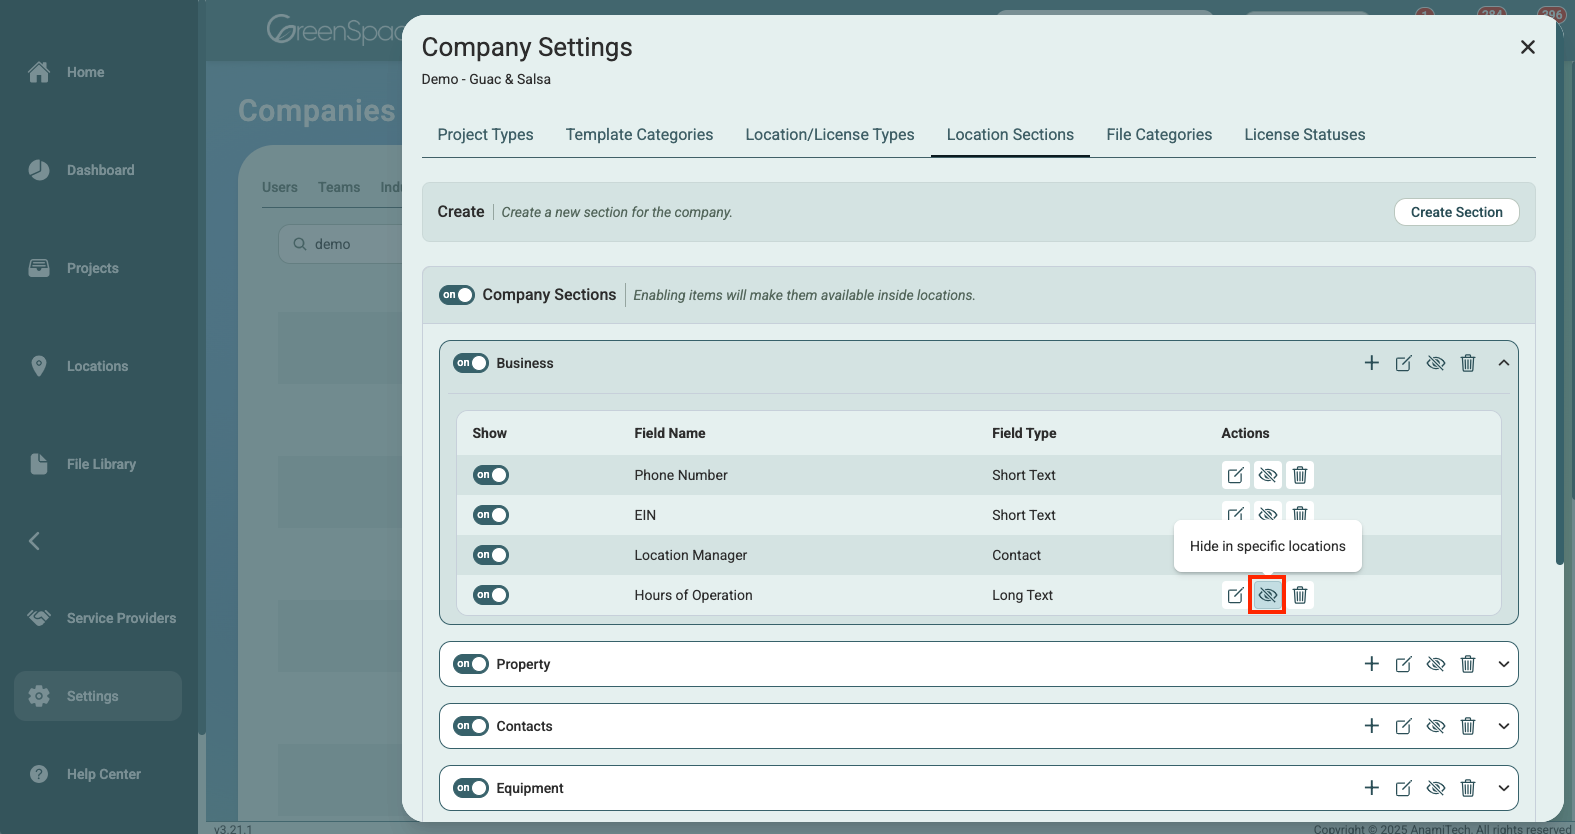
Under Actions, click the Hide/Show crossed out eye icon on the right of the field you would like to hide or show from multiple locations.
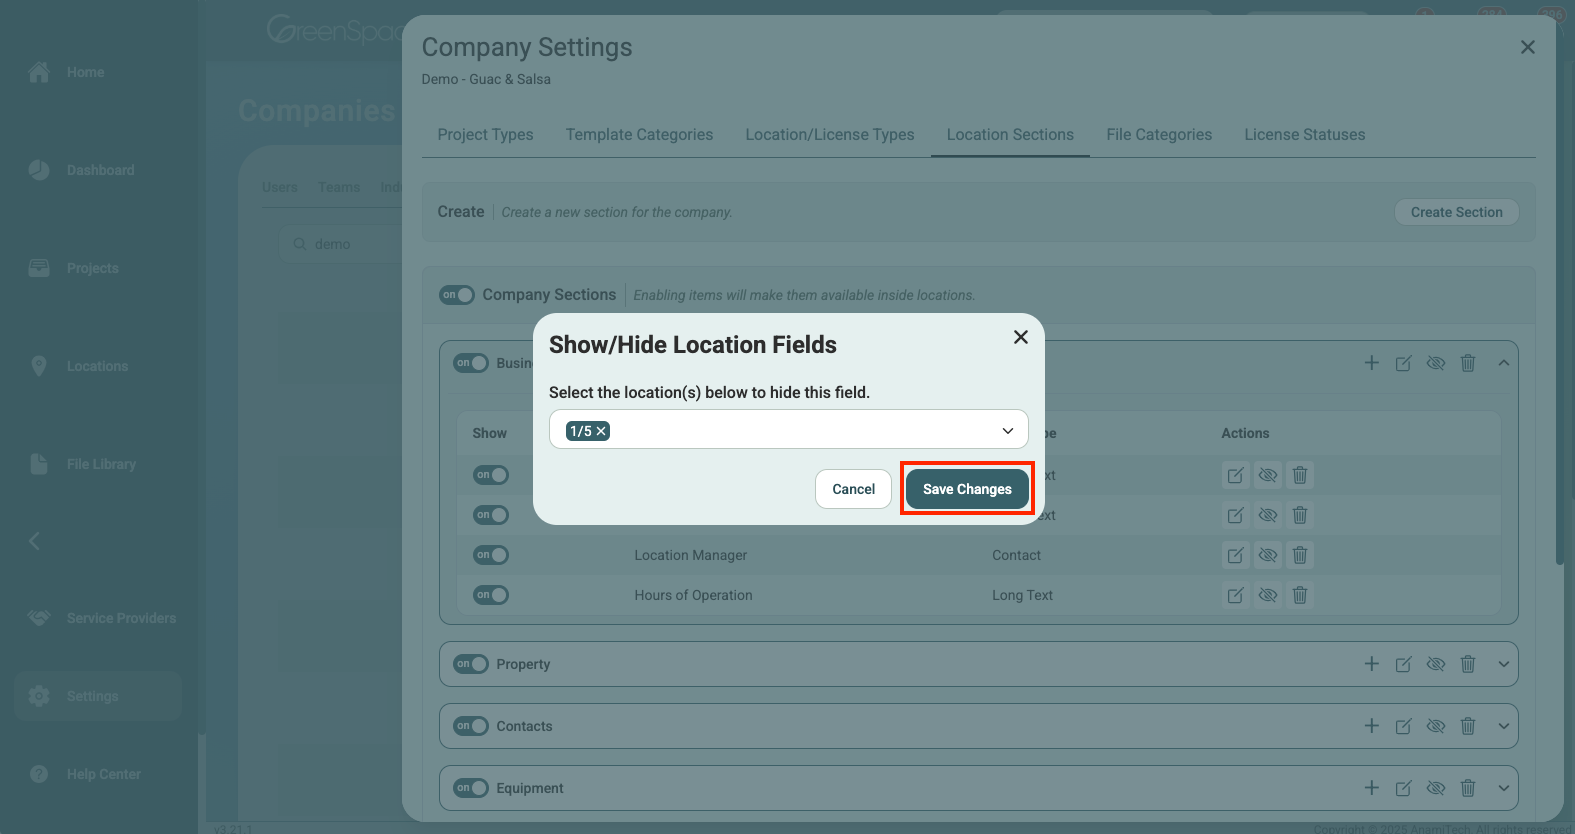
From the drop-down menu, check the boxes next to the locations where you want to hide the selected section. Ensure the locations you would lie to show the section is unchecked. Click the drop-down menu arrow to collapse the menu.
Click "Save Changes".
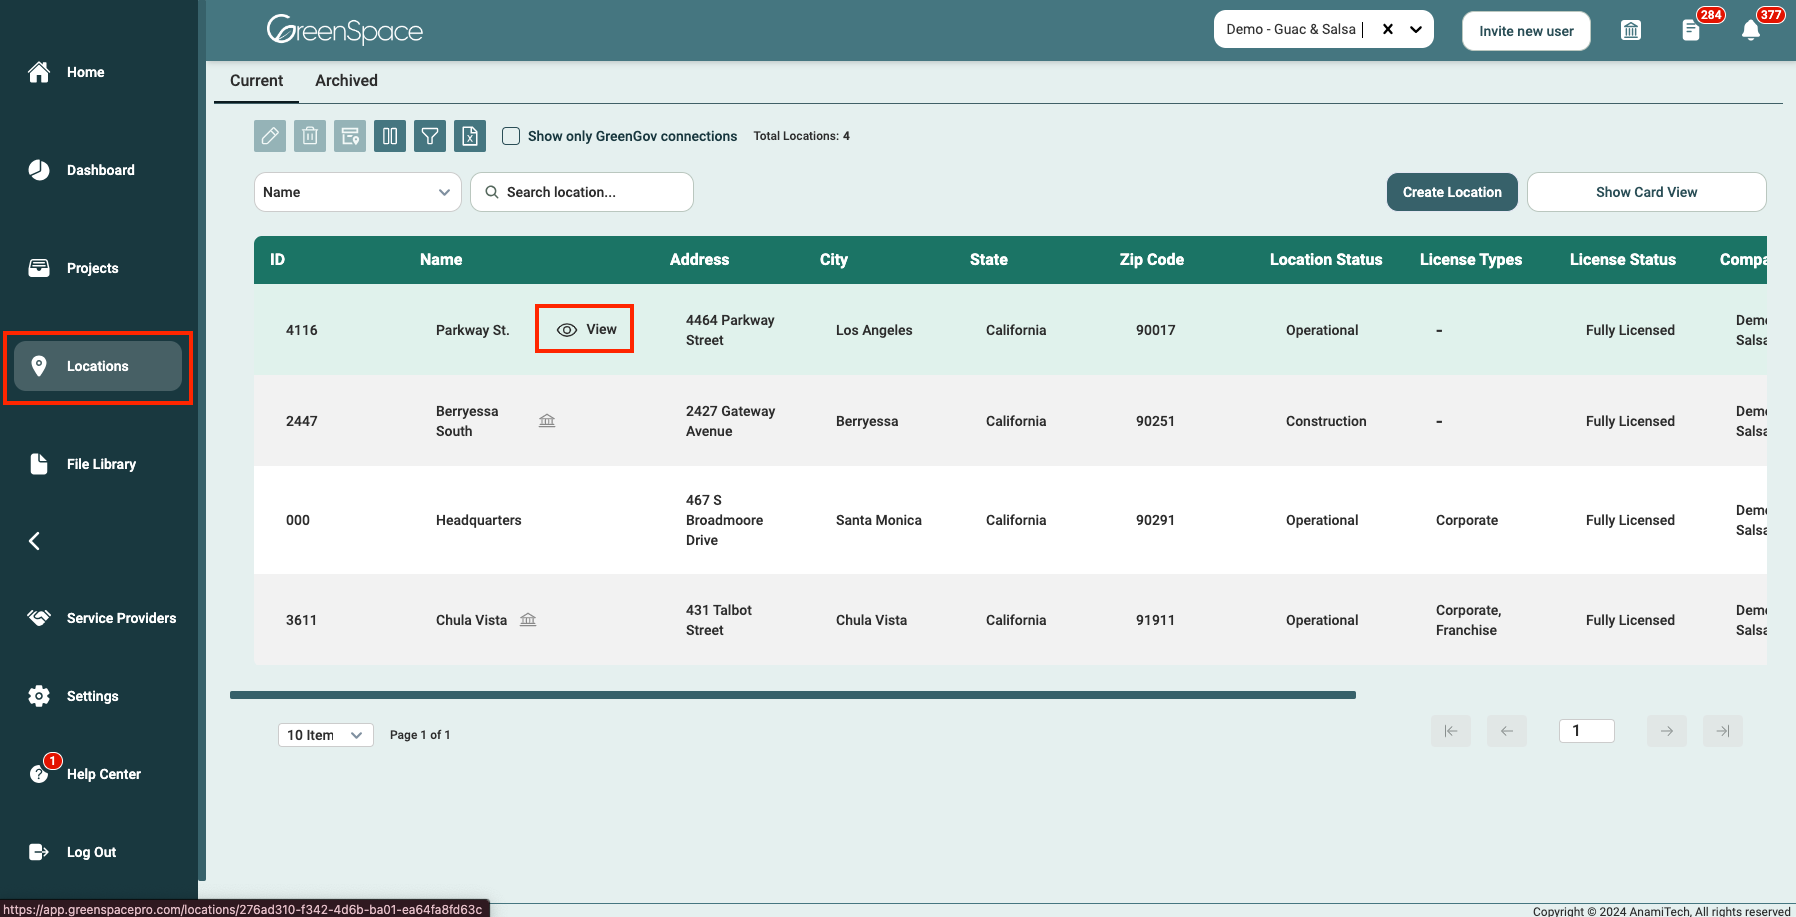
Customize Individual Location Sections and Fields
Admin + Invited Managers Only: If you have a member account in GreenSpace, your role does not allow access to these options. Please contact your admin or manager for assistance.
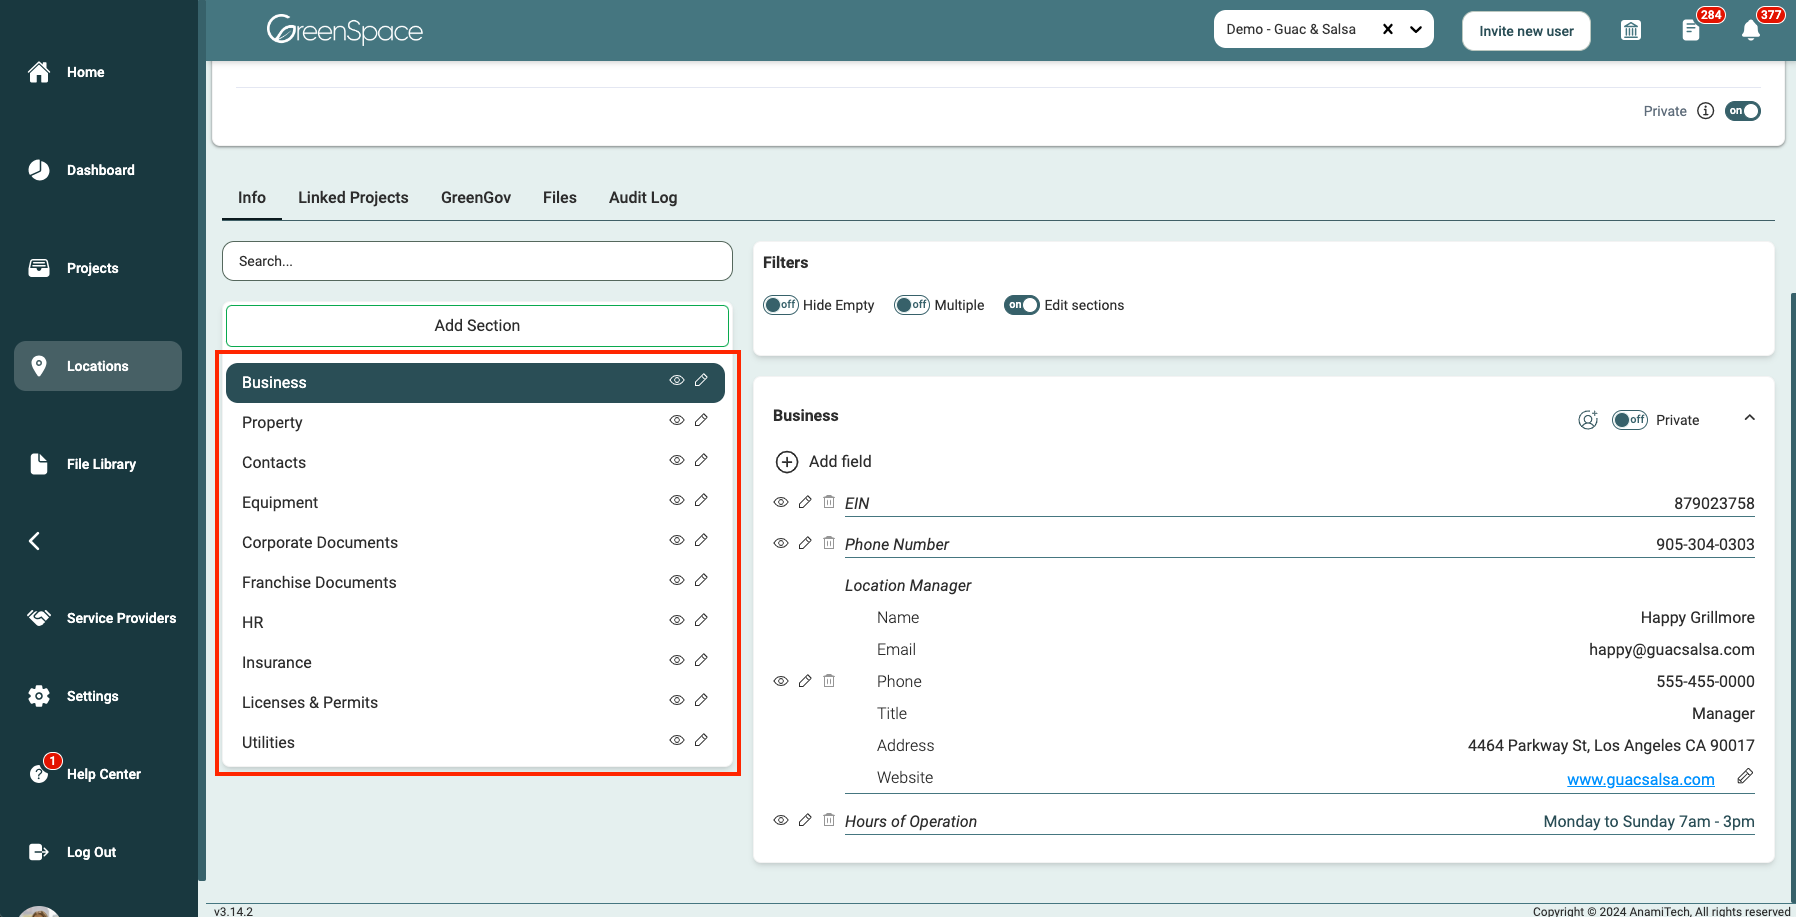
Select the Locations option from the main menu located in the left-hand corner of your screen. Then open the location you wish to edit from the Location List overview by hovering over the location and clicking the "view" option that appears.
Add Section (Admin Only)
In the filters section, toggle the switch next to "Edit Sections."

Choose "Add Section" and enter the title of the new section.
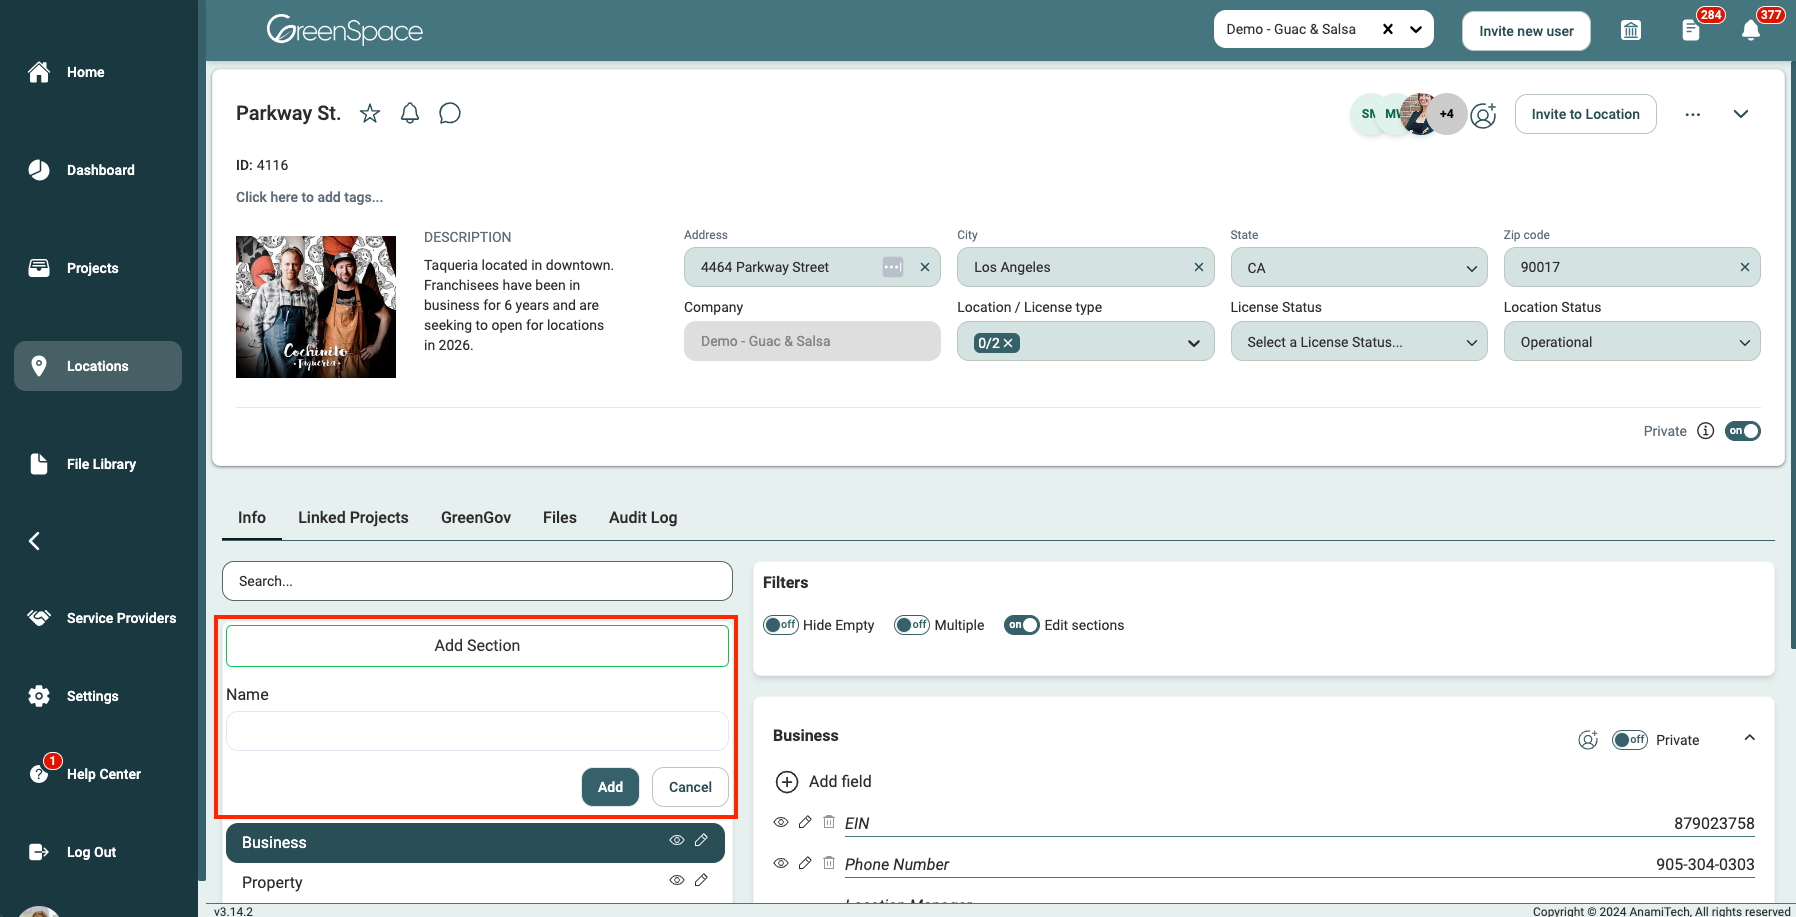
Specify whether you want to add the section to this specific location or all locations within the company.

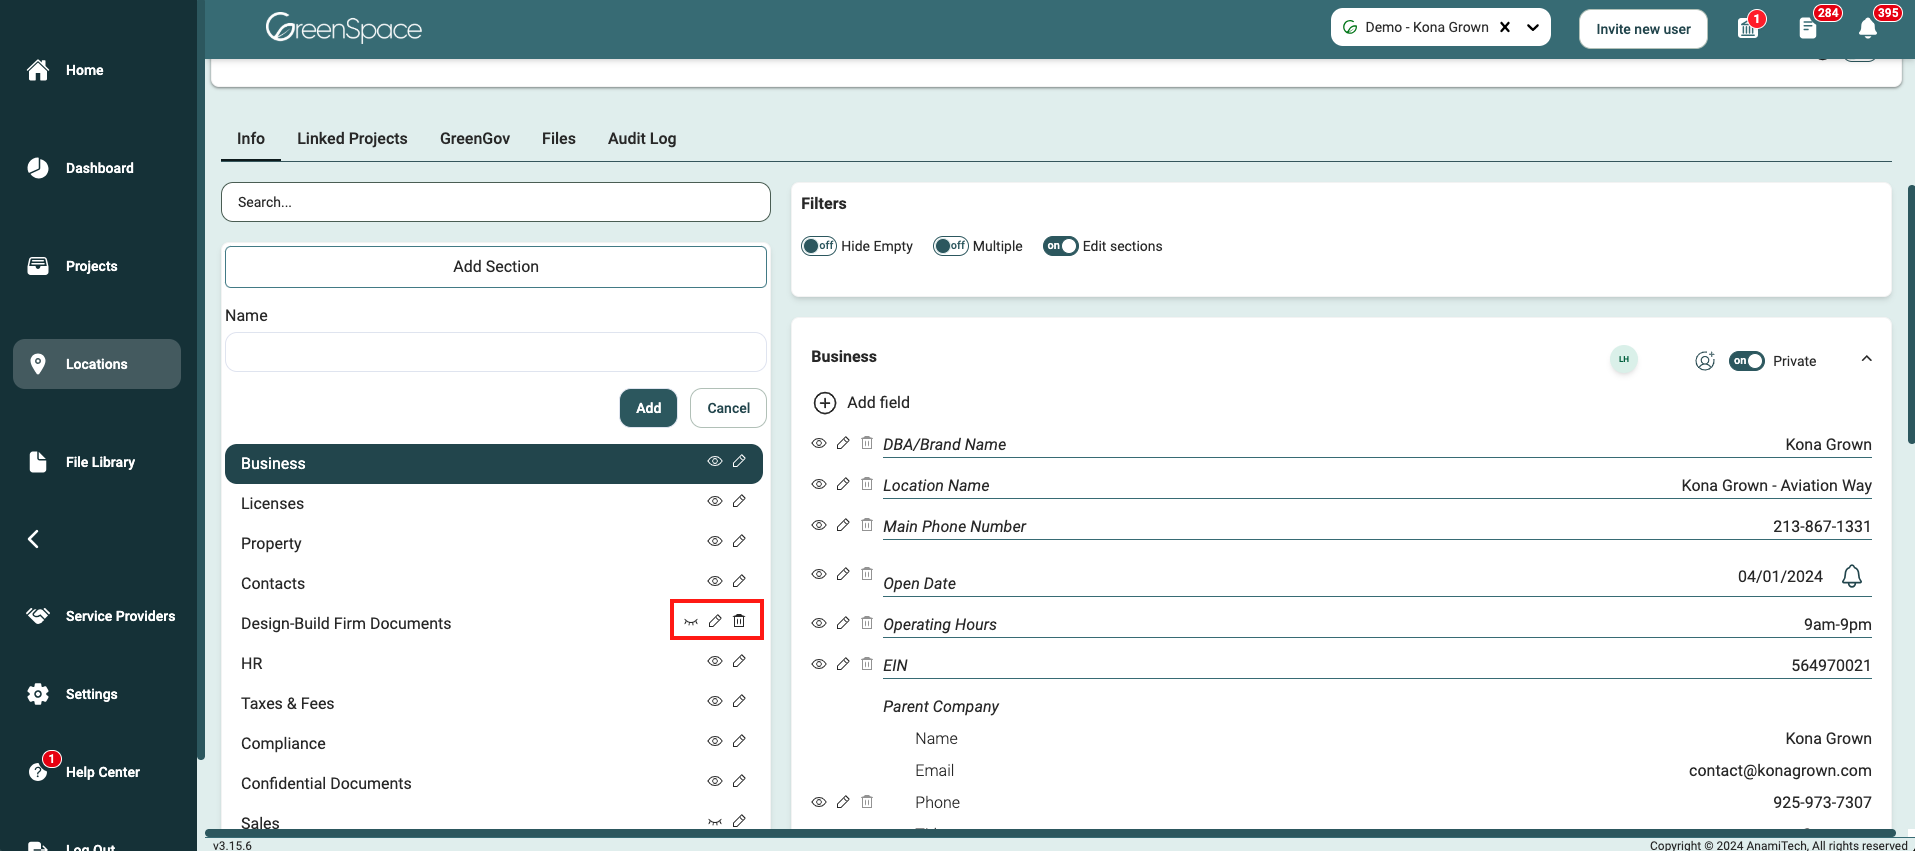
Hide, show, edit, or delete a section from your Location list by clicking the associated icon to the right of the section title. You can only delete custom sections your company has created.
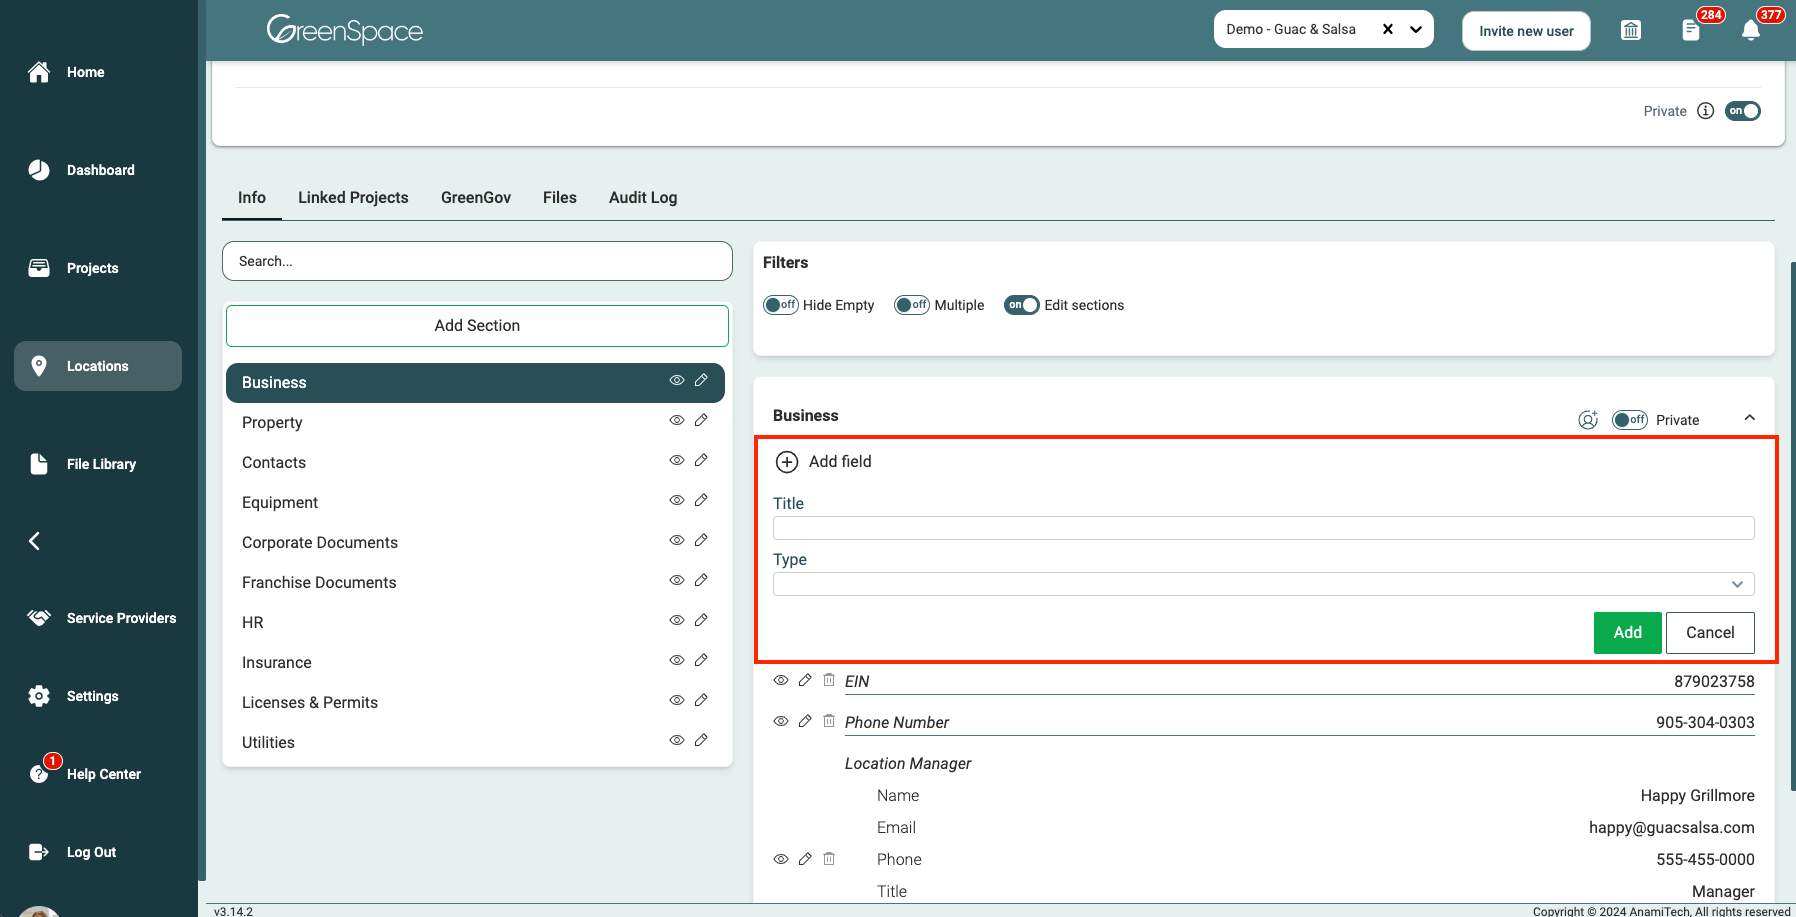
Add Field
In the filters section, toggle the switch next to "Edit Sections."
Choose the section to which you want to add a field.
Enter the title and select a type from the dropdown menu. The options are as follows: Short text, Long text, Date, Date Range, Time, Dropdown, Multiple Select, Web Link, Attach File, Contact, or Money
Suggestion: For actively updated documents, use a weblink. For static documents, attach a file.
Click Add to save.
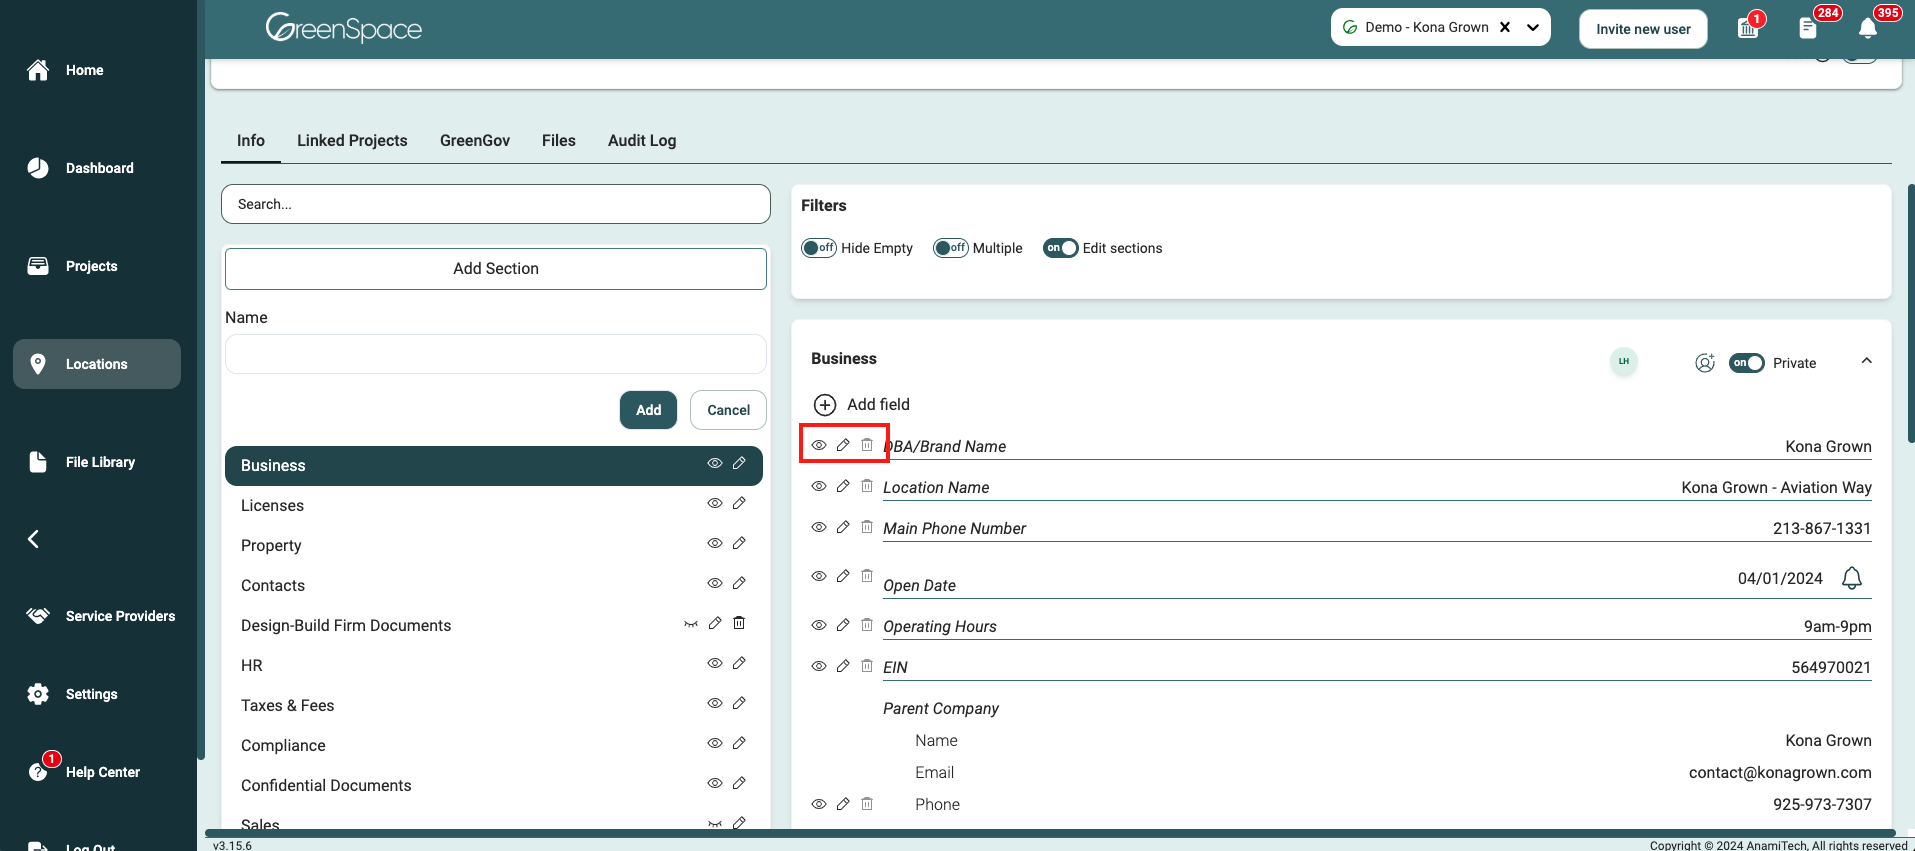
Hide, show, edit, or delete a section from your Location list by clicking the associated icon to the right of the section title. You can only delete custom sections your company has created.
Reorder Sections and Fields
Toggle the switch next to "Edit Sections."

Drag and drop the section or field to its desired location. Only Admins can edit the sections order.

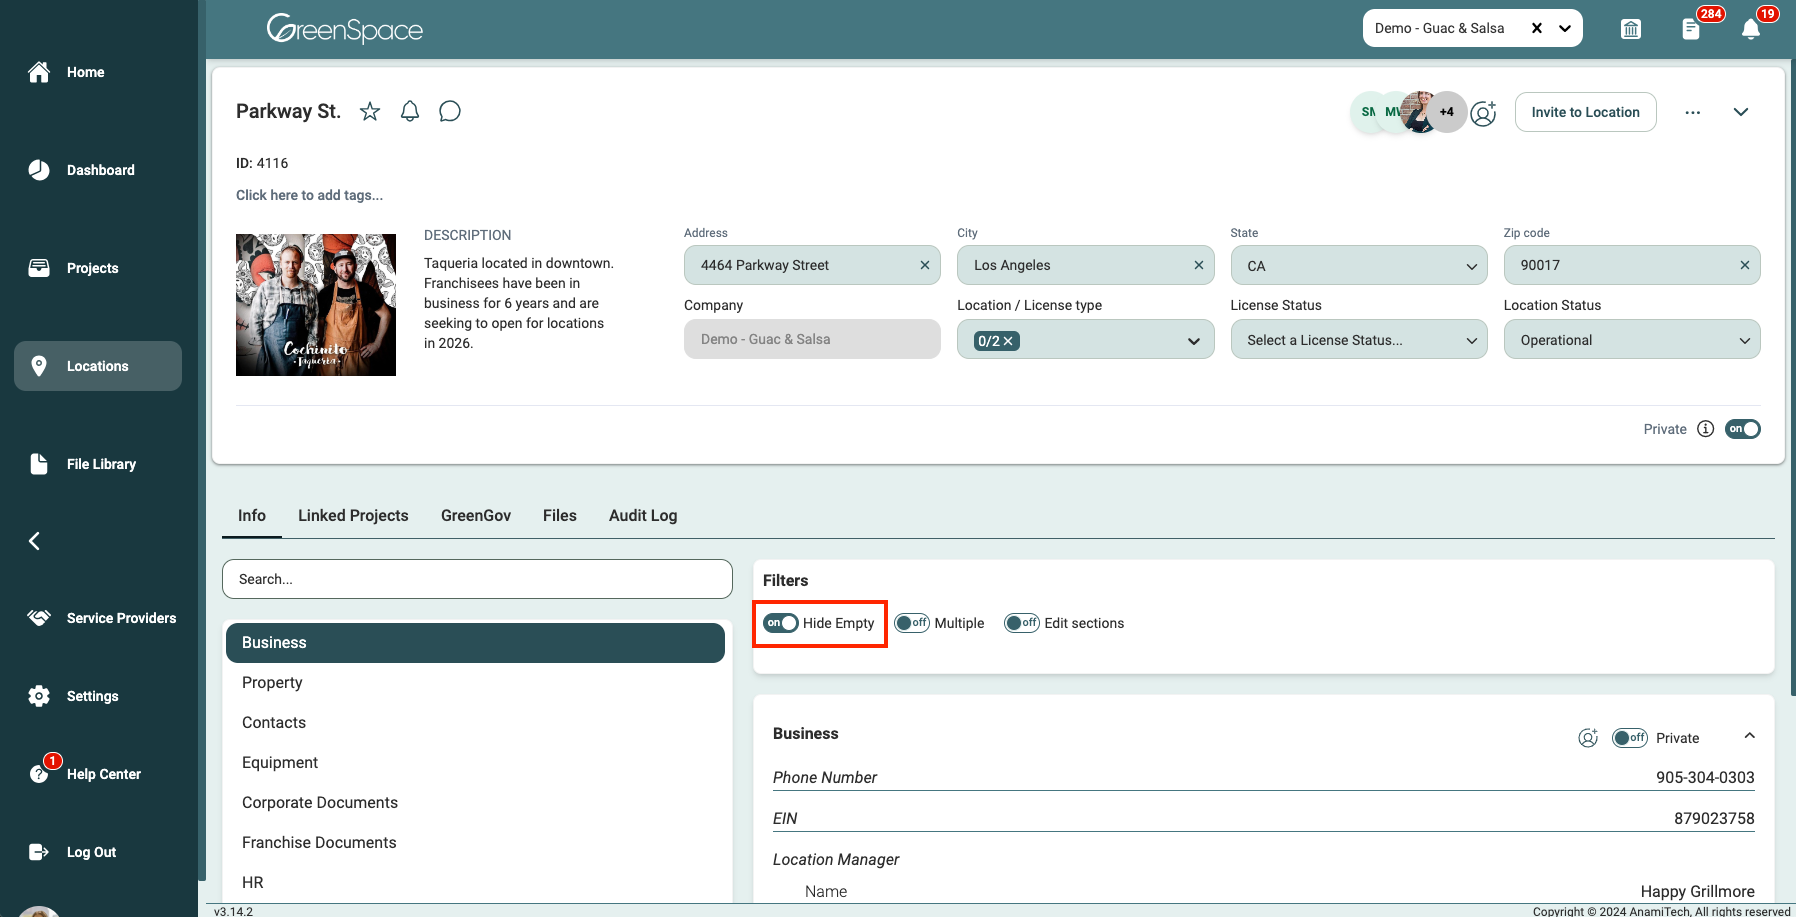
Hide Empty Sections
The "Hide Empty" filter hides all sections that are empty to help reduce visual clutter.
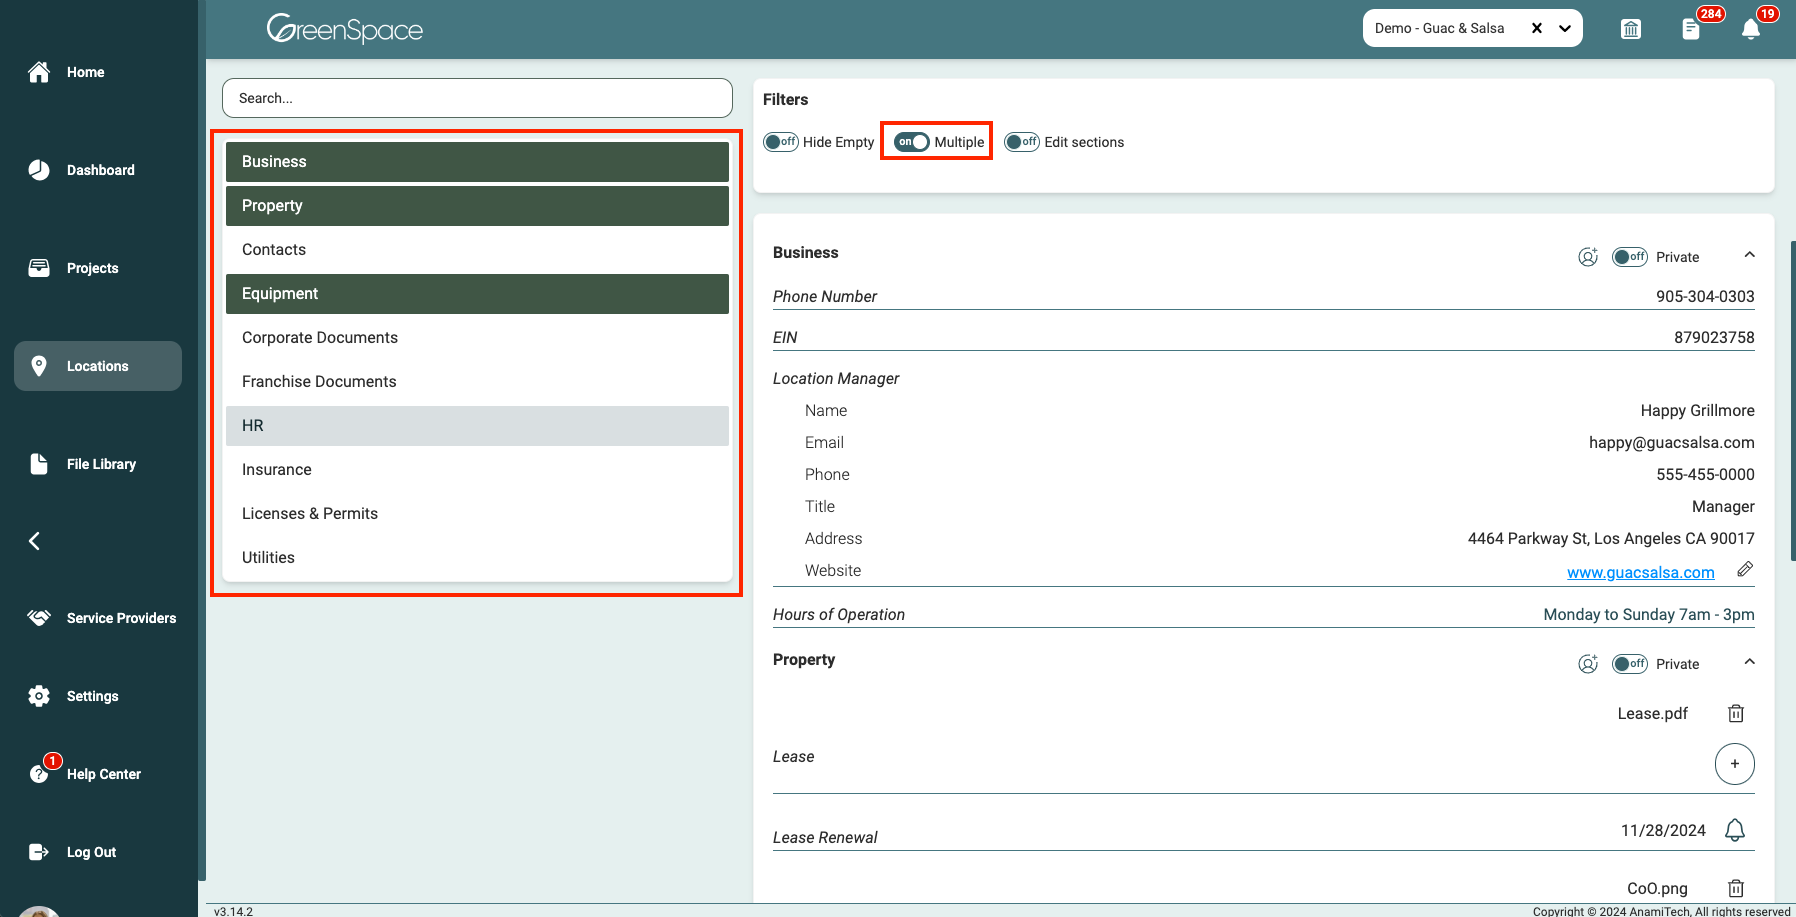
View Multiple Sections
Toggle the "Multiple" filter to view information in multiple sections at once. Select each section you wish to view and they will all display on the screen.
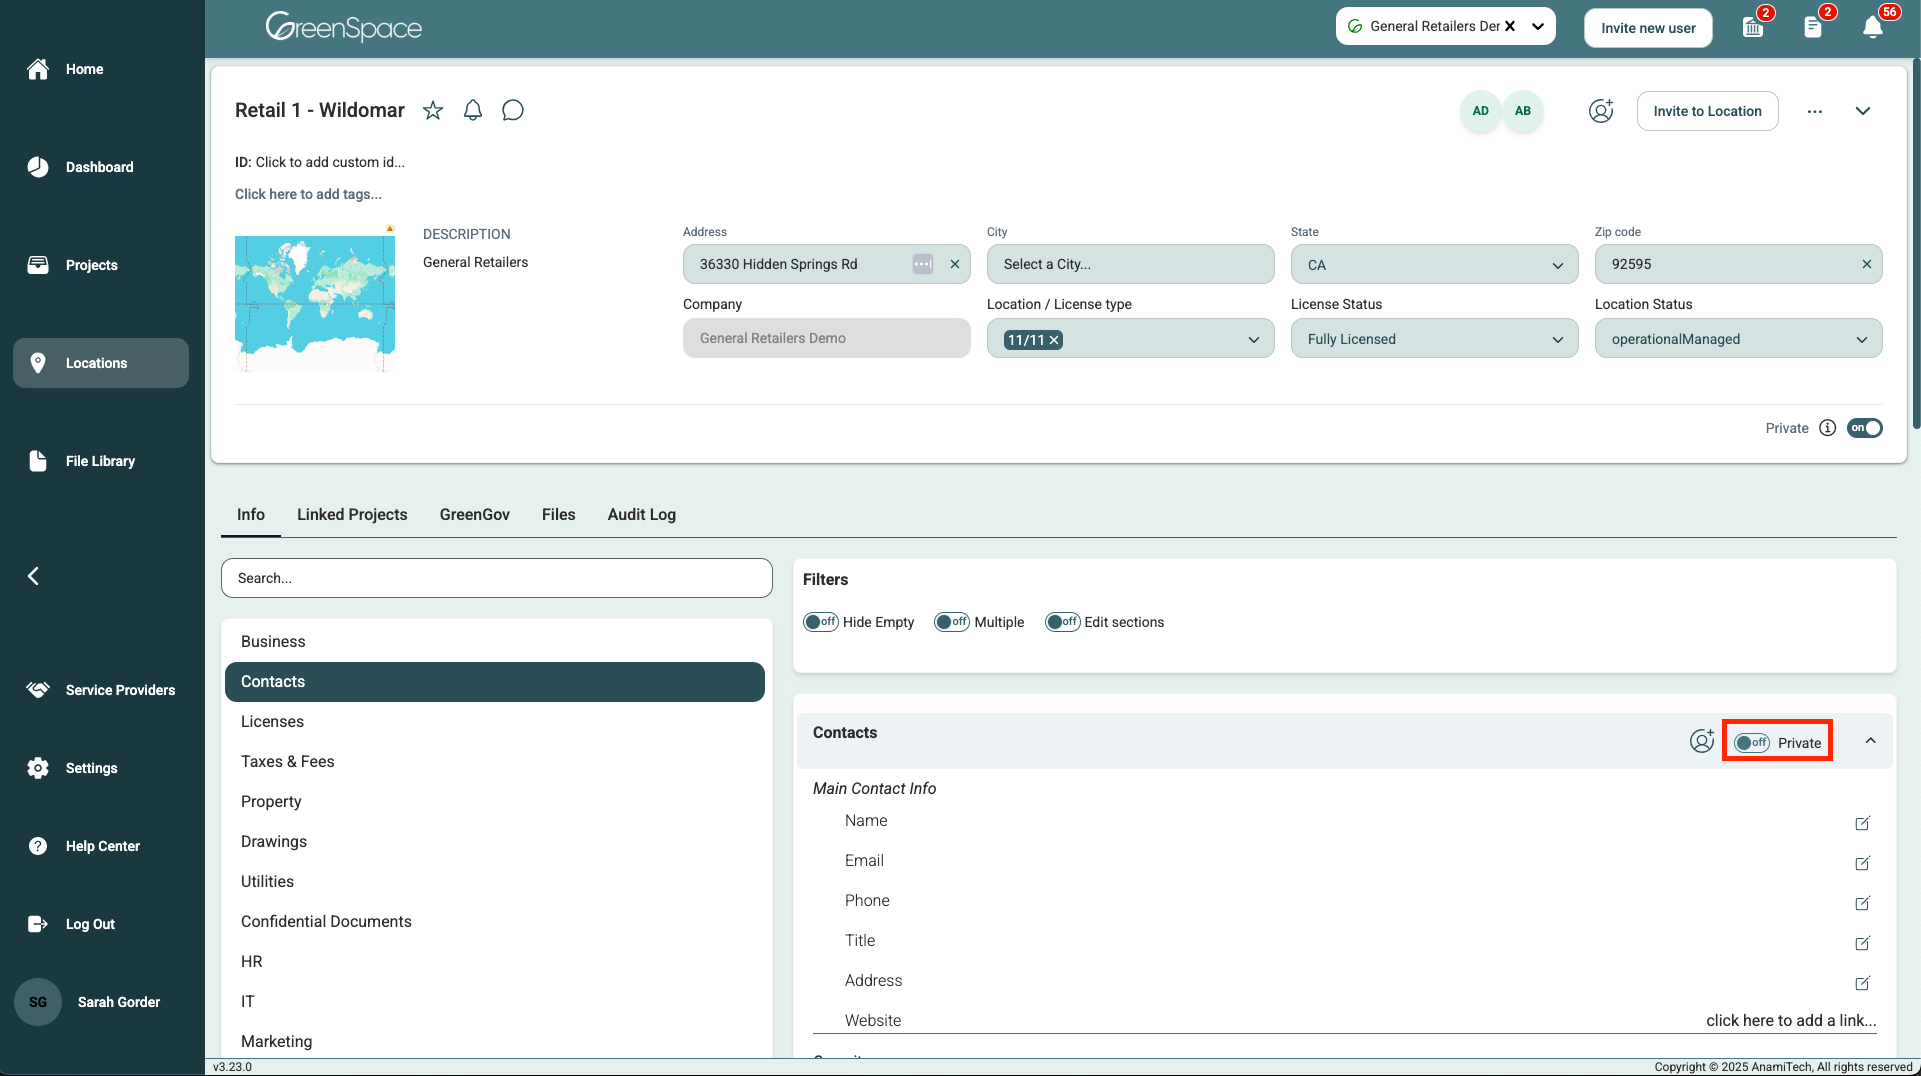
Making a Section Private (Admin Only)
Click the "Private" toggle "On" to make this section private in all Locations.
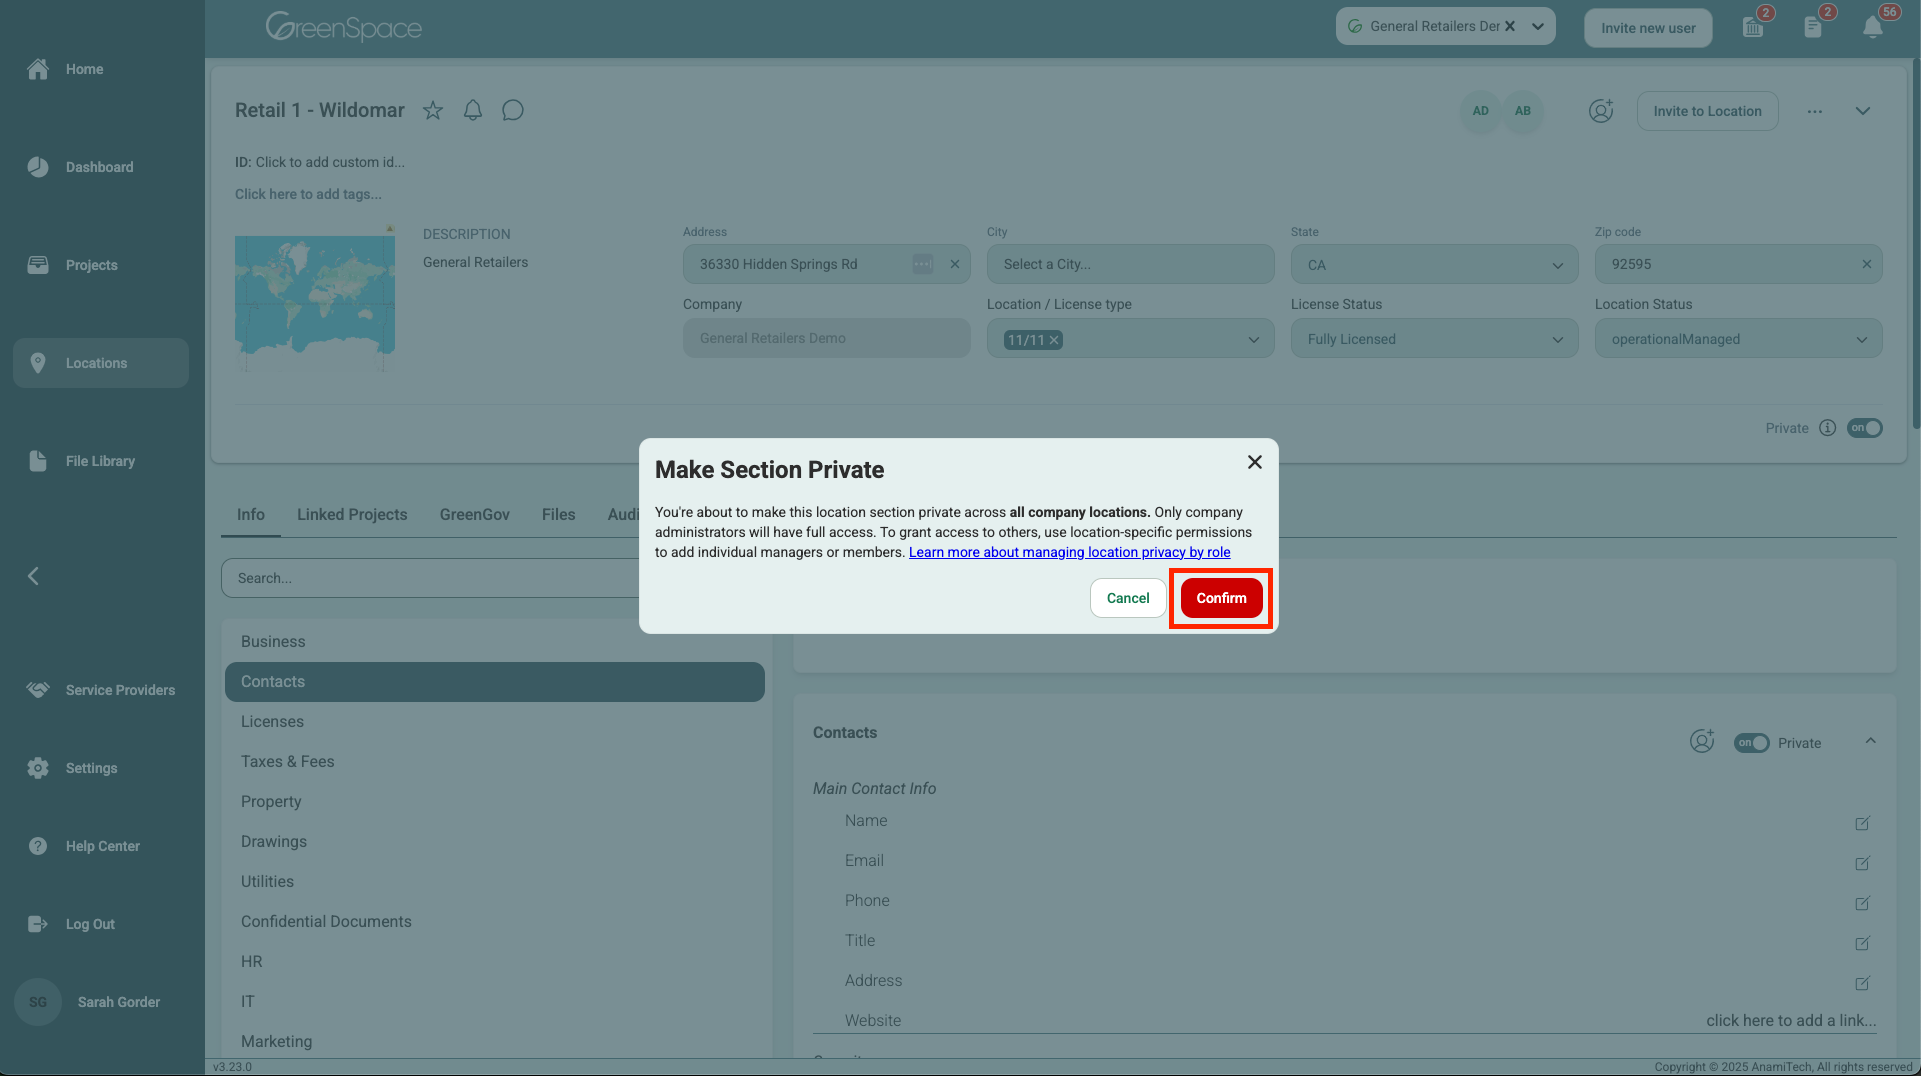
A pop-up window will appear ensuring you are aware this action will make this section private in all locations in your selected company. Only company administrators will have full access. To grant access to others, use location-specific permissions to add individual managers or members. Click "Confirm" to apply.
Customizing locations, sections, and fields in GreenSpace empowers you to tailor your workspace to fit your company's unique requirements. If you have any questions or need further assistance, our support team is ready to help. Follow these steps, embrace best practices, and enjoy a fully personalized GreenSpace experience.