How to Manage Workspaces
Admin Only: If you have a manager or member account in GreenSpace, your role does not allow access to these options. Please contact your admin for assistance.
Creating a Workspace
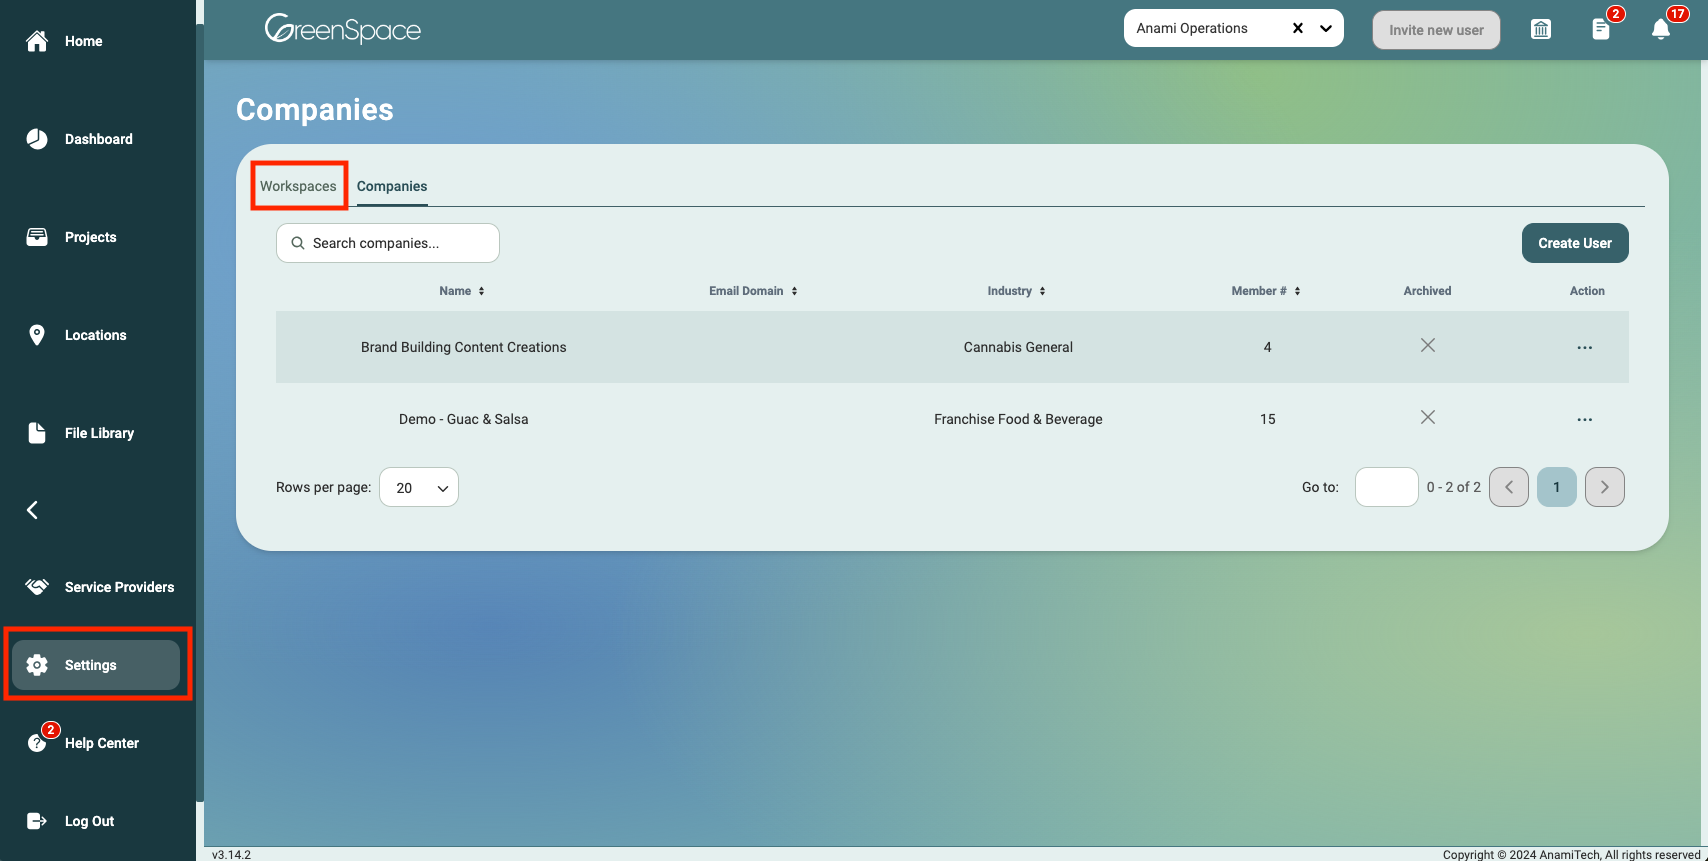
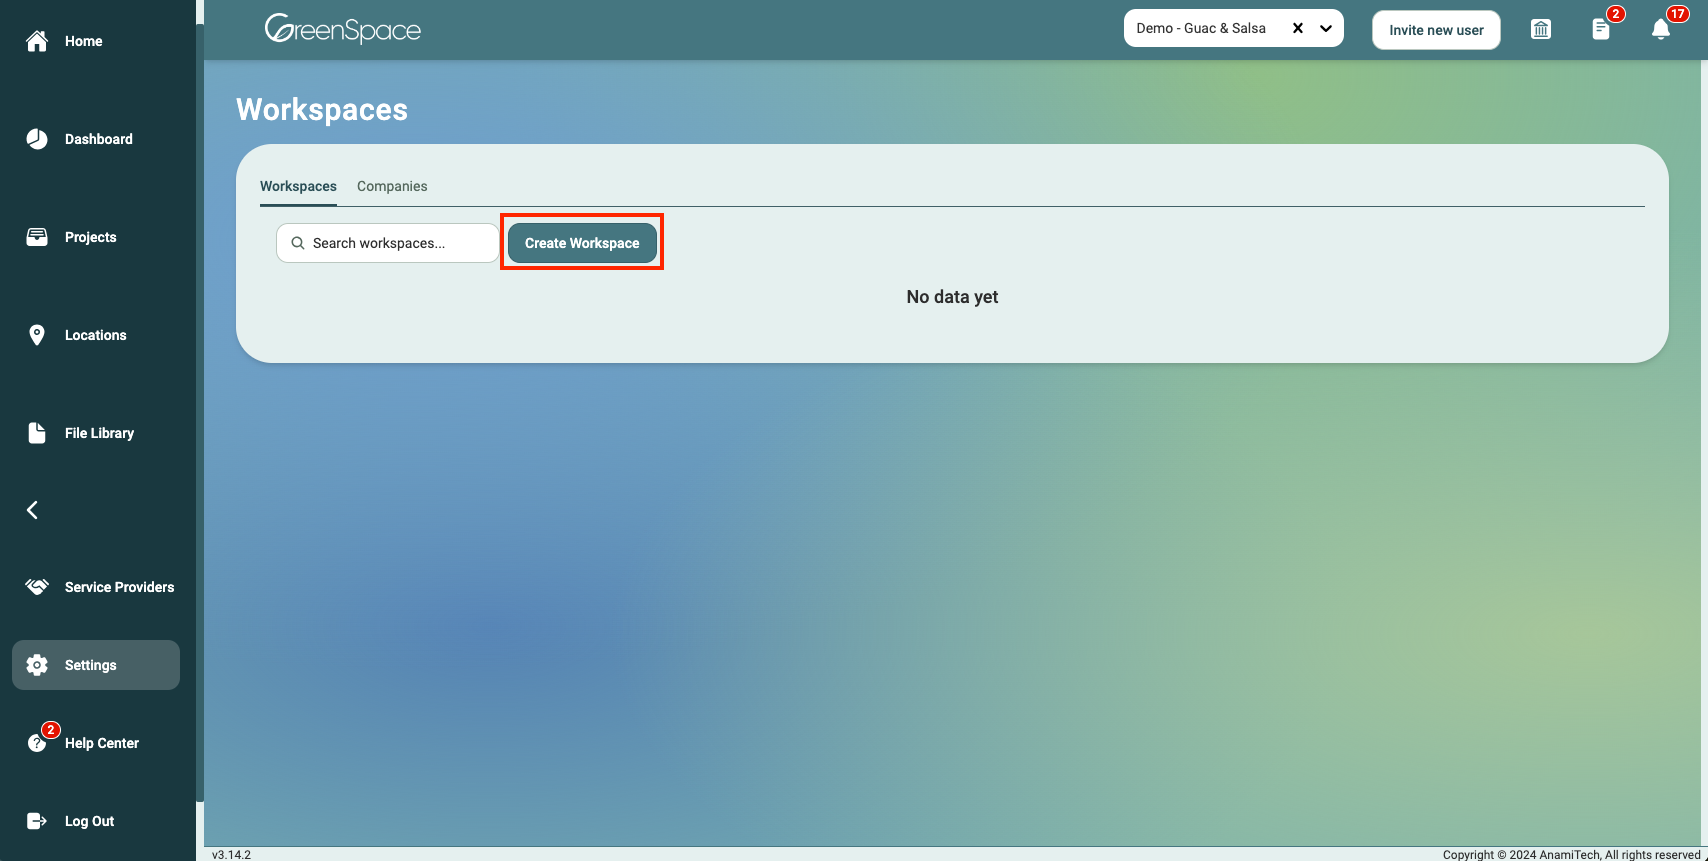
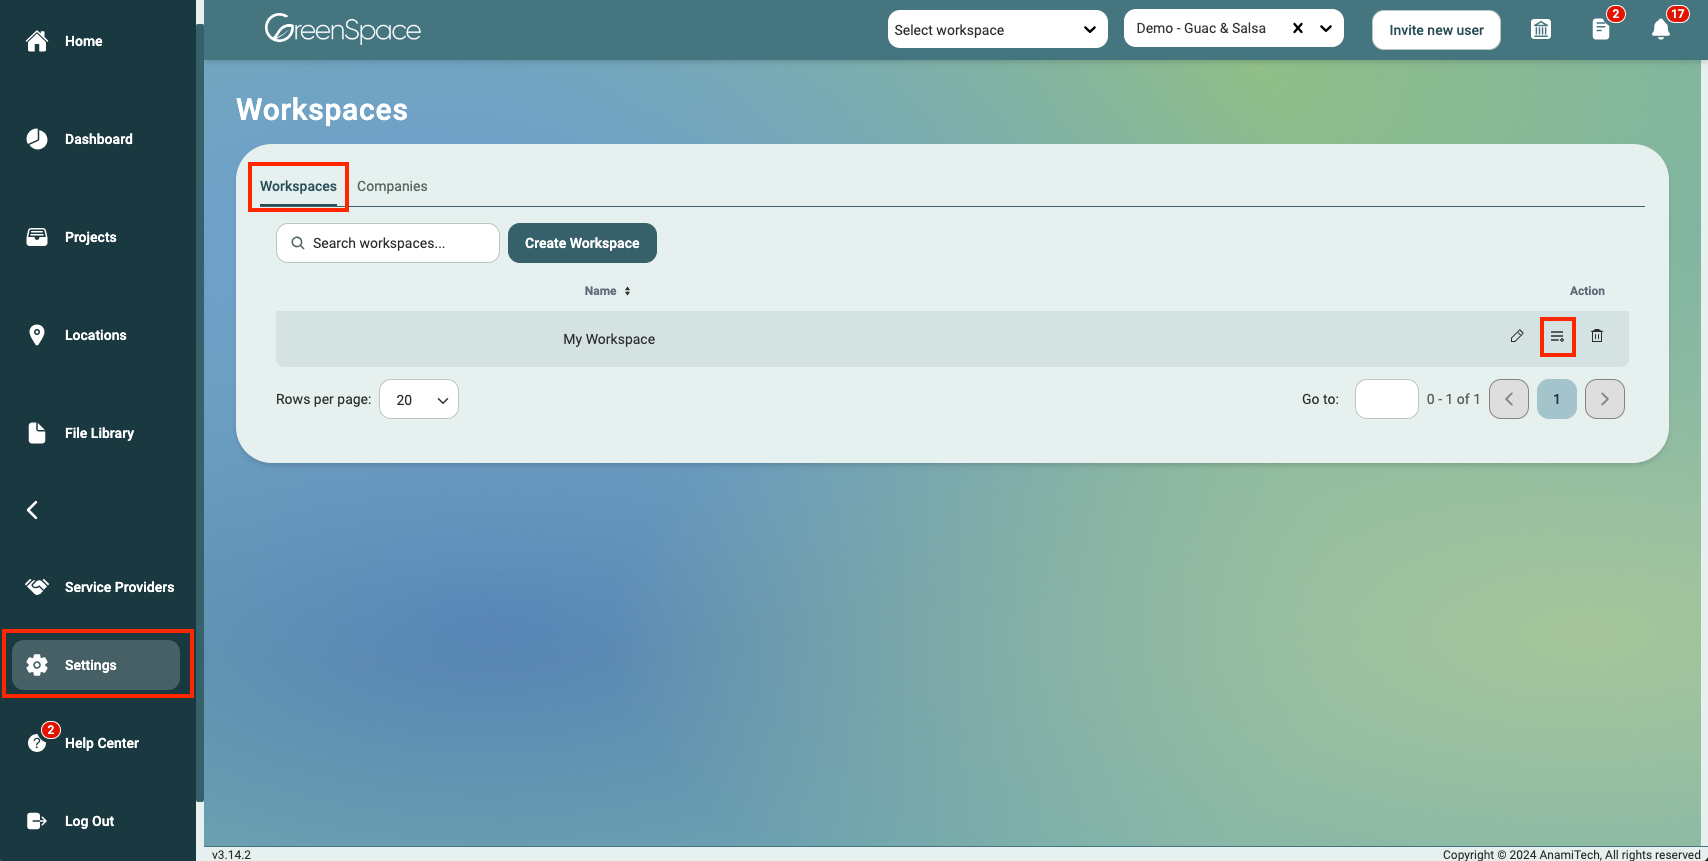
Navigate to the Settings page located in the main menu on the left of your screen and select the Workspaces tab.
Click "Create Workspace".
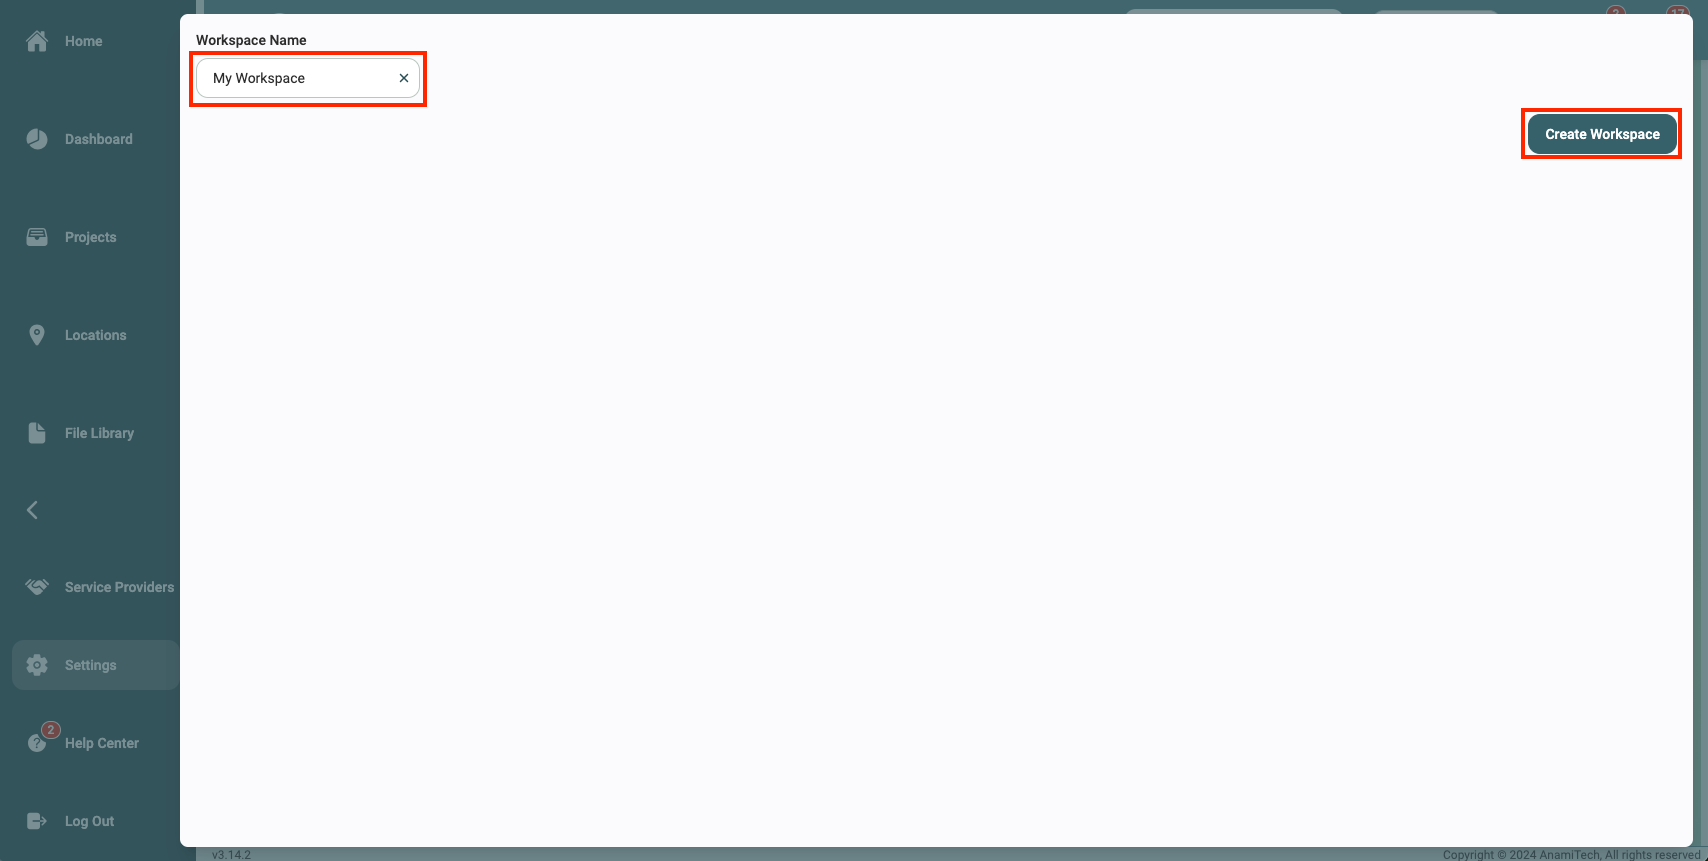
Enter a name for your workspace and click "Create Workspace".
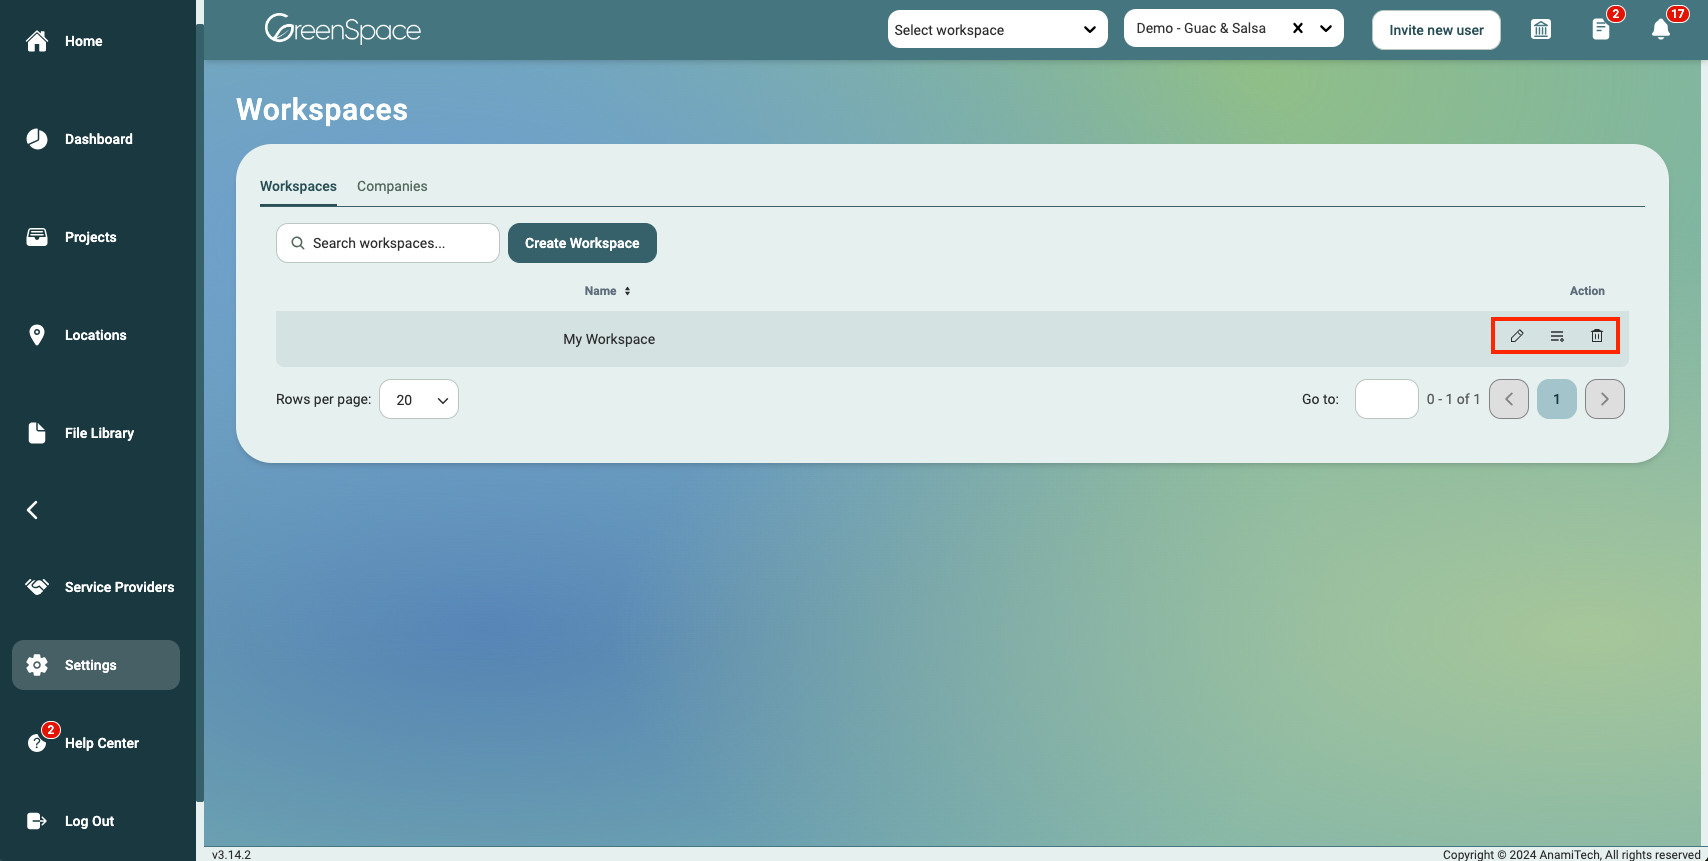
Workspace Actions
- Edit Workspace Name: Click the pencil icon
- Manage Companies: Click three line icon
- Delete Workspace: Click the trash bin icon
Add/Manage Companies
Navigate to the Settings option in the main menu on the left side of your screen, select the "Workspaces" tab, then select the three line icon next to the Workspace you would like to manage the companies that have access.
Click "Add Company". Then select one or more companies from the drop-down menu and click "Add".
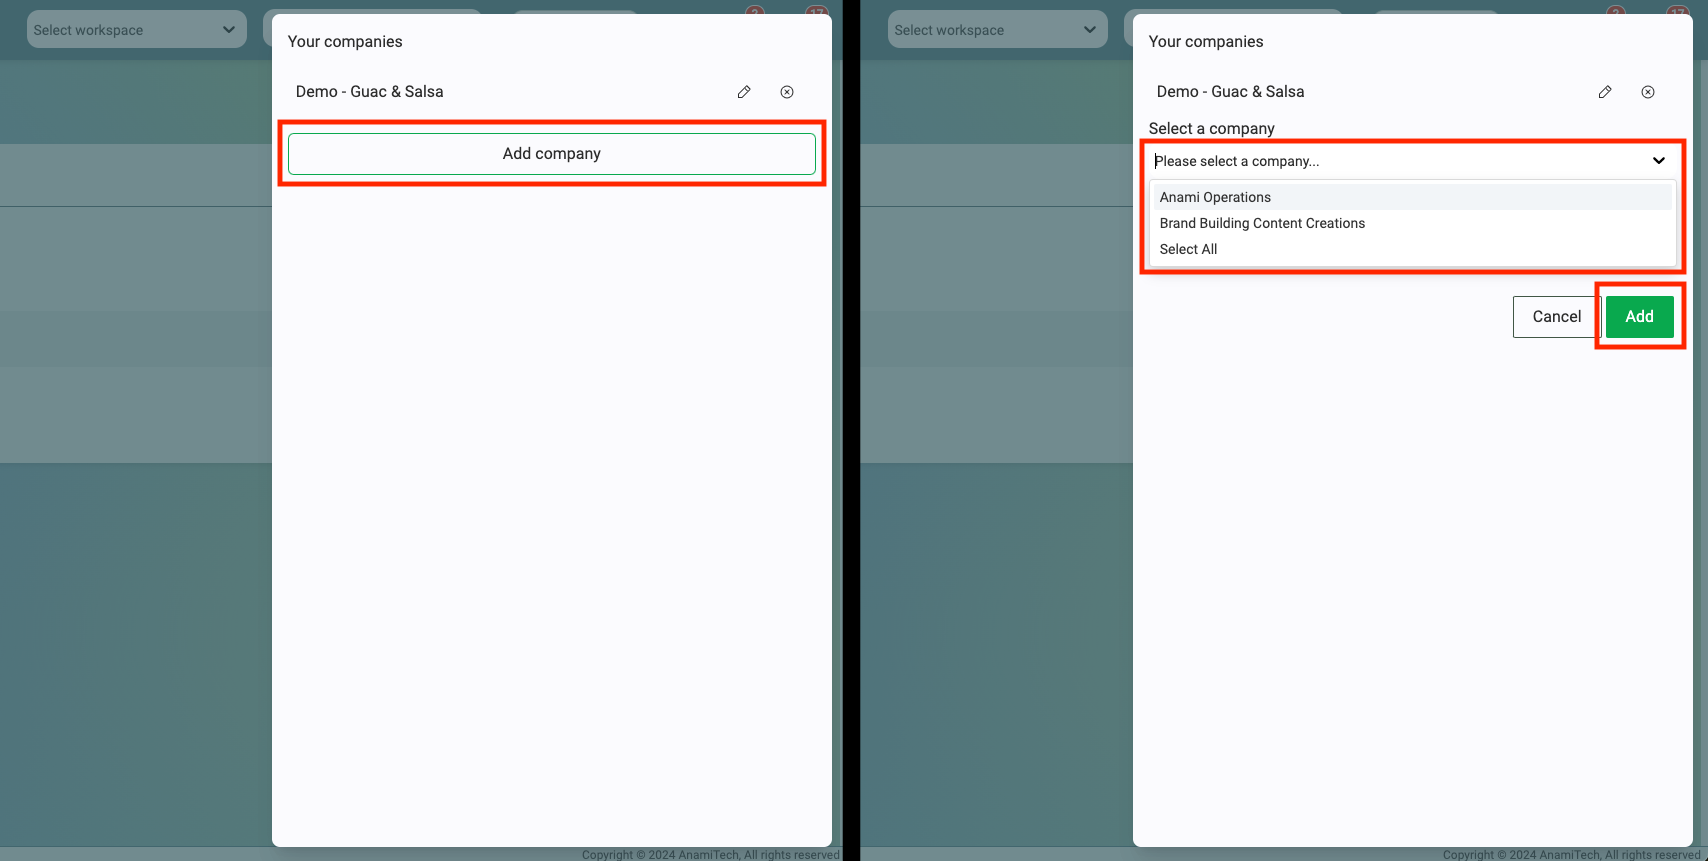
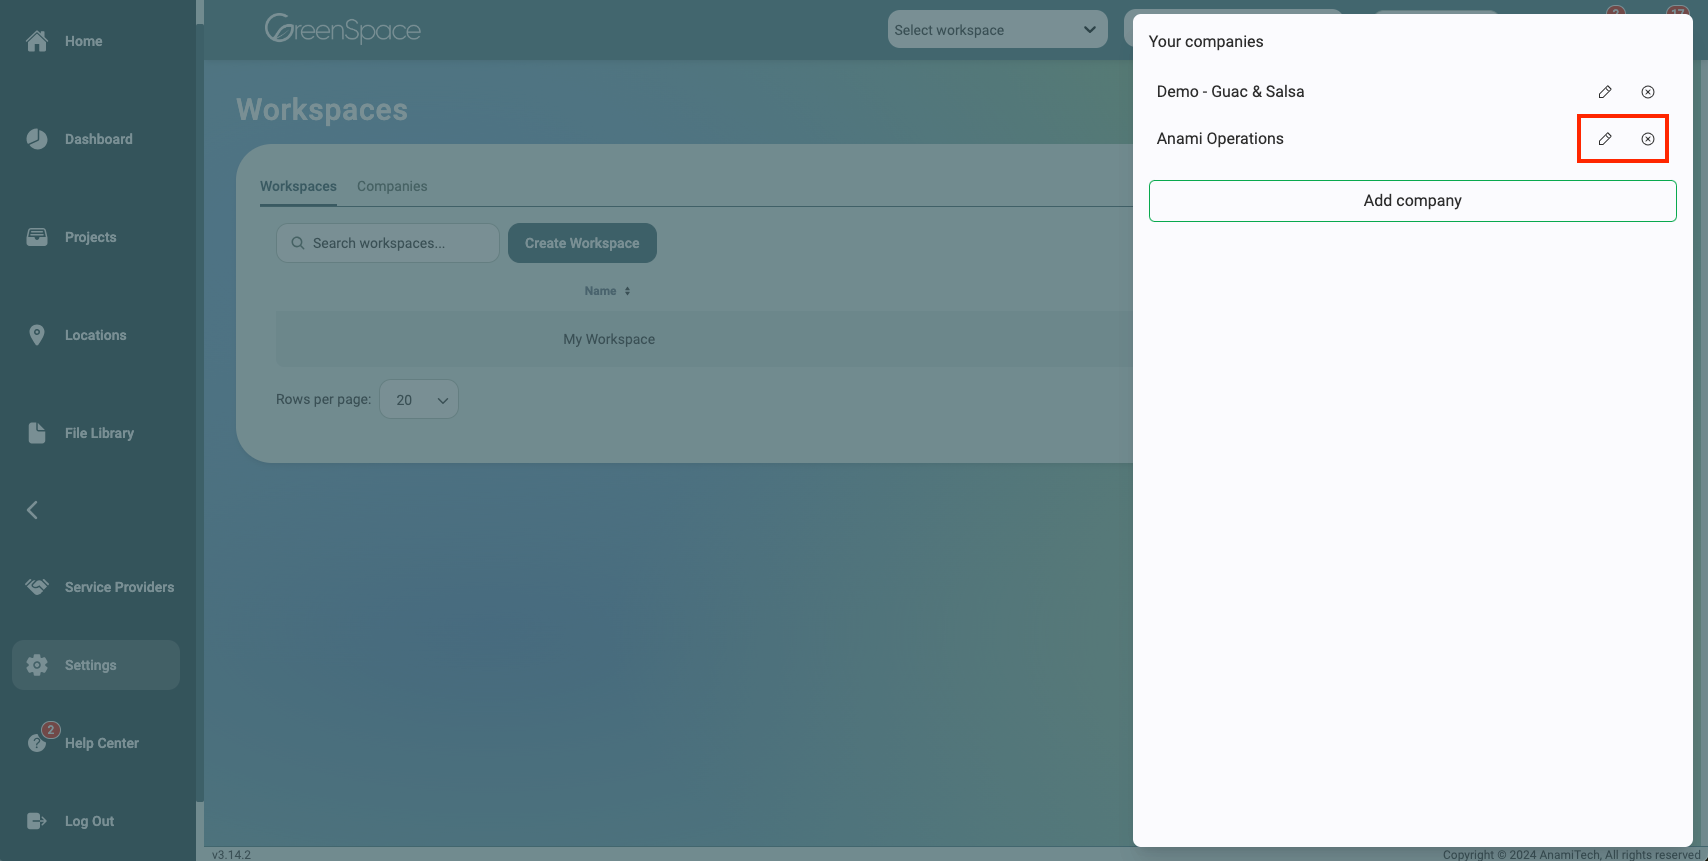
To change a company from one to another, click the edit/pencil icon. To delete a company, click the x with a circle icon.
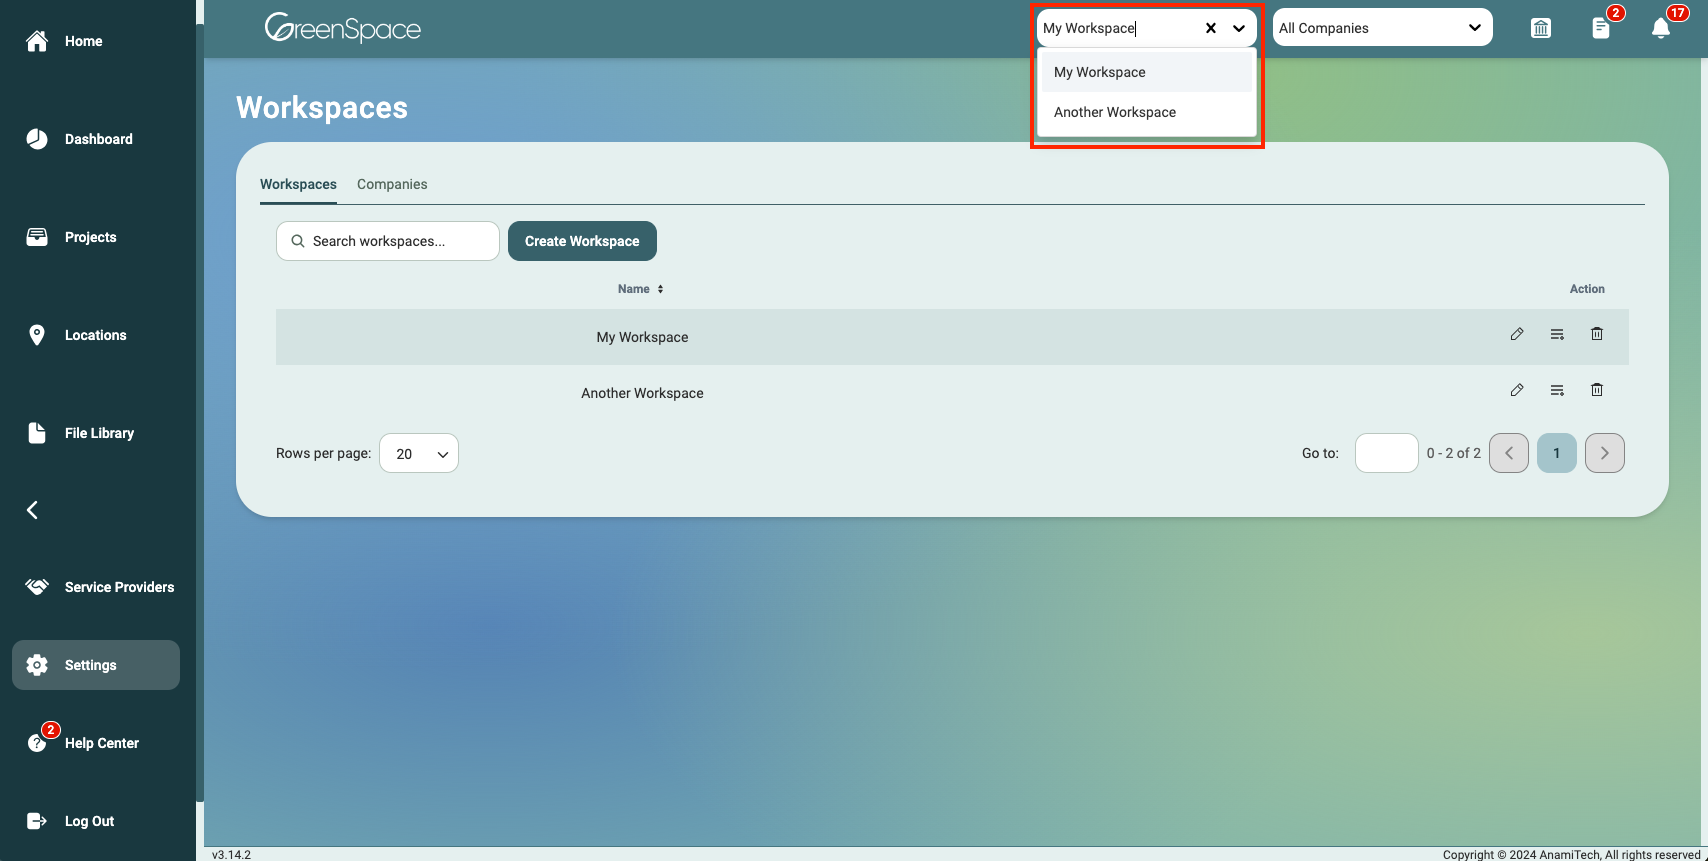
Selecting a Workspace
Choose the workspace that aligns with your current projects from the main bar at the top of your screen. Upon selecting a workspace, the Homepage, Dashboard, Projects, and Locations will display items pertaining only to the companies within that workspace, allowing you to focus solely on relevant information. To exit all Workspace, click the X next to the name of the current Workspace in the drop-down menu. Note: If this company is not associated with this Workspace, this drop-down menu will not appear.